Nota bene: this is a work in progress.
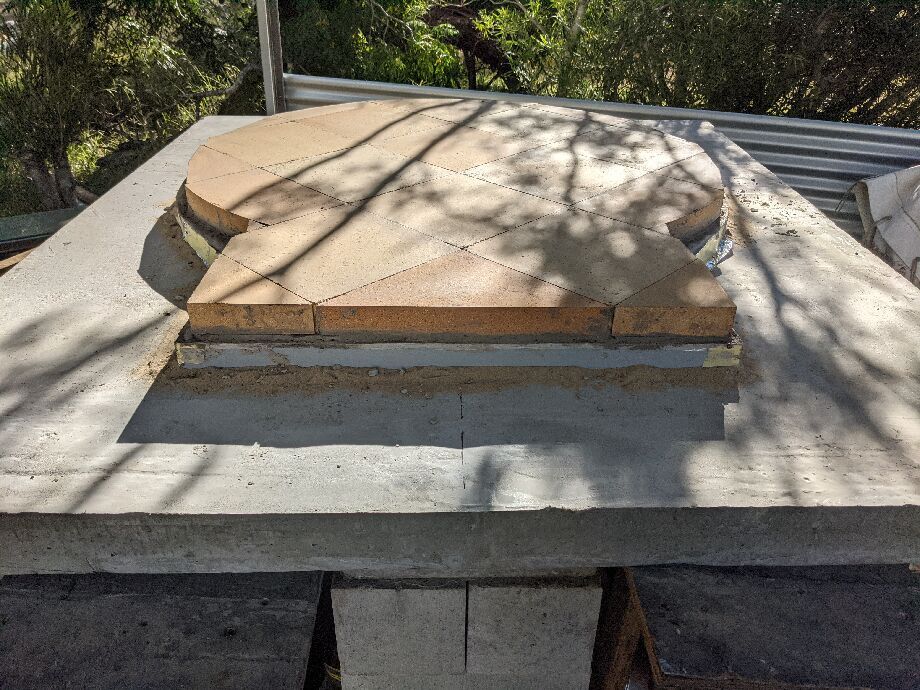
Current state, as of 2022-01 - I have done three full cook-level firings, up to 520C, and need to do two more before being able to seal the render.
I've got some (cosmetic) tiling to complete around the edging, and then decide how I'm going to hide the besser brick stand (render or micro-corrugated steel, I suspect).
 Current state as of 2021-11
Technically the project started in mid-2020, but progress was dreadfully slow, partly because I needed to build a hut before starting on the oven itself.
- The TL;DR
- Kit selection
- Miscellaneous trivialities
- Time and costs
- Preparing the site
- Basic site preparation
- Preparing the slabs
- Building the pizza hut
- Unpacking the kit
- Calcium silicate sub-floor insulation
- Floor tiles
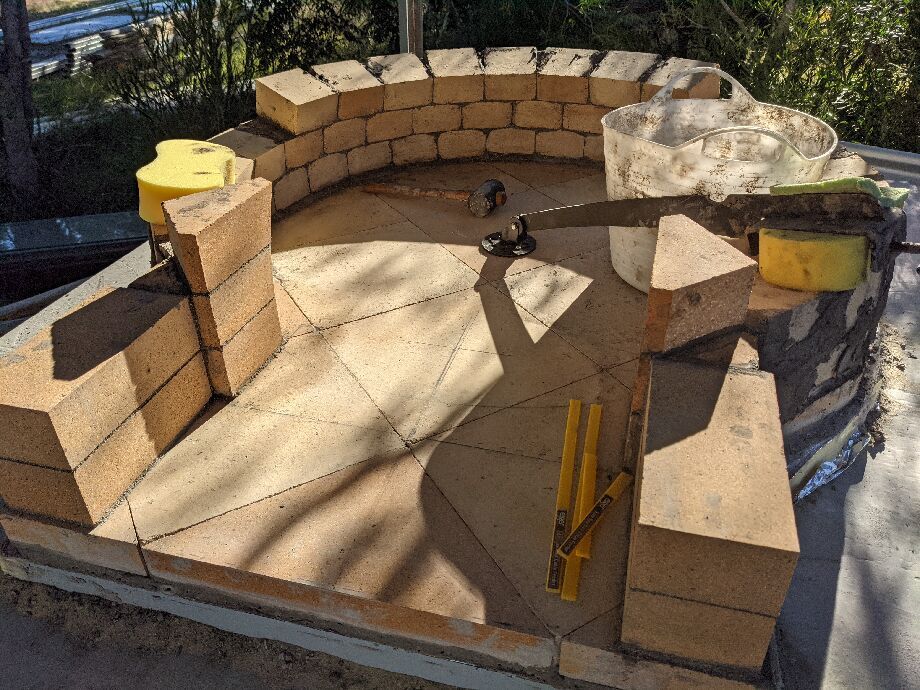
- Building the dome
- Installing the pre-cast flue
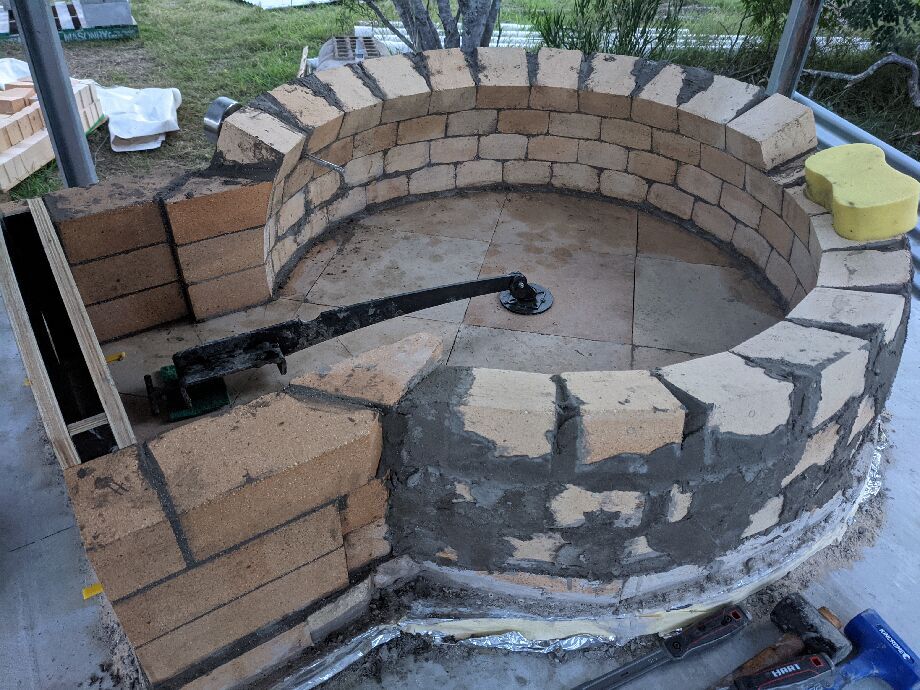
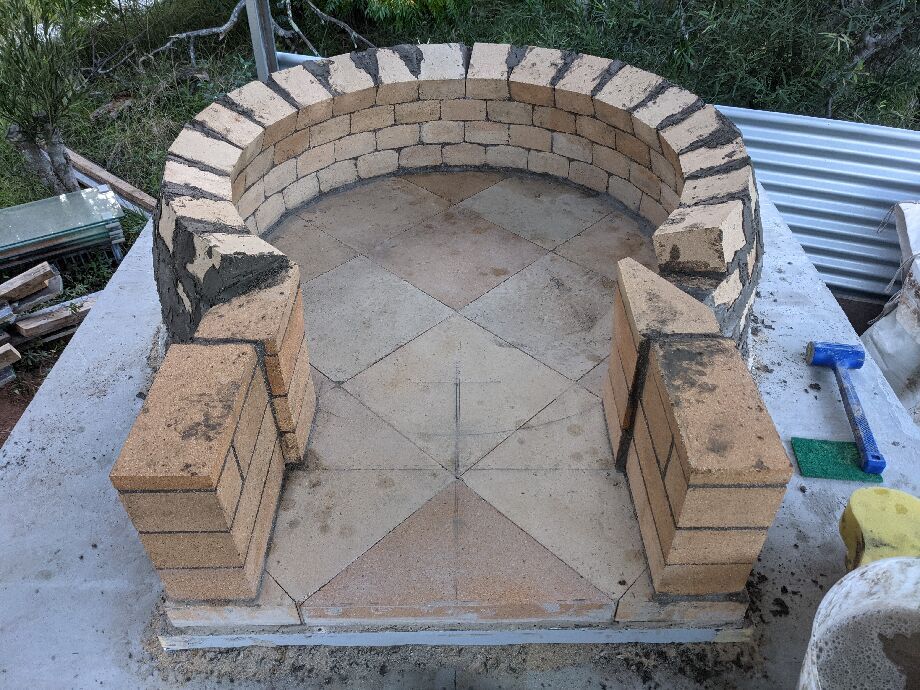
- Installing the granite return base bricks
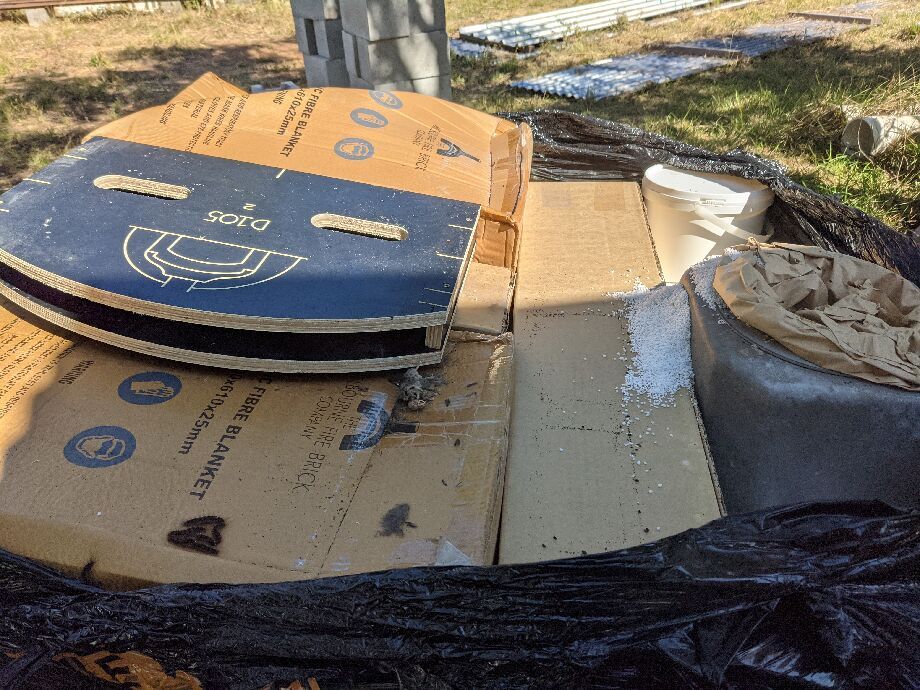
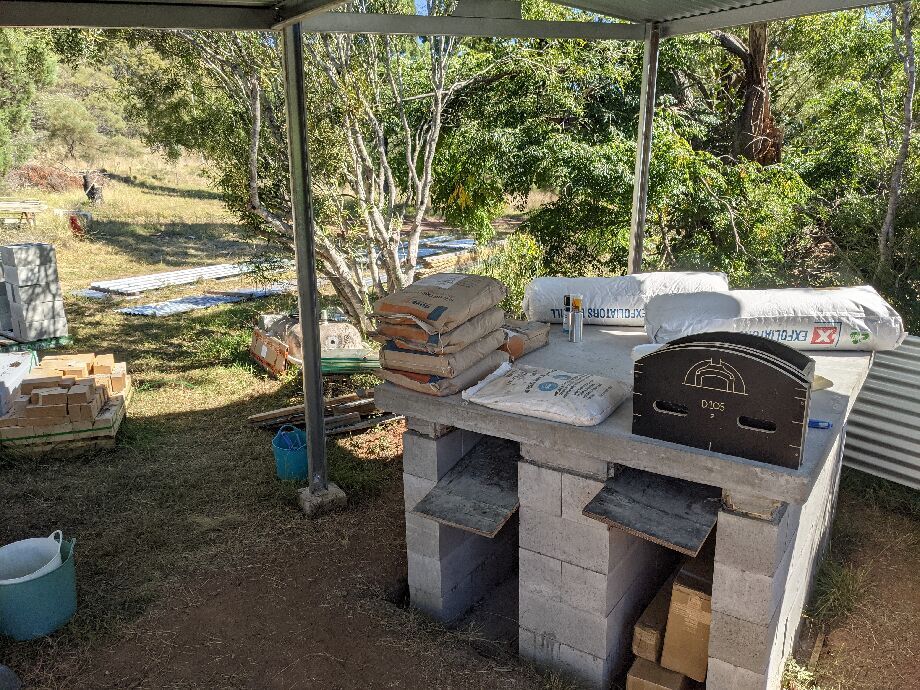
- The insulation blanket
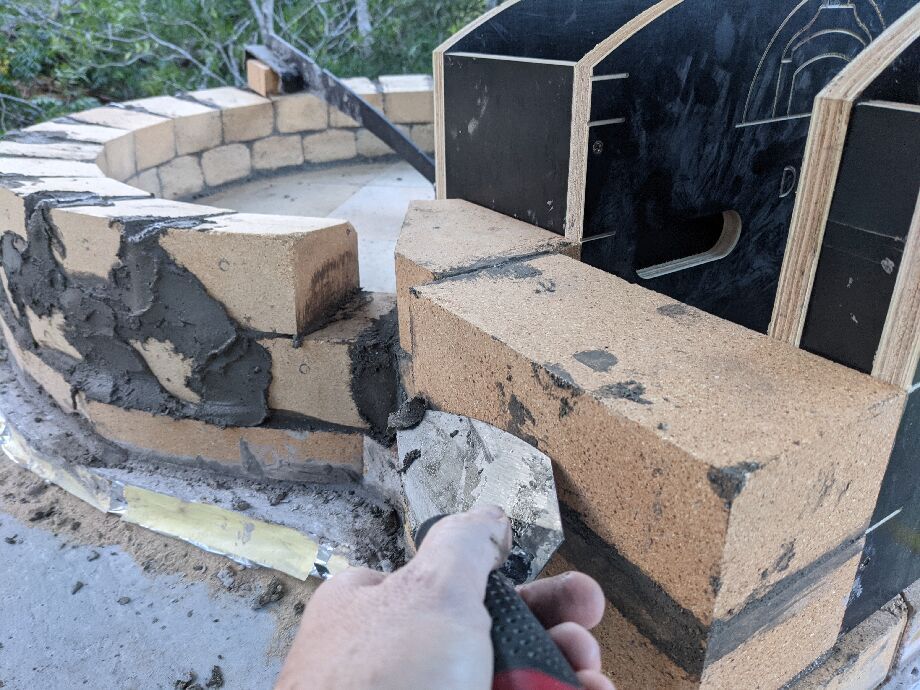
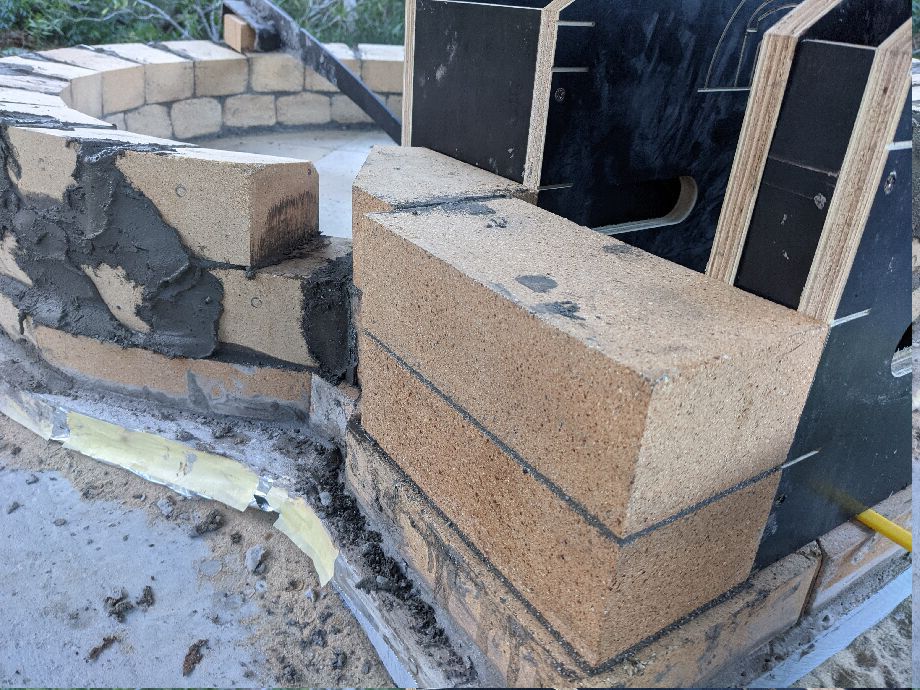
- Fiddling with sizing for dome and granite returns
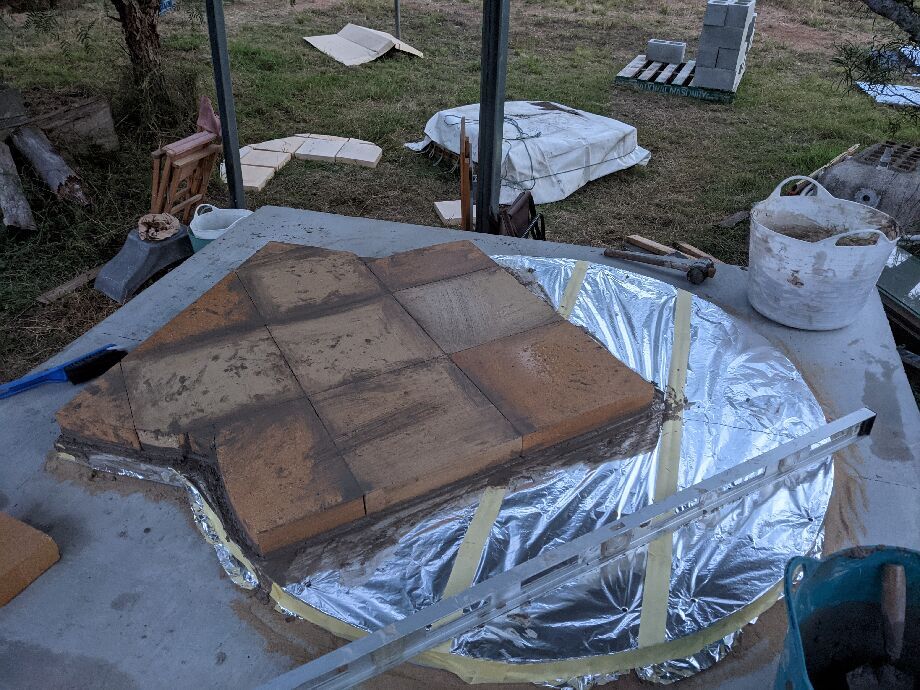
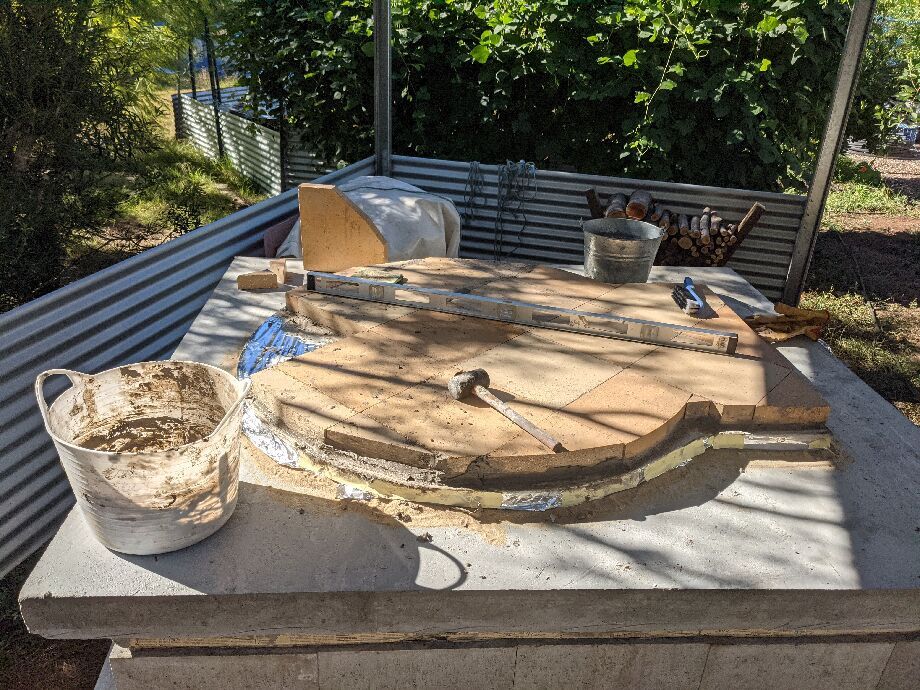
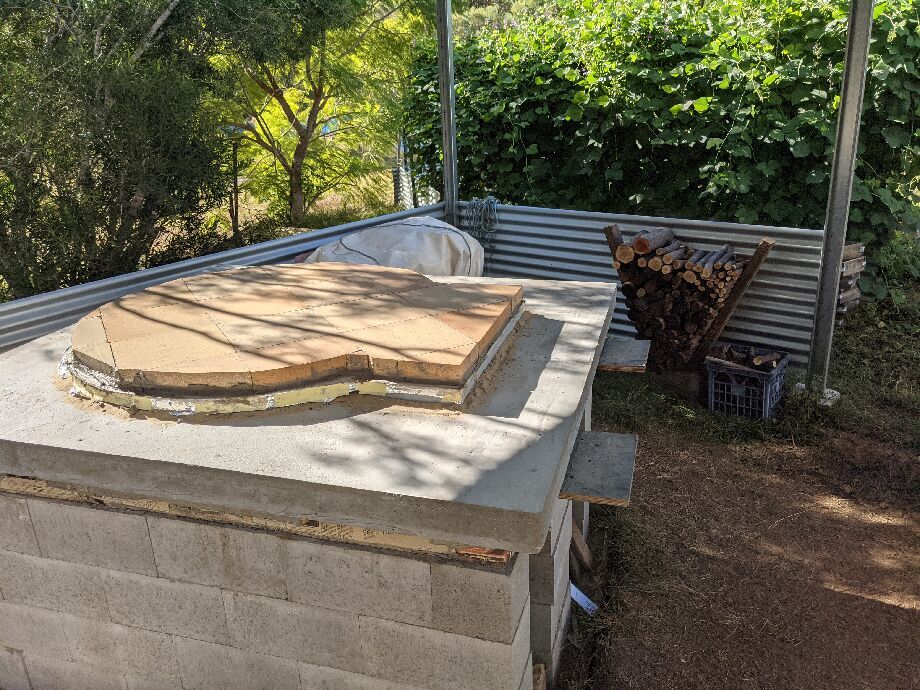
- Tiling the stand
- Rendering the dome
- Tidying up
- Installing the flue
- Render drying and curing
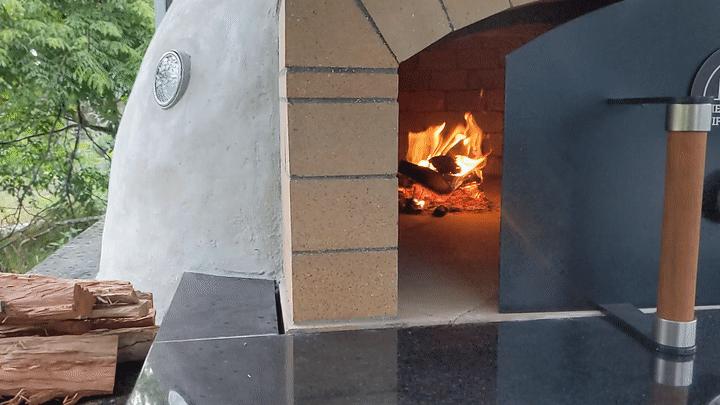
- Curing Fires
- Making pizzas
The TL;DR
There's a lot here. Deep soz.
It's a construction slash walk-through slash review of the Melbourne Fire Brick Company's D95 pizza oven kit.
Most of it is in the 'Here's what I did' style, which might be of interest to anyone who, like me, will approach almost all the different tasks with basically no idea what they're doing.
Also a 'What I would do differently' on most sections, which will probably be more useful.
There's an abundance of photos.
I had wished for more official photos during this process, as the videos sometimes breeze over details and options, and adopt an 'it's up to you' approach, which I'm sure is fine for people who have done this style of project before, or creative types with strong opinions.
For those of us who crave a more prescriptive guide, not so much.
First - the BIG question: knowing what I now know, would I do it again?
Probably not.
I mean, I'm really happy with the result:
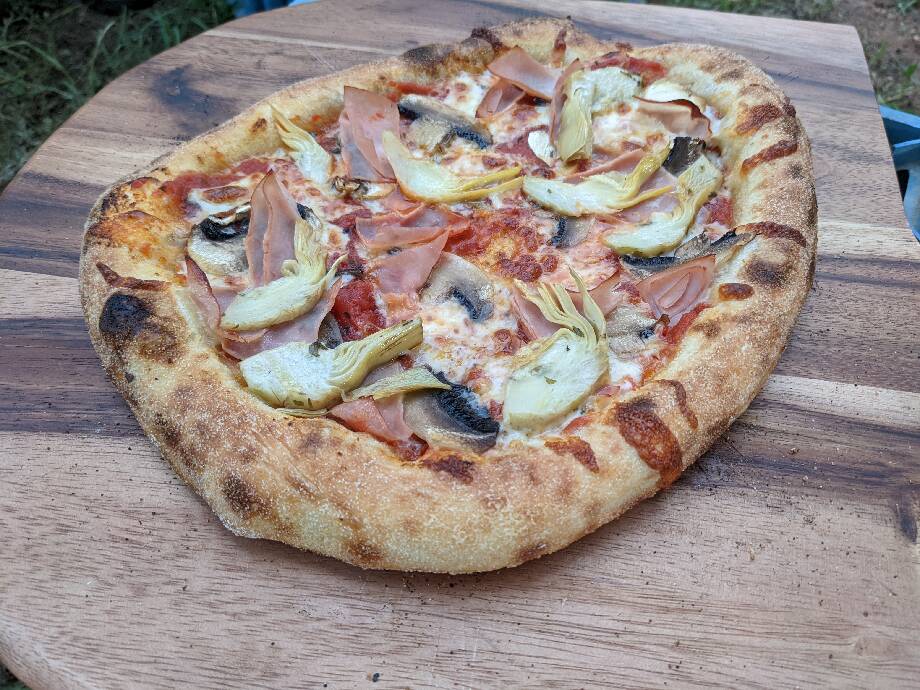 The third actual pizza-cooking effort
... however it's consumed an absolute shit-tonne of my money and time, and I've an abundance of objectively way more important infrastructure projects I could / should have been focussed on.
Ooni and Roccbox and Alfa Forni etc make mobile (maybe not strictly portable) pizza ovens that can reach 500C -- plenty good enough for Napoli style pizza. They also reach those temperatures fast -- in less than a half hour -- which compares very favourably with the 2+ hours to get a brick oven ready.
Yes, brick and cast ovens will hold useful (cooking) heat for a day, but most people have much cheaper & more convenient ways of cooking at 180-200C.
The main complaint people have with those smaller style ovens is that they lose heat quickly when you put a pizza in, so you have a slow cycle as the oven recovers back to max temperature. But that problem is easily ameliorated by running two or three of them side by side, and that may in fact be slightly more social as you wouldn't have the contention around a single door.
Certainly a couple of those appliances would be cheaper than building one brick oven, and the portability aspect shouldn't be under-rated.
Second - my experiences distilled into these pithy recommendations
-
Review the contents of whatever kit you get as soon as practicable. If you have somewhere to lay things out, under cover, immediately after the pallet arrives, and can relocate water-sensitive items under better cover, it makes life MUCH easier. (I did not.)
-
Corollary of that -- prepare everything you possibly can, at your site, before getting a kit shipped. That includes slabs (base and suspended), any hut or other structure you're erecting, etc. (I did not.)
-
There's a reason they don't mention / predict how much time it will take to build. The videos -- while fantastic -- make it look like you could do this in a weekend. If you've built some before, have all the tools, have already sourced all the additional bits you'll need, have a helper available, have guaranteed weather, etc -- then maybe you could too. I talk about time and cost estimates a little further down, and I sorely regret not tracking both more carefully. It's a HUGE undertaking.
-
Do not build one of these in a corner, unless you hate yourself and enjoy swearing. Having full access around the whole stand provides plenty sufficient difficulty.
-
Take your time. There's lots of great resources out there that can guide you step by step, and there's probably a lot of things involved in building an oven that you've never done before (for me, almost everything). But so much of this kind of project involves things you can see, and you'll remember every small mistake you make, especially the ones you made because you felt rushed, forever. One of my front bricks is about 2mm proud, and it gives me the heebeegeebees.
-
There are lots of parts of the oven you won't ever see once completed - look at photos so you don't waste time prettying up bits that will ultimately be hidden.
-
Yogurt containers - both 500ml and 1 litre are excellent for doing per-ratio measuring.
Third - if you're just looking at the photos, know these things
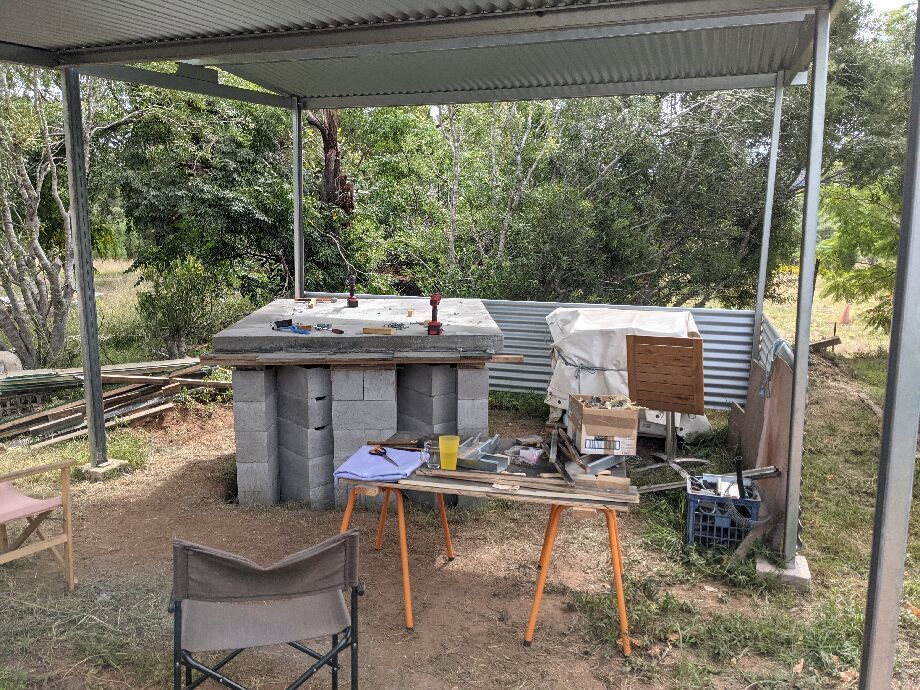
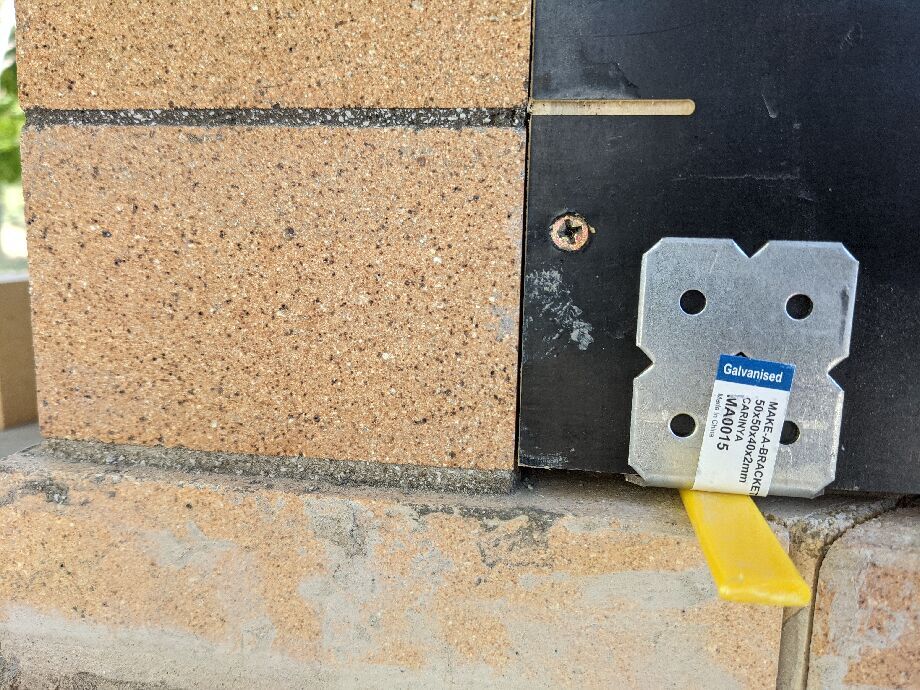
The top of my stand is 1970mm long by 1750mm wide - that's the usable, tiled surface with ~20mm overhang. The slab proper is 1930 x 1710.
The oven itself, fully rendered, is 1500mm wide (east-west). The advertised width requirement is 1550, so they really are listing the minimum space you can get away with. You want more. My stand gives me 12cm at the narrowest bit on each side, but a comfy amount of space towards the front and rear corners.
Height above the ground is hard to say accurately as the ground slopes. I'm tall (188cm) so I went higher than 'average', given I have the luxury to adjust the surrounding ground level a fair bit in either direction later as part of the landscaping. From a metre back, I have excellent visibility to the back of the oven.
My hut is a clerestory style, about 4 x 5 metres, and 2.6 metres high. I should have gone slightly wider/longer, partly for practical reasons, partly aesthetics (the ratio feels slightly wrong to me).
Kit selection
I've wanted a pizza oven for decades. In the abstract, they're really cool things to have (I don't have enough experience actually having one yet to know if that's true out of the abstract).
In March of 2020 I found myself with sufficient space, time (I bought soon after the 2020 lockdowns started), inclination, and otherwise unallocated dollars.
This was also a year after we'd had some spectacular pizza at 400 Gradi in Naples.
Here in Sydney, Australia, there's quite a few options available - from the 'here's some bags of stuff and a few A4 pages' through to 'we'll come and install this for you', with the unsettling range of pricing to reflect.
I knew I wanted something around the 1 metre internal diameter. Much smaller is just silly in terms of space for food + fire, concurrent pizza capacity, and heat retention. The non-negotiable expenses are non-trivial: the infrastructure to support the oven build - the base, stand, slab, awning / hut, etc - and my time.
Going much bigger than 1 metre internal did feel like overkill though. I won't be entertaining dozens of people at a time, plus my preference (and consequently any potential guest's only choice) is Napoli style, which by definition can be turned around in under 90 seconds.
I looked at three vendors:
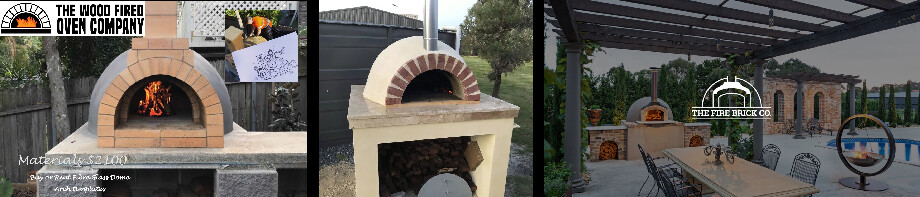 From left to right - Field Furnace, Perth Wood Fire, and Melbourne Fire Brick Company
The pictures above are the main images each vendor puts on their product page.
-
Field Furnace at Wetherill Park in Sydney. They advertised (and I note that they still do in 2021-11) an oven kit for $2100. However, after having a yak with Lee there, and he was undeniably very helpful and knowledgeable, the sample quote I then received for a brick oven kit was $3,300. I found out recently a nearby neighbour went with an oven from these guys, but I haven't seen it yet.
-
Perth Wood Fire Pizza Ovens did nicer looking kits, and the pricing was very attractive, at a touch over $2000 for 920x1200 internal. The offer to 'deliver and render' was something I didn't understood, as there's a lot of time & work between those two events. It also wouldn't apply to me anyway, given my location on the far side of the country.
-
Melbourne Fire Brick Company has by far the most flash web site in terms of aspirational photography, clear information around pricing, building guides (they have a huge set of quite detailed instructional videos), and PDF manuals. Unsurprisingly they're also the most expensive option.
As it happens the aesthetics of the first two didn't appeal to me, and the perceived quality of the third option was compelling.
The D95 (950mm internal diameter) was $3190 early last year. I note it's gone up to $3390 now. The next model up, the D105, is an additional $400 - which gives you the same warm-up time, slightly longer retention, and 10cm wider.
Their pre-cast (non-brick, but similar external aesthetics) 850mm internal only needs 1h15m to heat up, but the relatively poor heat retention and smaller usable size put me off that. Pricing was a touch under $3000, so not much difference there. Its construction requires a lot of maneuvering of hefty parts, which at the time I thought of as a negative, but in retrospect it would have been significantly easier and faster to put together.
I had a call with Ben, the proprietor, and he was helpful and patient with my questions.
Later, when I rang to put an order in, I spoke with a lass who, as I was pondering on whether to go for the optional large granite landing kit, said I shouldn't be penny pinching. I nearly hung up at that point, as that kind of sales tactic irks me. Anyway, the net result of that conversation was that I spent an additional $400 on three pieces of granite, so I guess the tactic works for them.
Anyway, turns out that buying a brick oven pizza kit is the easiest part of the process.
Miscellaneous trivialities
Or A Bunch Of Thoughts For Which There Was No Other Logical Place To Dump Them
The instruction PDF is very nicely put together. The addenda (Notes & Updates) at the front has to cope with changes to both the video series and other printed material, and there's been a couple of significant design changes since some of these doc kits were put together, and when my kit was purchased. It feels like this may be better served by an email list, or a space on the web site. Presumably there aren't lots of post-shipping changes, it's more the design changes between revisions of the kit themselves.
The D95 Instructions PDF does not have an embedded ToC. A lot of vendor-supplied PDFs make this mistake, and it's hugely frustrating. I think Microsoft Word defaults to not including it when doing an export-to-PDF, and I guess most people don't notice what they've never had. Once you experience a decent PDF reader (I use okular) and get used to ToCs for fast navigation, it's annoying when they're not present.
There's a few Q&A's at the end of some of the later videos, which are interesting, but it's a shame there isn't a Q&A or FAQ section in the PDF or (better yet) on their web site.
Most of my problems with the documentation is that they're not hugely prescriptive. Often there seems to be an assumption people have done some amount of bricklaying, rendering, mortar mix, etc before. Ratios and glimpses of materials as they're being prepared or applied often feel incomplete, given the capabilities of the media. (Having said that, the video set is WAY beyond what any other vendor has put together, so in a relative sense it feels slightly disingenuous to complain about it.)
The phrase 'We give you ...' is frequently uttered in the videos. I hear that a lot from enterprise IT vendors in my day job, so I've probably become overly sensitive to it, but nothing in this kit was a gift. What is actually meant is 'The kit you've purchased includes ...'
Time and costs
I scrawled many notes as I went, with a blend of accurate and nebulous data on both the time and money fronts.
Plenty of tools were purchased primarily for this project, but will be useful in a post-pizza-oven-construction world.
And of course there's a huge range of ancillary choices you can make on a project like this, mostly around cosmetics, that will drastically affect the final tallies.
Time
My progress could best be described as glacial.
I bought the kit in May 2020, and the pallet arrived mid-June. I had anticipated that pouring some slabs, and building a simple galv steel hut / shack would not be too time-consuming, which turned out to be spectacularly misguided.
Then winter happened and brought other priorities. Subsequently, the summer weather was oppressive, which slowed things down in a different way.
So, my base slab was poured in October, the hut went up shortly after. The besser brick risers were laid out and in-filled in January 2021. Then a big gap until April when I set up the form-work for the suspended slab, and a stupid amount of rebar, and then poured that.
Only then was I happy to crack open the pallet, which had been kept intact and covered with some very heavy duty tarps since it had arrived. I'd had nowhere to unpack and then store the contents, in any case.
In May I set up the cal-sil under-boards, and got the first five rows of the dome build, including the inner entrance arch.
In June, the rest of the dome bricks were completed, and in July I poured the keystone on the dome, put the front arch up, and got the pre-cast flue installed.
September was a slow month, with only the granite landing brickwork being laid and the ceramic blanket being put onto the dome.
October, in comparison, was a flurry of activity. Cutting and polishing of granite tiles for the stand, laying those tiles, then grouting them, laying the main granite front landing, applying four perlite render coats and basically finishing the main construction efforts.
In November, curing fires were started after I got a rivet gun capable of pulling stainless steel rivets through the thick flue metal.
By December 2021 I was actually cooking pizzas.
I'll concede that progress was undeniably torpid, but there were quite a few impositions on my time. Another shed / workshop build, a base & shack build for some beehives, a heftily over-engineered 3 metre tall slab + besser construction for a combustion stove on the side of a cabin, felling a LOT of trees and doing some huge bonfire burnoffs in preparation for another bad fire season, plus due to the country accidentally managing the pandemic reasonably well (at least up until the middle of 2021) we ended up being called back to the office regularly enough to be inconvenient.
This section may be fleshed out eventually, but I don't have detailed time-tracking for everything. Things I do have, I've tended to note in the subsequent sections anyway.
- Floor tile and base
- marking and cutting out the cal-sil underlay - 1 hour
- getting it level with sand underneath, and then applying foil + masking tape, placed center, oriented, etc - 2 hours
- doing the mortaring of the floor tiles into place - 2 hours
- Dome
- row 6 - took just over 2 hours, including clean up. (Refer below for row 6 details.)
- row 7 - two x 1 hour sessions, including setup, brick moistening, etc using a single wooden strut to support the 'behind' brick, and warmer water for soaking and mortar mix.
- Render
- 2 hours for each layers 1 and 2
- 3 hours for each layers 3 and 4
Progress
Some notes I made that likely aren't terribly useful, showing rate of consumption of mortar mixes etc
- Under-tile mortar mix - I used only half the 20kg bag, with about 10mm layer of mortar.
- I got half-way through my refractory mortar at about the start of row 5. I suspect the D105 owners get the same number of bags (3 + 1) so they'd need to be slightly more cautious.
- I finished the last of the trammel tool capable row (row #7) with full type 2 bricks with the very last of the second bag of refractory mix - ie. 2/3 of the way through.
- 45 bags of pre-mix concrete mix went into the base slab - dimensions are 1800 x 1900 x 100mm
- 10 bags sand, 4 bags cement, an awful lot of aggregate - for the besser (cinder) block in-fill
Costs
Specifically for this project, the big ticket items include:
- $4000 (ish) for the oven - that's $3200 for the kit proper, plus the granite landing (see above), the in-wall temperature gauge, shipping, high-temp spray paint
- $450 (ish) for the ground slab + rebar + formwork
- $300 (ish) for the concrete and aggregate that went into the besser risers
- $400 (ish) for the suspended slab
- ? for the concrete
- $198 for the N16 rebar in the suspended slab - $152 actual, $46 cutting to lengths
- $400 (ish) for the besser bricks
- $450 for the granite tiles
- $165 for two x 7" flue lengths (900mm each)
- $170 for two x 7" flue elbows
- $170 for two x peels (1.3m) and two x acacia paddles
- $280 brass bristle brush and ash shovel (1.5m long)
- $110 for dough boxes & scraper
- $255 coal scoop and 3 x natural brush heads
- $1000 for the hut
- $? for the 100x50 galv purlins that make up the hut
- $? for the plain galv orb roof
- $? for the plain galv orb low wall sheets
- $? for the bolts, heavy-duty brackets, for same
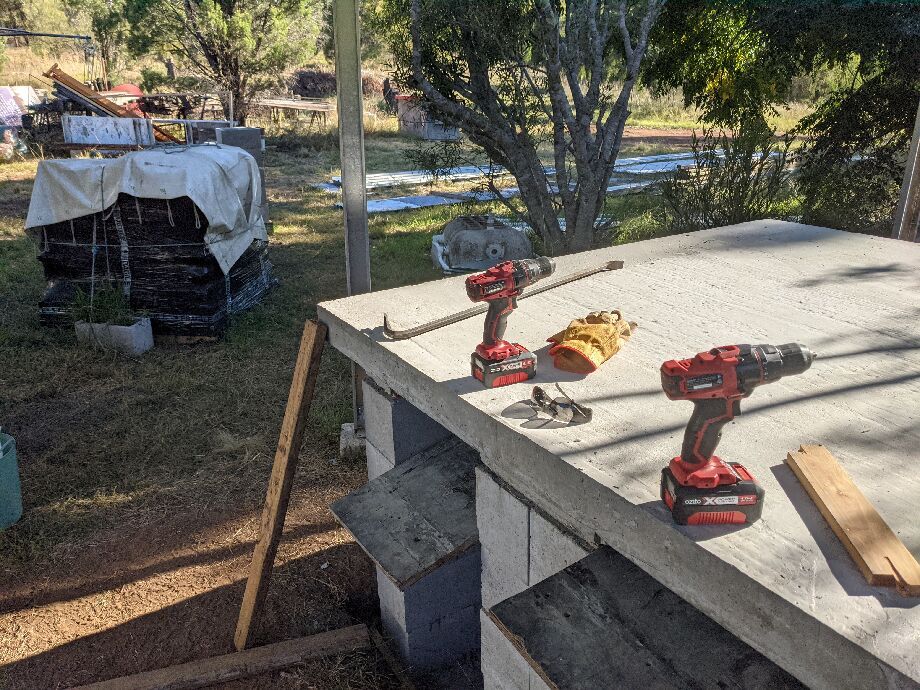
Tools purchased kinda, sorta for this project, but useful forever, include:
- $80 for a concrete vibrator
- $700 wet tile cutting saw
- $200 air-driven wet polisher + assorted diamond pads
- $100 long-handled rivet gun (stainless steel rivets in the flue)
- $26 car jack for the fibreglass dome
Tools I already had but were either essential, or highly useful, for this project include:
- compound mitre saw - for preparing formworks
- bandsaw (timber) - ditto
- bandsaw (metal) - for cutting metal (formwork), hut framework, and rebar
- jigsaw - for the calsil insulation sheets
- angle grinder - for much the same, but also cutting down some of the fire bricks
- drills - 2 battery, 2 corded
- cement mixer
- rod tie puller
- air compressor - for the wet tile polisher
- trowels
- clamps
- dead blow hammer
- rubber mallet
Consumables are a huge list, and I didn't really track them much - many I already had:
- A bundle of timber, including laminated ply and 70x45 pine, as well as a lot of 100x50 purlin C-beam, for making up formwork.
- Lots of hex-head screws involved there too.
- Large (20mm) aggregate, used for the besser brick in-fill
- rod ties
- concrete chairs (plastic, for rebar)
Myriad little sundries. For example, $25 for the dozen or so bricks that were originally purchased to just fill in the gap under the granite landing, but turned out to nicely complement the fire bricks well enough to keep them as a feature. They also consumed an hour of my wife's time to go and buy them.
Other things that fit into that category include:
- lots of plastic truggs to mix up adhesive, mortar, render, etc.
- gloves
- adhesive / mortar drill mixer
- primer for tile adhesive to fix to concrete
- tile adhesive
- tile grout
- tools for tiling & grouting
- kitchen nylon sponges and scrubbers
- paint-quality filter mask
- safety goggles
- bag of 3mm plastic tile spacers
On the subject of tools
I am / was quite impressed with:
Cyclone Black Thermal water-proof gloves - fantastic, lasted well, warm and dry hands, nicely tactile while handling tiles
Craftright scraper - cheap, robust, nicely designed
A special mention of the utterly exquisite Coal Scoop from Slow Food & Hand-Forged Tools - the rest of their tools look fantastic as well, but I'd already accumulated a bunch of cheap ebay gear by the time I found these guys.
Preparing the site
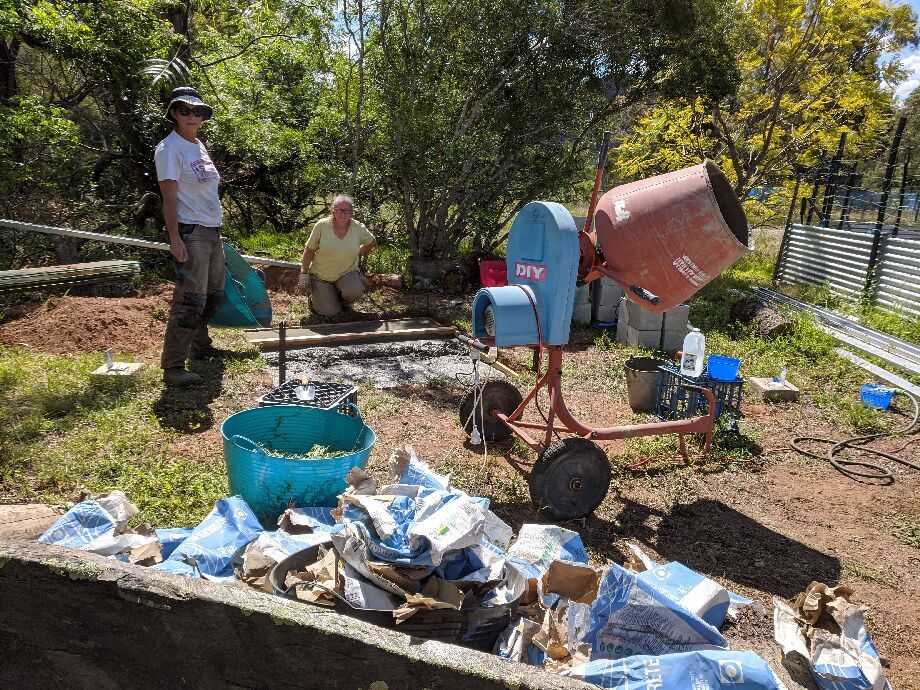
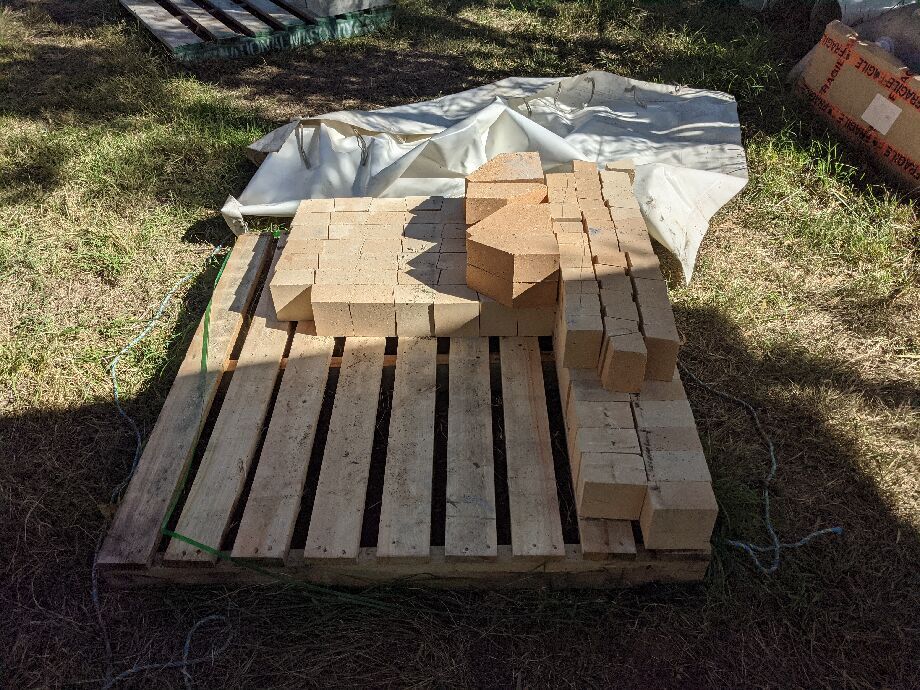
My kit-on-a-pallet arrived in June 2020, along with two pallets of besser bricks, and a lot (but as it turned out, nowhere near enough) concrete, cement, and lime.
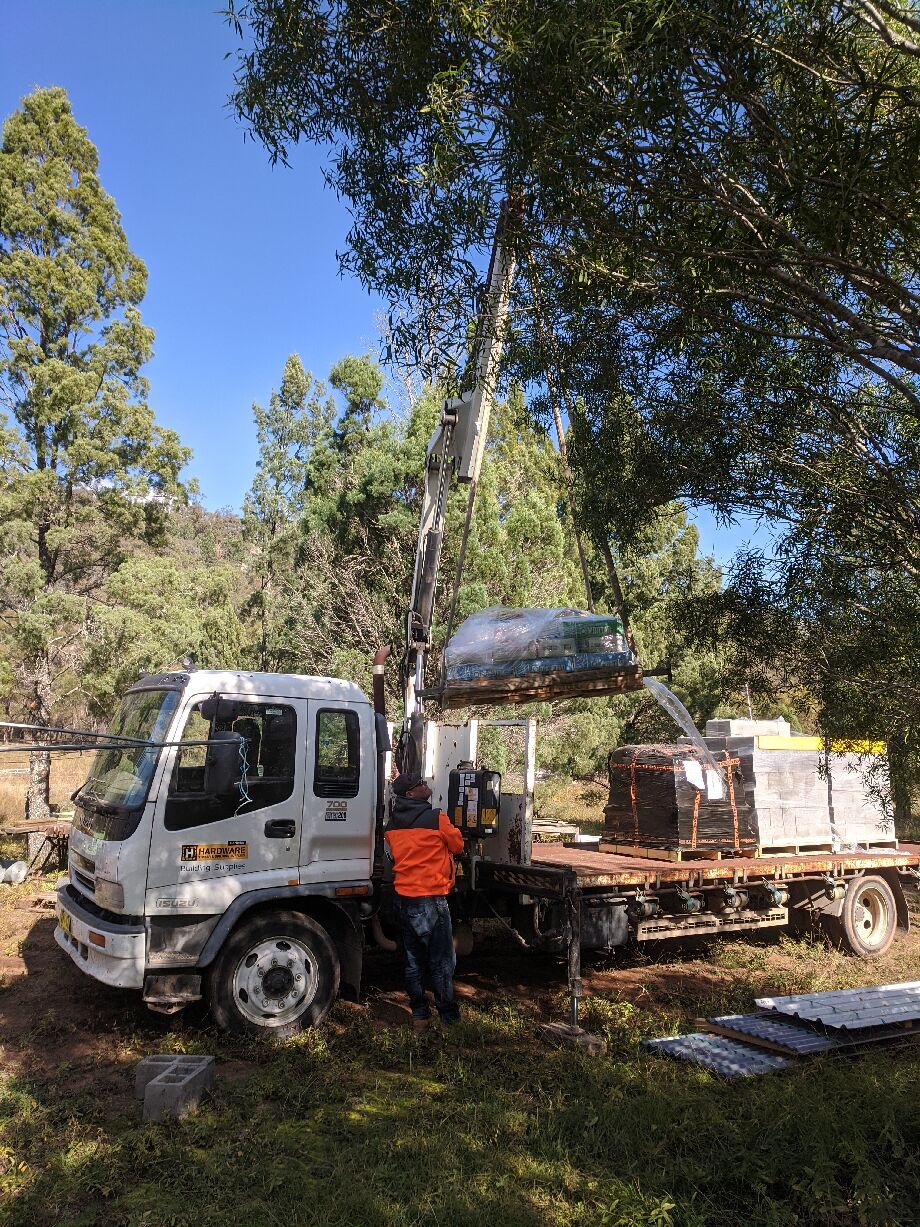 Delivery of the oven kit plus sundries
I'd naively thought I could build a small shed structure in a few weekends.
That totally failed to happen.
I had not put up a free-standing shed before, so some learning experiences there.
I used 6 concrete footers, with heavy duty galv L brackets embedded in them, which were then bolted to 100x50 galv C beams.
The hut is designed to get most of its integrity from the galv sheeting on the roof and three sides, augmented with some diagonal struts.
I thought a clerestory style roof might not need a flue (that was misguided), or failing that I could use two 45° bends and avoid having to punch holes in a roof and use a twin-wall flue, with all the problems that brings. As it happens, the two-bend approach should work really well, as my placement of the oven within the space is just right.
The clerestory roof protects us from most of the wild weather that comes in from the north-west, while allowing excess heat to escape readily. This will pay off in summers when it's frequently around 40C.
What would I do differently?
I'd take MUCH more care in getting those concrete footers + angle brackets in precise positions. When I set them in place, I reasoned that I could compensate by varying the lengths of the 100x50mm C-beams I used. This, like many things, just pushes more work onto future-Jedd, and future-Jedd deeply regretted that.
Anyway, this all had to happen, and it happened very slowly, before I could start on the actual pizza oven.
Here I'm working out spacing and angles. I wanted to maximise space for people to mill around in here, but also didn't want to limit my access to the back and sides of the oven stand. Everything at right angles felt awful, hence I went at something around 30 degrees. My thinking here was to allow people in, or coming in from, the pergola area (main sitting / eating / milling area) to see the oven entrance, extending the visuals as it were. I made sure that the placement of the oven opening didn't mean I'd be bumping the other end of the pizza tools on the corner steel post, too.
Basic site preparation
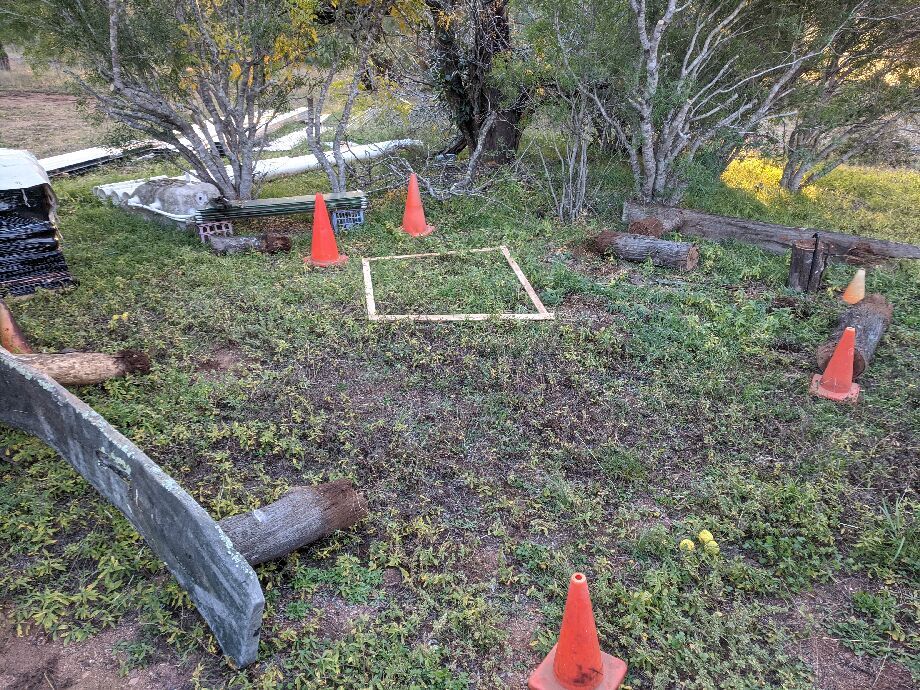 Working out the best location and layout
Digging a reasonably deep hole, and then capping off with these above-ground frames, means I can either tile, or use gravel, or remove / build-up the soil later on, once I work out just how high the ground needs to be there. I don't need a lot of mass in these footers as my roof is near-flat, and unlikely to catch much wind.
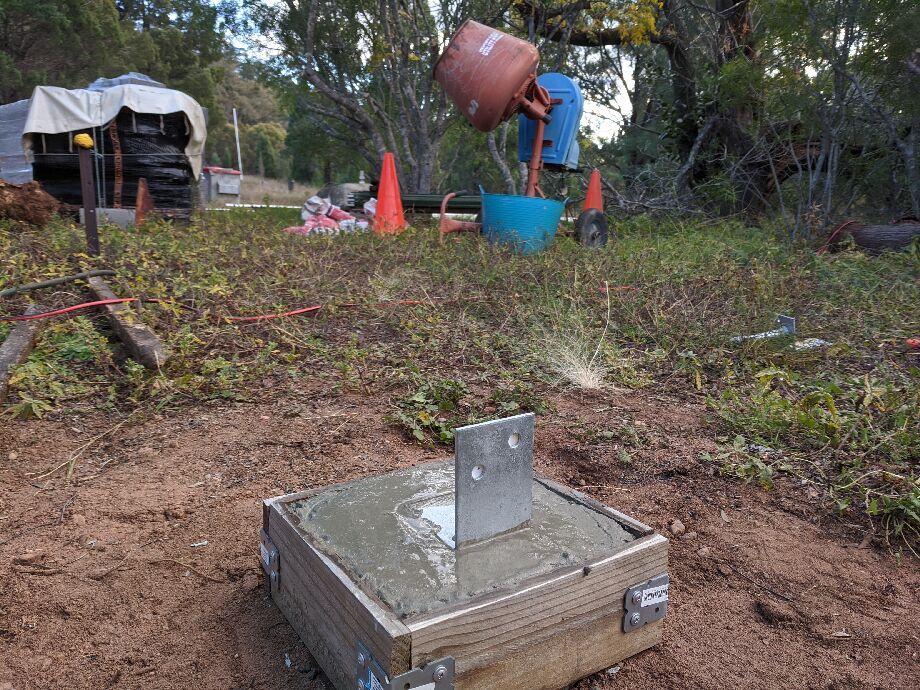 Small concrete footer with galv bracket embedded
I hasten to mention - there's a stonking deep hole under that framework, that's just there so that I have a flat surface to put my steel C-Beam posts on, above ground level, so rust risk is minimised, and inspection is easier.
 All hut footers are in
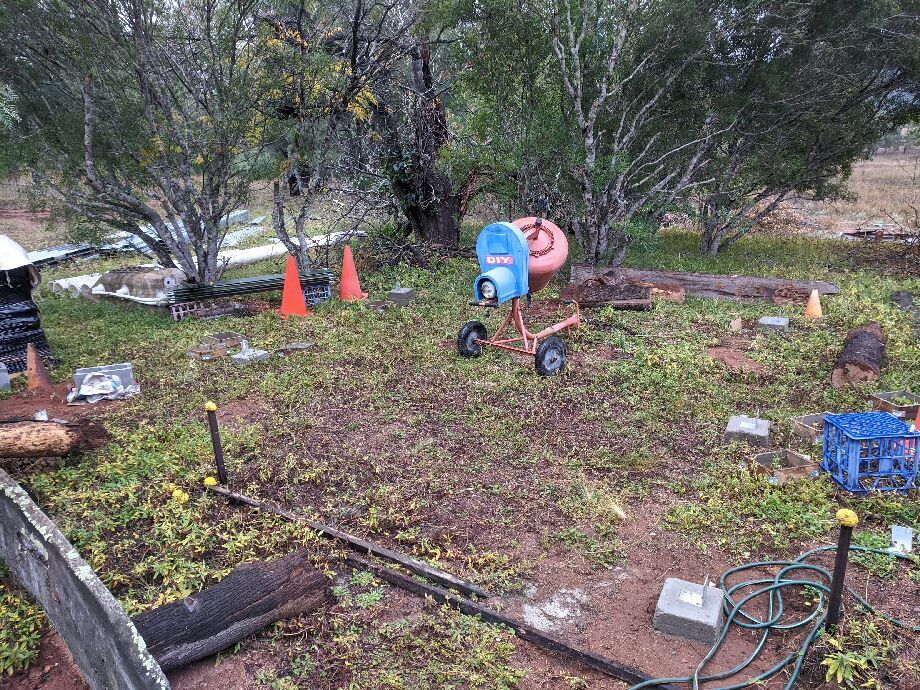
Slightly stronger visuals from besser bricks, plus I think at this point my stand size had grown a bit from my earlier plan (with the timber frame).
 Visualising the stand dimensions with besser bricks
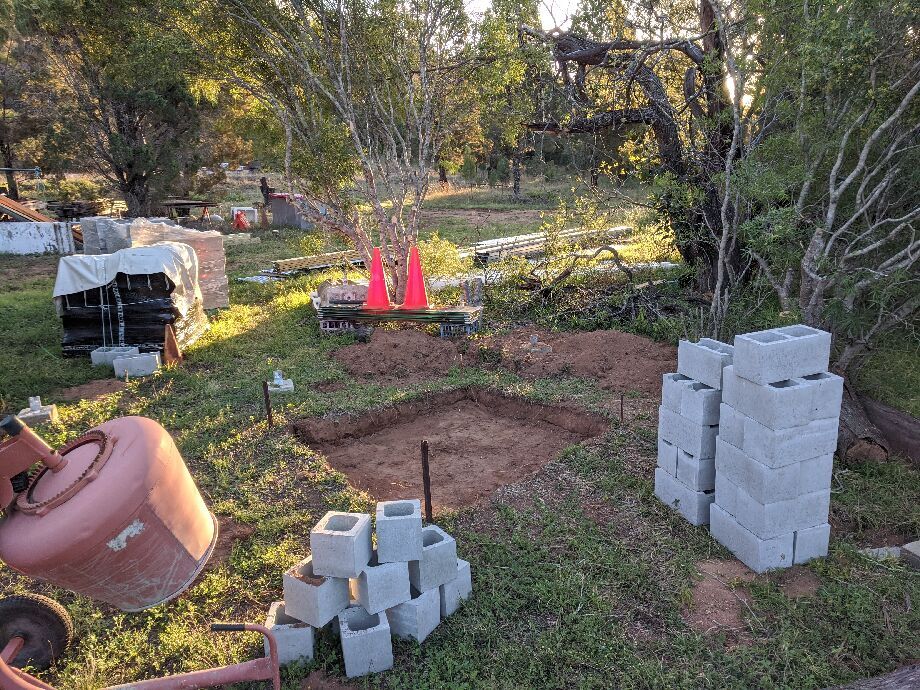 Bottom slab hole nearly done
What would I do differently?
Next time I'd dig a wider hole -- it can always be back-filled -- so I could retrieve the H4 timber formwork. I suppose I still could now, but it's a major pain.
I might also put down a plastic liner so that water can't come up into the bottom slab. It's unlikely to, given how I've got the shed, and especially once I get the rain guttering plumbed in, but nonetheless.
Preparing the slabs
You're almost definitely going to have to build two slabs - one on the ground, one suspended.
I guess you could potentially form up a huge cube, perhaps some waffle boards strategically placed amongst some reinforcement bar, and get in a couple of tonnes of concrete. Good luck.
Anyway, I didn't do that.
Like almost every other component of this project, I a) had never really formed up or poured a concrete slab, and b) was petrified that if this one thing isn't done 100% properly, the whole project will catastrophically fall apart later on. This unsettling sentiment returns, increasingly amplified, at each and every step.
Loosely I knew I had to do a ground slab, make up a series of besser blocks, interleaved, with the conflicting concerns of between the slabs were to try to maximise usable space, while maximising strength / minimising the distance of the span(s). Either way, the whole bottom slab was going to have the full mass of everything above it transferred via the width of some number of besser blocks.
While I knew I'd be able to work around the slab to build the oven, I also knew that ultimately I'd not have a lot of room on the left-hand side, or the back, to be pulling firewood or equipment out from there, so I anticipated a design that only offered storage from the front of the structure.
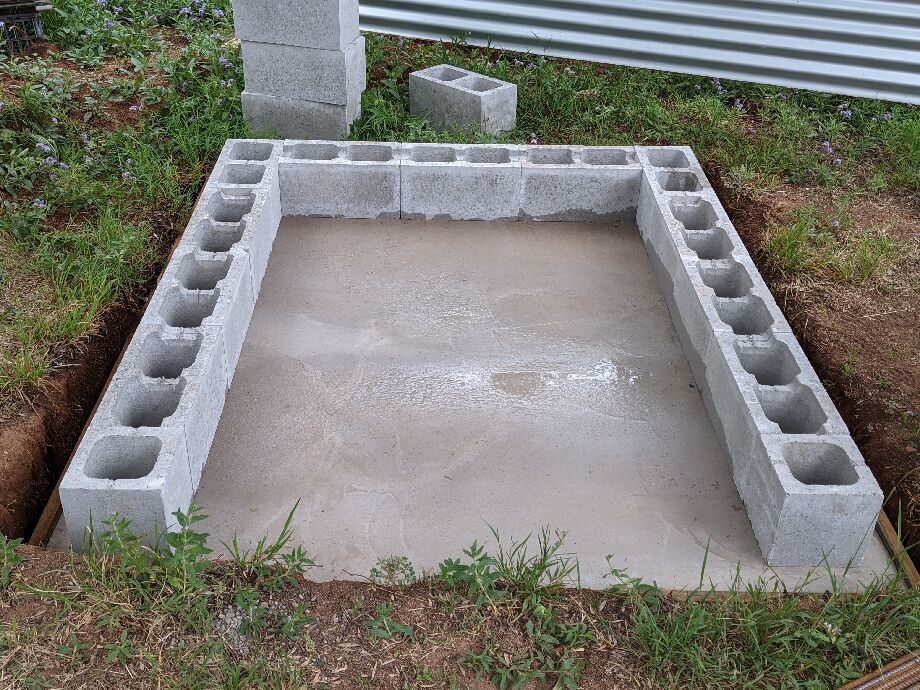
The lower slab
This consumed about 45 bags of pre-mix concrete (about $350) plus rebar ($100).
The reinforcement bar was a combination of relatively thin gauge mesh, maybe 5-6mm, along with some chunky 12mm bars, diagonally, in two directions, at about 200mm spacing.
I pondered, but did not end up, having some bar sticking out of the slab to bind the besser bricks to.
Our soil is pretty rubbish, certainly no chance of digging down and ever reaching a clay sub-soil, so I selected an area that hadn't been disturbed much in living memory, dug down maybe 20-30cm, and set up some timber frame to make a roughly 1800 x 1700 base slab.
I was anticipating having a slightly wider suspended slab than the base slab, and I wanted that slight overhang around all the sides. An example, amongst many, of where I thought something that I knew was uncommon would be quite easy, not considering why it's so uncommon in the first place.
Using 25 x 150mm 'wet cut' (really, really, really horrible quality) pine mini-sleepers, I formed up the base, got it level, and attached some (internal) small sacrificial wooden stakes to keep it in place.
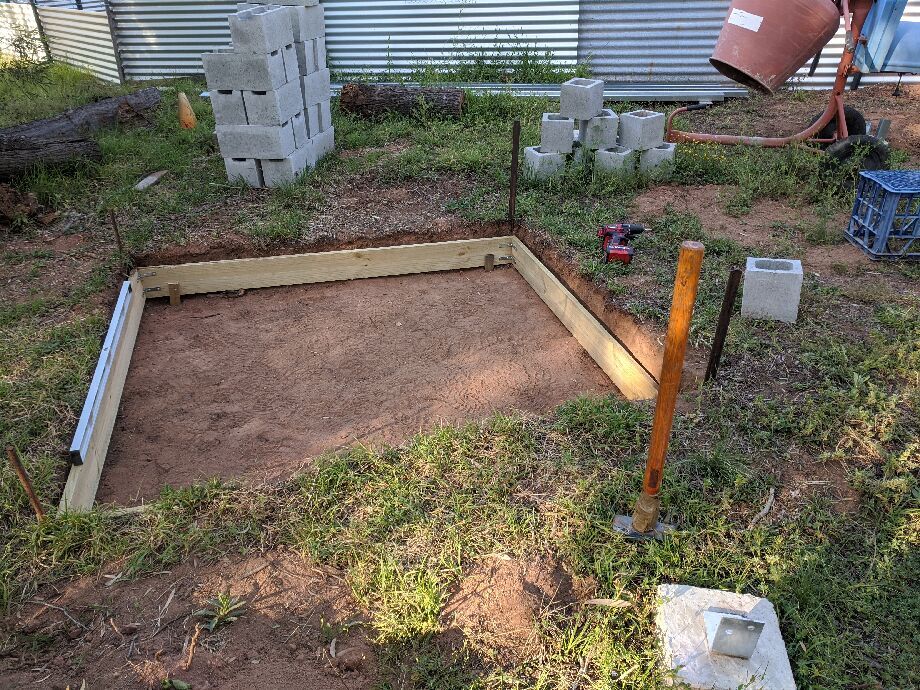 Levelling the form work for the base slab
Then I laid in some diagonal rebar, for no good reason other than I had some thinner gauge mesh than I thought would be sufficient, and didn't want to try to run this thick rebar along the same lines, partly increase overall strength, partly so I didn't struggle to get concrete in between parallel steel bars.
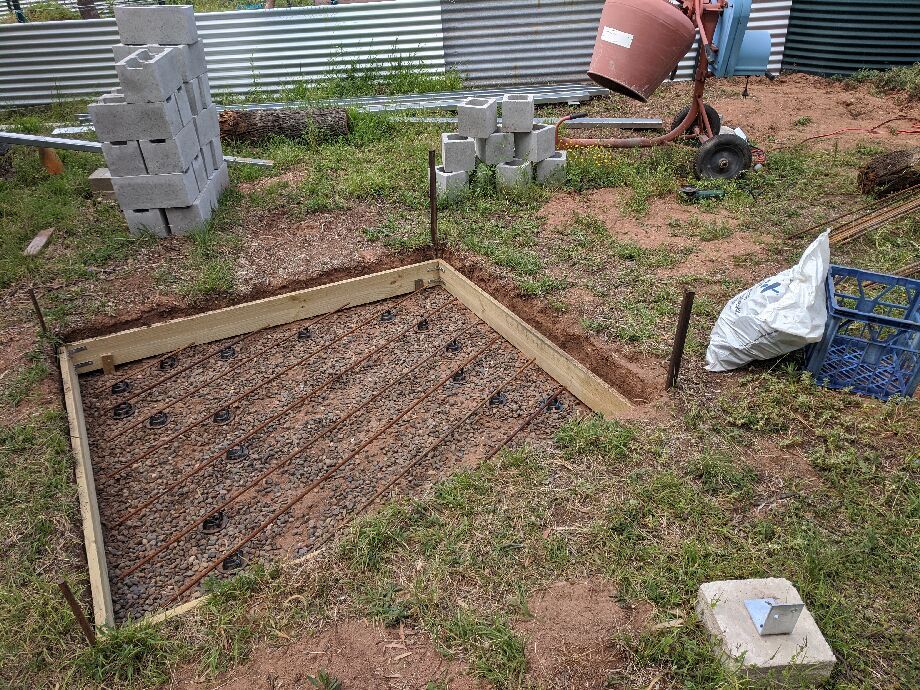 Base slab reinforcement bars - first layer
After that, the galv mesh, and then a second layer of 12mm standard rebar orthogonal to the first layer.
Luckily I had two helpers on the day. Getting concrete into all the nooks, and trying to vibrate out air pockets, was entirely manual.
(A result of this experience was that I subsequently purchased a concrete vibrator.)
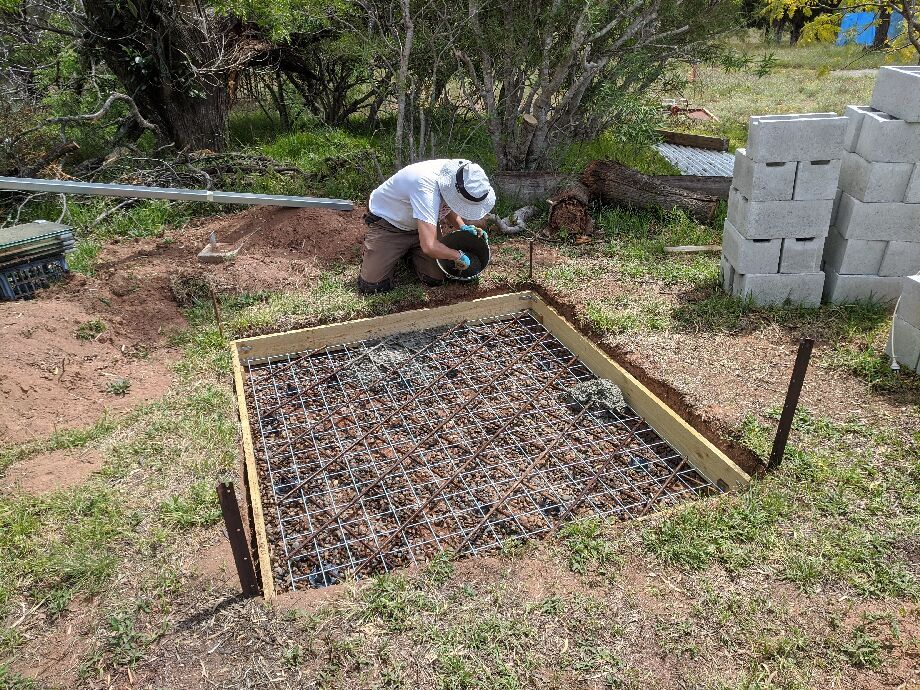 The base pour starts
Once we were nearly full we could screed across the top of the formwork to get our level.
 Screeding the base slab
This was early October, and the site has afternoon shade, but nonetheless we threw a large sheet over it, and kept it moist for about a week.
It's about as level as someone's first 3 square metre slab could be expected to be.
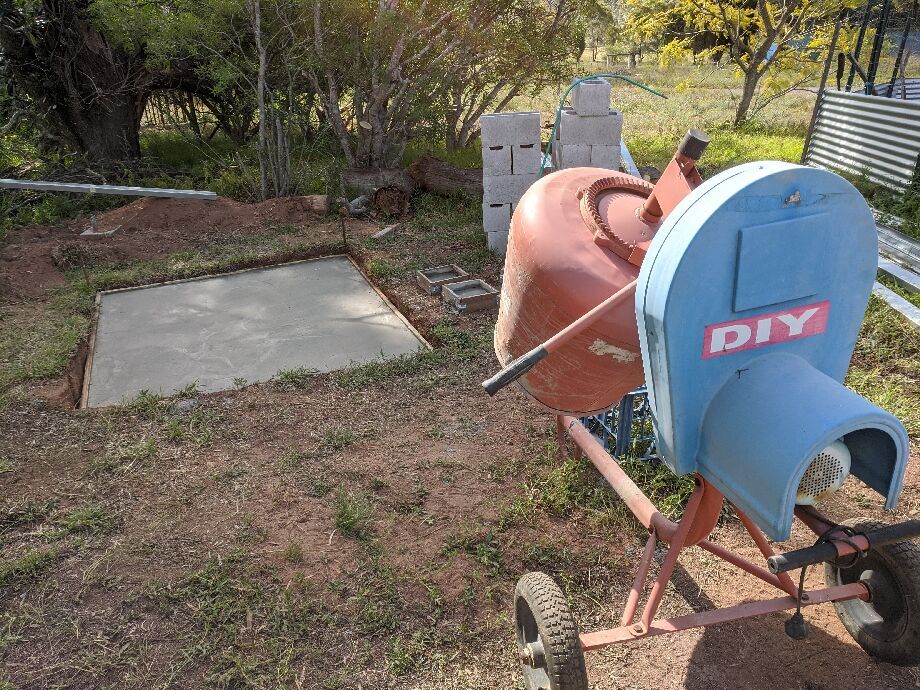 Base slab completed
What would I do differently?
Unfortunately for my location, getting a truck in with ready-mix isn't feasible, certainly not economical for such a small volume - about a third of a cubic metre. Plus the access to this bit of the property would make it near impossible. But if I was in suburbia that'd be my preferred option.
Certainly I should have had a concrete vibrator on hand for this bit of the work. I had one for the rest of the concreting, and they're an absolute marvel.
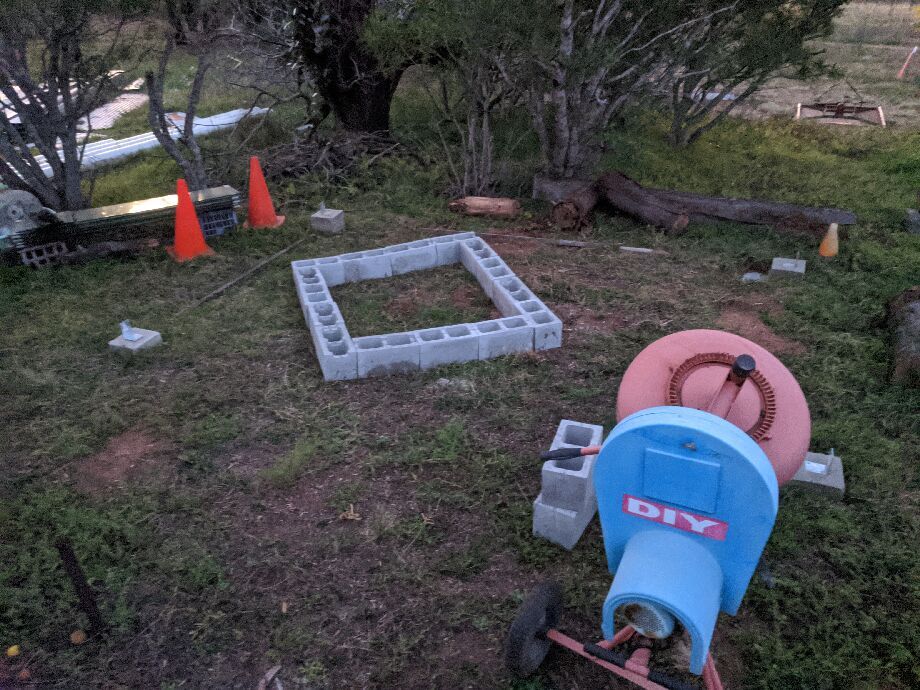
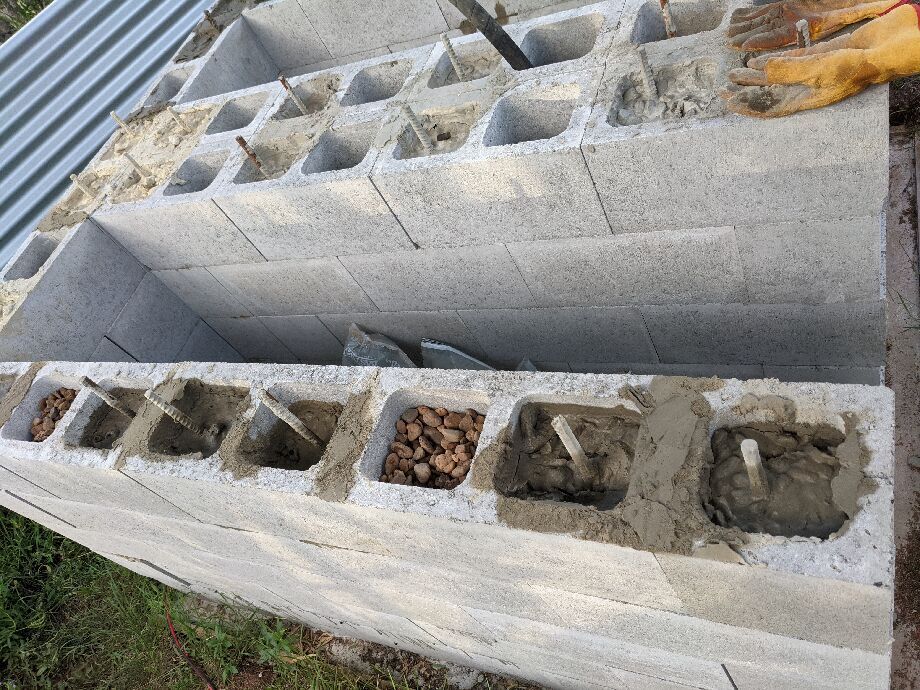
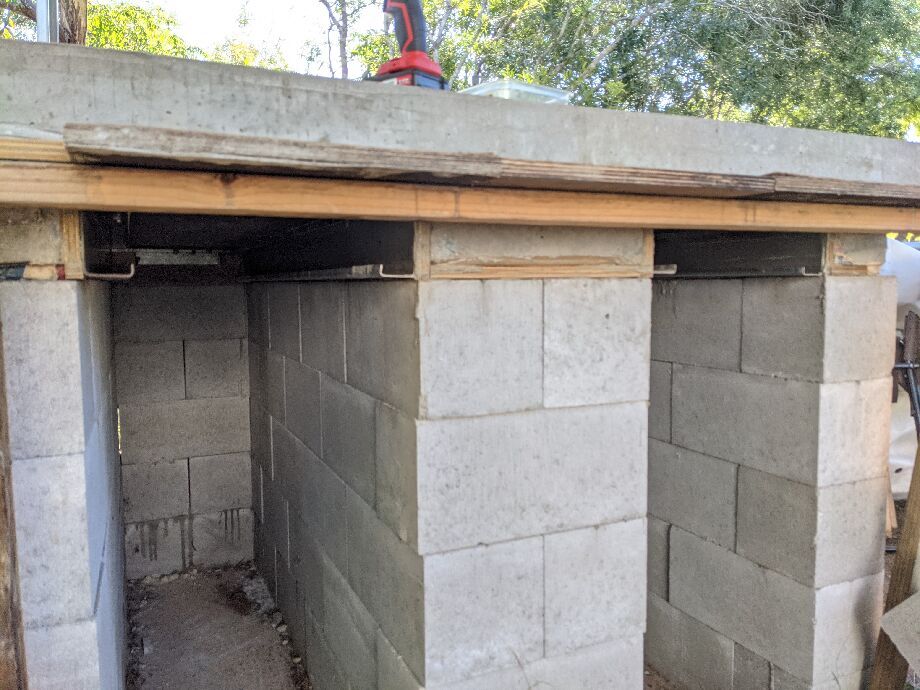
The besser (cinder) block risers
Having settled on a design - a big E shape - that meant my biggest span was going to be just under 400mm, the next question was what height to make the top slab.
Calculating backwards - 50mm for pizza oven floor tiles, 50mm for calcium silicate, 100mm for the top slab - and then working out where you'll be standing, and needing to look (without stooping) into the back of the oven.
 Working out what height feels comfy
I was in the fortunate position that I could later adjust the ground level around the front of the oven by, easily, 10cm up or down, and probably more.
Having said that, 6 besser bricks (at 19cm each) felt too high, but 5 was too little, so I (foolishly) opted to go for five high and set up formwork to get me ~ 10cm additional height during the main slab pour.
Massive regret. Only (much) later did I discover you can purchase half-height besser bricks.
Even without that knowledge, in retrospect I should have done two pours -- the additional 10cm height on the walls, left that for a week, and then come back and formed / poured the top slab.
From the design perspective, I did not like the look of top slabs that are flush with the outer edge of besser bricks, but the overhang is complex, and I procrastinated about how to set that up for much longer than is healthy.
I was lucky to have a lot of resources, including 'spare' C beam (which wasn't really spare, but got cut down to this purpose, so a bit of a waste of some of my longer lengths), and structural timber.
I also considered that with the placement of the oven, almost all its weight would be on the left & right walls, and the rear-wall - obviously some amount sitting near the front on the middle wall, but basically very little sitting on the spans of the suspended slab. Basically, compression strength of concrete is superb, but suspension strength not so good, and I don't like to under-engineer anything.
So, a really good scrub clean of the base slab, wet it down to improve bonding with the concrete about to sit inside the besser bricks.
 Bottom slab prepared for besser support walls
I'd bought, more by accident than design, a mix of both notched and not-notched besser bricks.
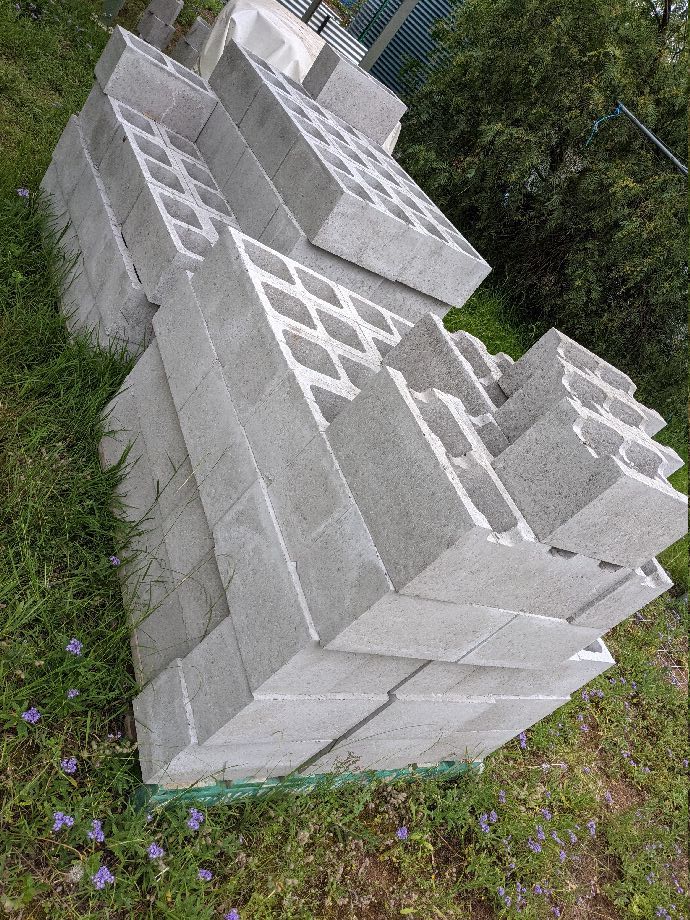 That's a lot of bricks
 The first layer in place - placements were marked in pencil on the slab
I used half-bricks at the front corners only, and was able to interleave almost everything else - I think there was one spot, in the middle, where I had to put a pair of bricks on top of the same-alignment pair, but can't recall why I needed to do that. Perhaps to ensure a good lock on the 2x2 grid that joined the back wall with the middle arm.
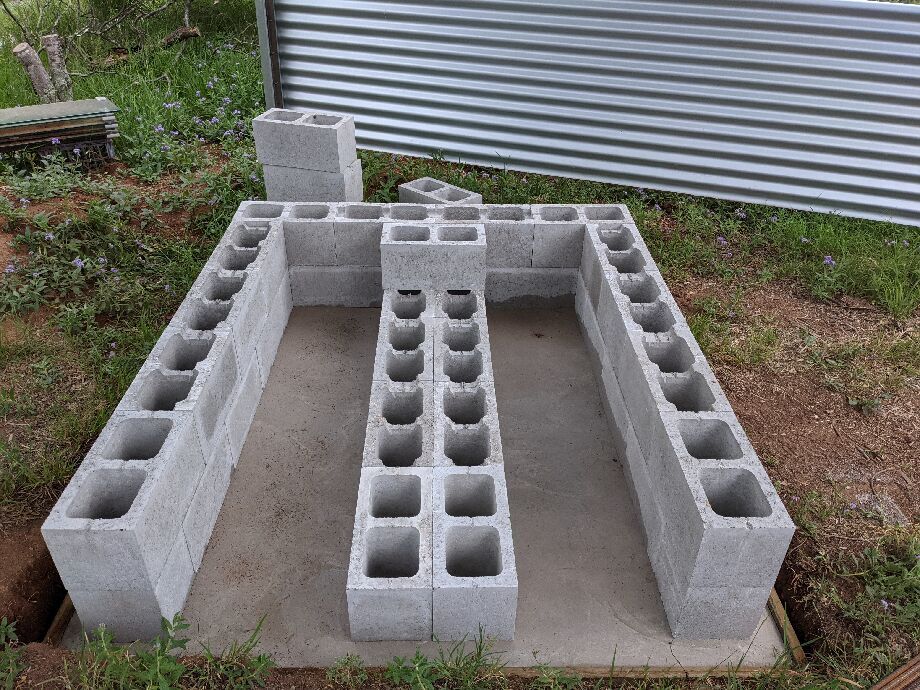 Second layer going into place
My plan was to fill every alternate column with concrete, and needed to break that rule (adding more concrete columns rather than missing some) at the corners, the front sides, and the 2x2 grid middle-back and middle-front. I mucked up my counting on the sides, so ended up doing two additional columns. Basically, a shit-tonne of concrete went into this structure.
The plan also involved putting concrete into all the cavities on the first two rows, to really lock the base in with the overlapping brick pattern, and put rebar in all the full-of-concrete cavities, reaching to the very top slab.
It meant having 26 lengths of rebar, so it was handy to have a metal bandsaw that you can set up and walk away from while it does its thing.
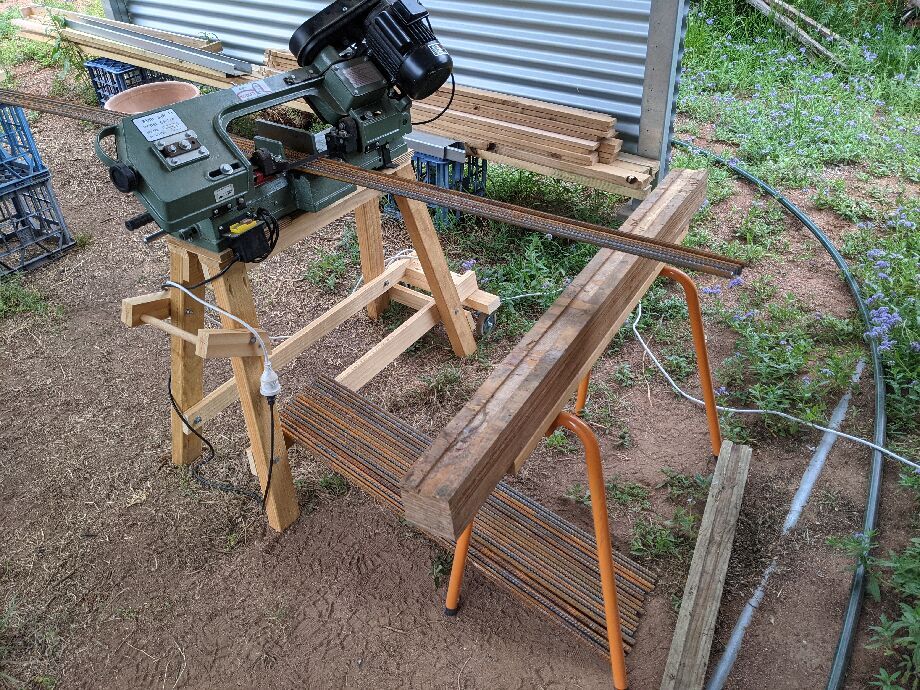 Cutting lots of rebar lengths
I would in-fill the non-concrete columns with gravel, as I had a stack of 20mm river gravel from another project. It meant that near the top of the gravel columns, I could re-introduce a small layer of concrete that would seal that cavity, and be ready to take the top slab pour later.
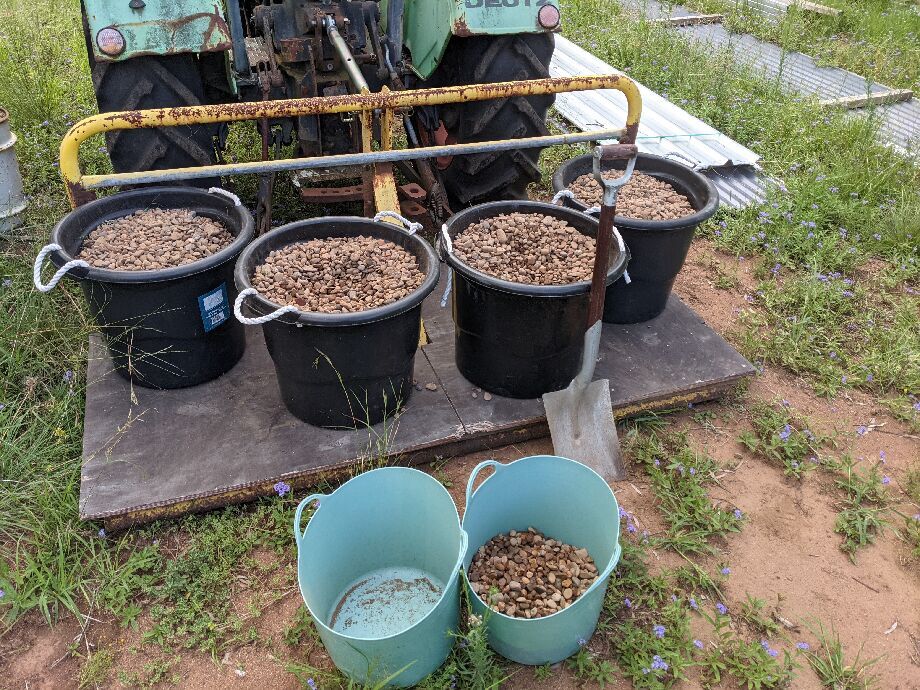 That's a lot of rocks
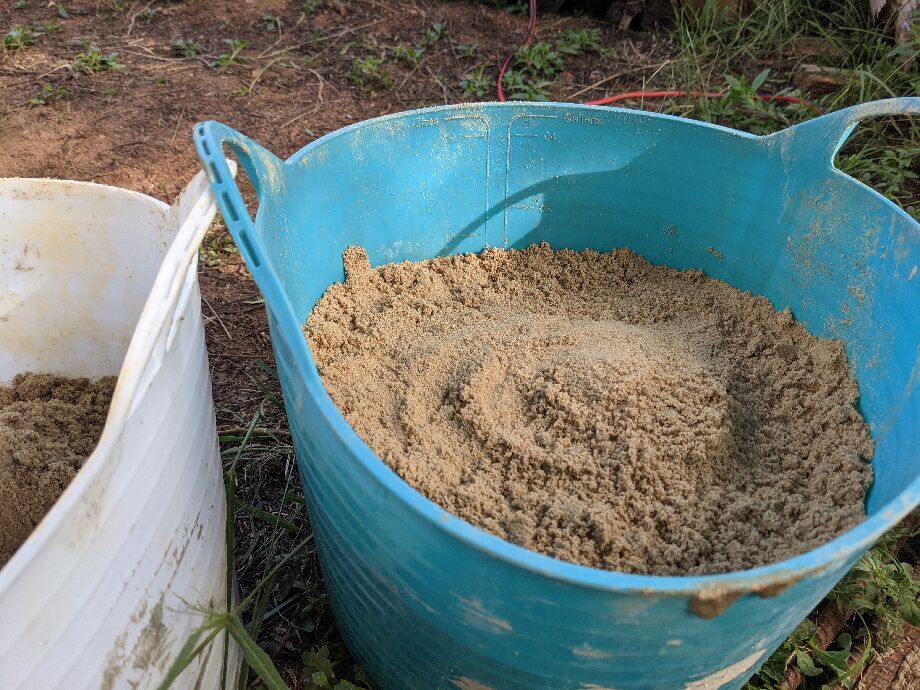
I was also using that gravel as the large aggregate in the concrete -- I wasn't concerned with this stuff needing much strength, and it was great for compression.
I went for a 1:3:5 ratio, which worked well.
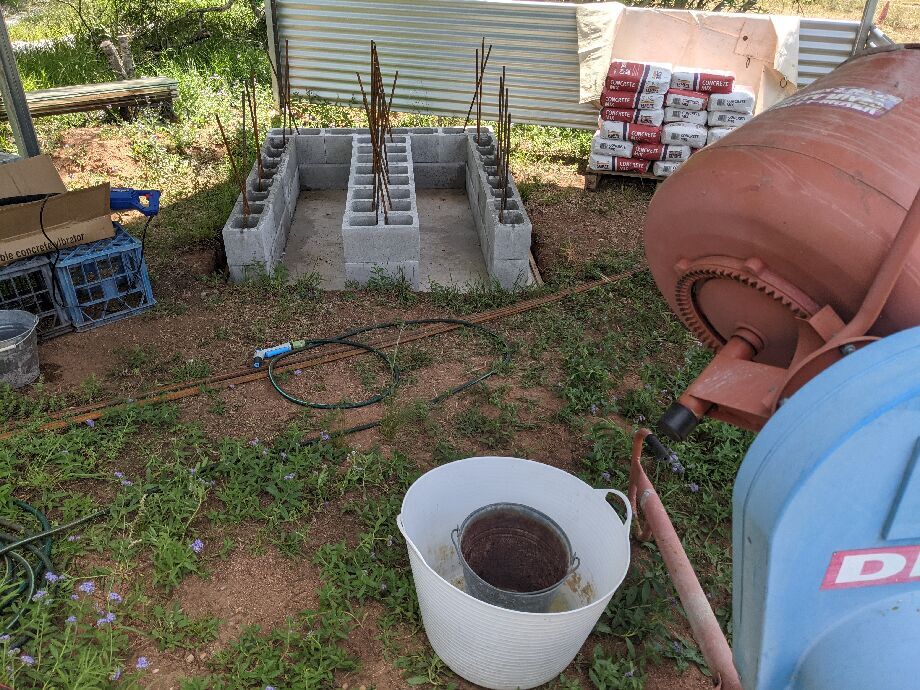 Rebar in all the concrete holes
I did this pour by myself, and got into a nice cadence. It wasn't time-sensitive like a slab - no need to keep a wet edge, as it were. Keeping two x 15 litres (in trugs) stocked up, along with sand up to a 3 litre mark in another bucket, re-filling both up as soon as I got them into the concrete mixer, it meant the mixer was rarely sitting idle, and nor was I.
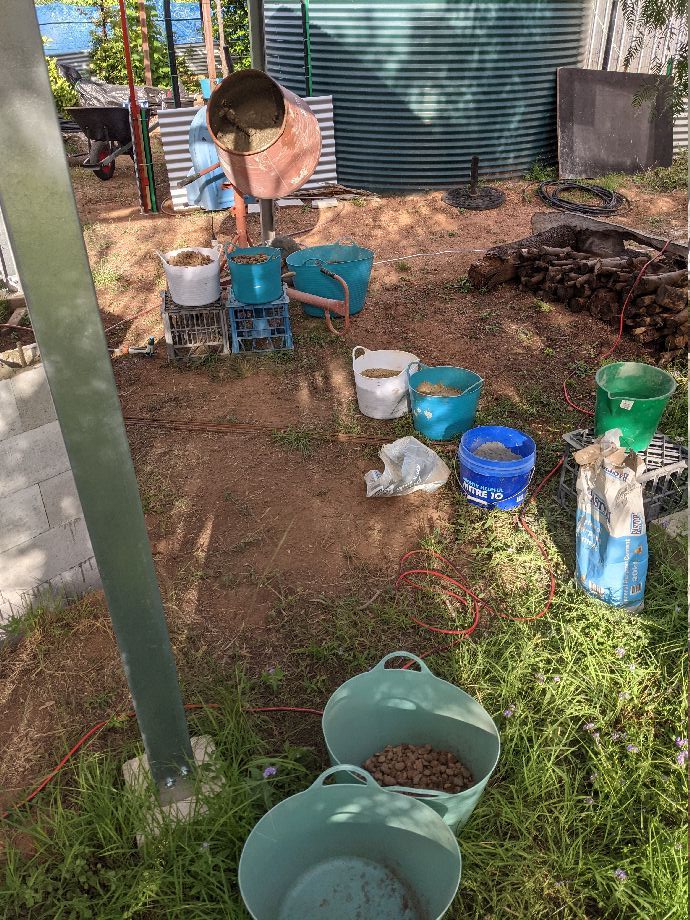 A string of buckets
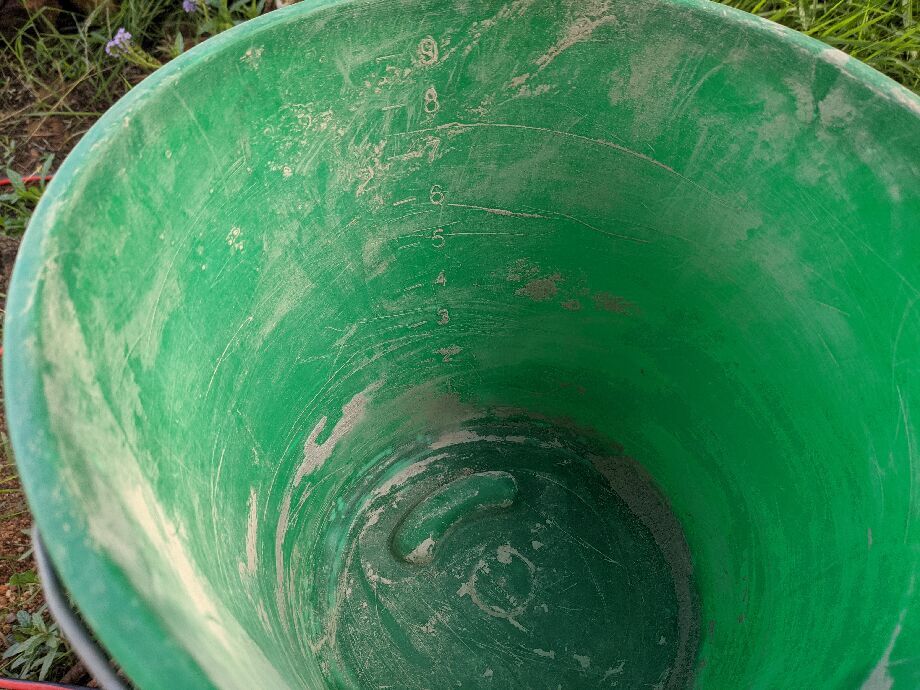 Buckets with gradation marks are essential
 So are trugs
First two rows completely concreted into place - the large aggregate ensured the rebar didn't fall over.
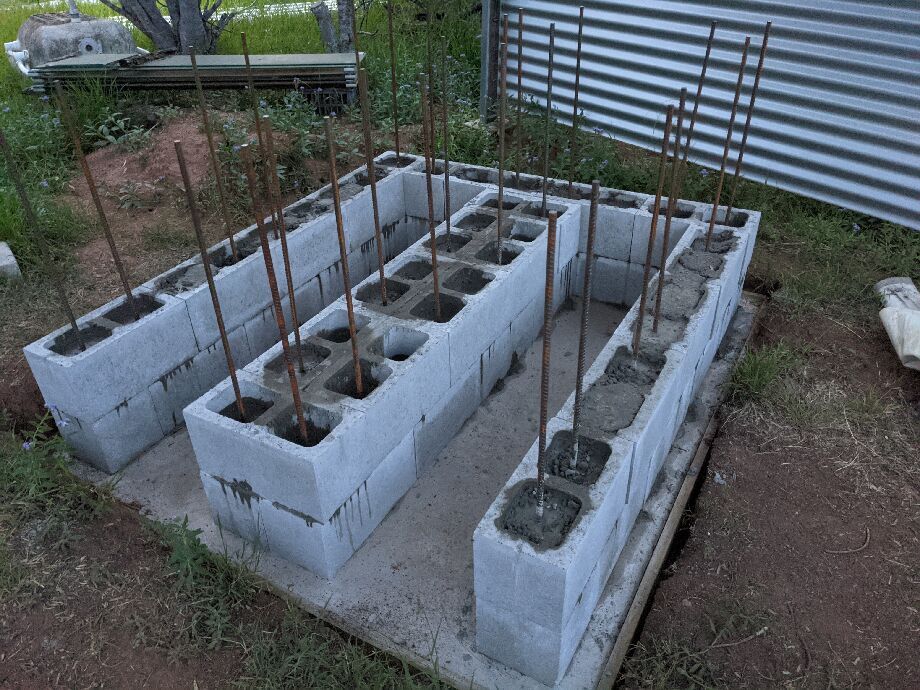 Rebar in the first two (very well cured) concreted layers
Using the concrete vibrator here gave me a bit more confidence about air bubbles being removed, too.
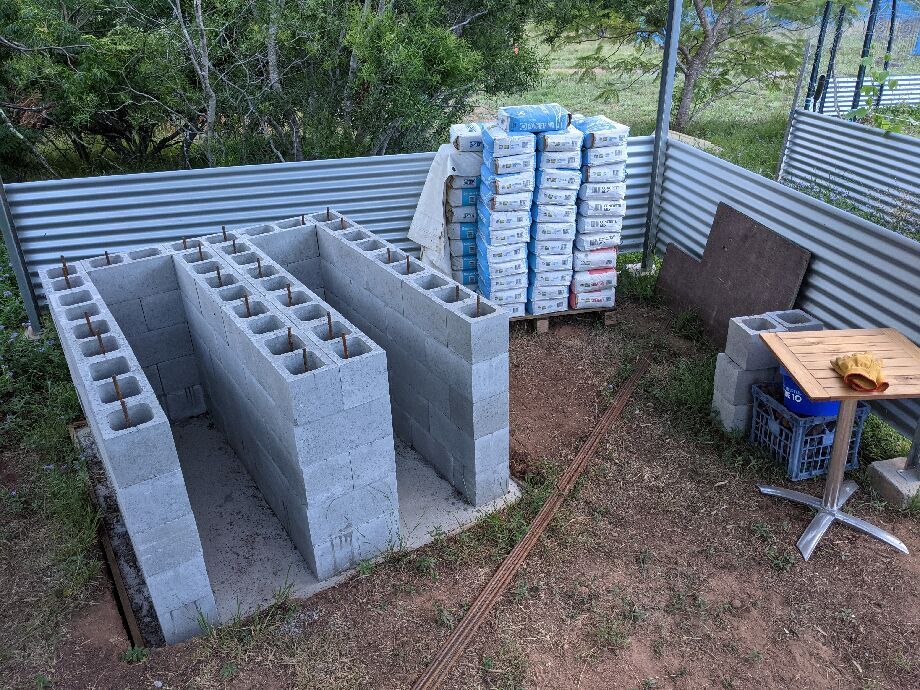
I completed the first two layers in November, came back to it in December, and finished in January.
 Besser stand rising
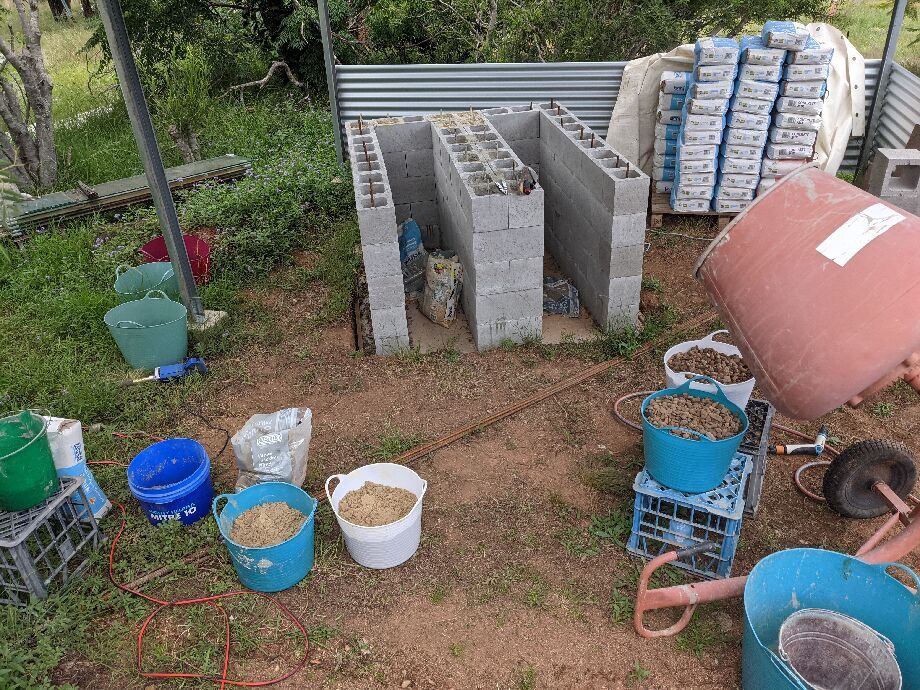
Sometime between the above picture (early December) and the next picture (late December) I brought in about 45 bags of premix (far-right), for the top slab.
I trust my own rinky ratios, and very large aggregate, and the 'I can pause for a cup of tea at any time' approach to in-filling besser bricks, but for the upcoming top slab, I wanted the good stuff.
For the in-fill though, because I was using cement (same price as pre-mix for a 20kg bag), and bagged sand (about the same price per 20kg bag), but my own aggregate -- this was much cheaper than using pre-mix there.
 Besser stand fully laid out (or rather up?)
Of course, for this in-fill, strength doesn't matter so much, as it's all compression.
Realistically, once the slab dries the weight will be entirely on the besser bricks themselves, anyway, which are also never going to compress.
When using the concrete mixer, I kept the transport (metal) bucket inside a plastic trug, so I could catch any of the slops that missed the primary target.
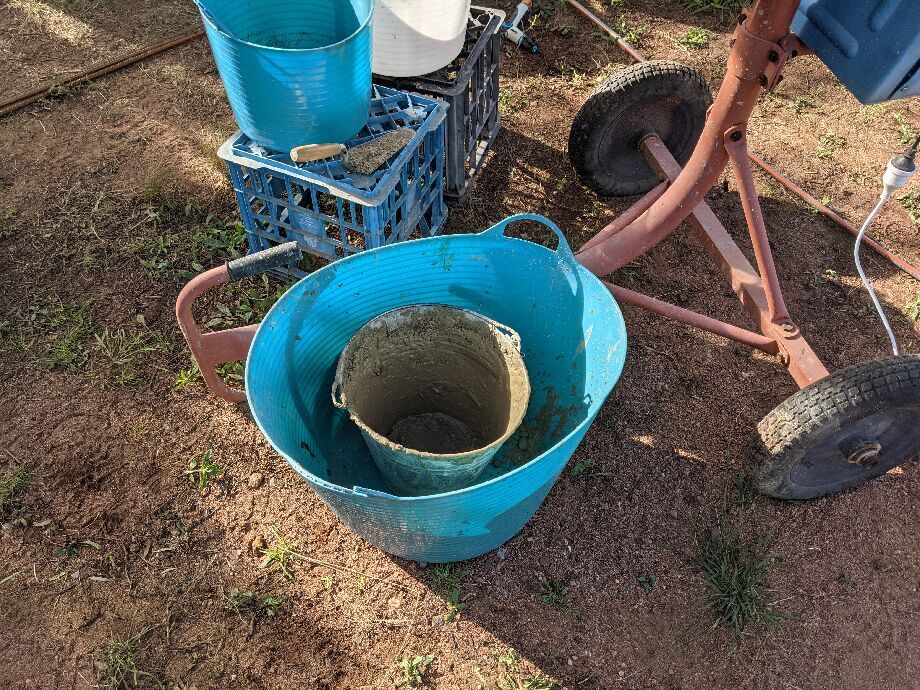 Bucket in a trug
In January I completed the besser in-fills, including some non-washed brickies sand (the yellow stuff at the back), which isn't ideal (it has some clay in it), but, again, all compression here.
 Stand nearly done
 Stand even more nearly done
What would I do differently?
The vibrator did move some of the besser bricks around, which wasn't a big deal for me, as I knew I'd be rendering or covering with slim-profile corrugated steel, or something like that. I could have got some ply formwork and clamped that on either side of the walls, to reduce that movement. It's hard to control the movement of the vibrator.
Kind of related to that -- besser bricks are dimensioned on the assumption that you are using 10mm of morter on top/bottom, and sides - which is why they are 190x190x390. This doesn't really make a huge difference for this kind of in-fill construction except that on a wall where you're staggering, brick-style, it means you have different numbers of joins on every alternate row.
For example, on the back wall I would alternate between four bricks end to end, and three bricks end to end with two bricks at 90 that interlocked with the left & right walls. That meant 3 joins (or 30mm) in one row, but 4 joins (40mm) - so if you snuggled each brick up against each other, alternate rows vary by 1cm. There's not much you can do about this, and because I anticipate rendering the whole thing one day, it doesn't really matter, but it may be something I could have tidied up at the time of layout, perhaps putting gaps in the shorter rows so the ends lined up better.
I should have marked ahead of time on each column precisely whether it was a concrete one or a gravel one, as I made a small boo that resulted in wasting some concrete needlessly-mix. Not huge in context, but mildly frustrating at the time.
As noted above, I should have gotten the walls to be the right height for the top slab, either by pouring concrete in form-work to get them a bit higher, or better yet by obtaining some half-height besser bricks. I would not do what I did here again - combined form-work for lift + top slab.
Upper slab form work
This was a flipping nightmare.
What I wanted to do was start the slab about 120mm above the top of the besser bricks, and then be about 110mm high.
What I should have done is employ a layer of half-height (10cm) besser bricks on the top of the stand walls, alternatively made up form work that solely extended the height of the besser brick walls by 10cm, left that to cure, and then made up a flat slab formwork based on that for a subsequent pour.
What I instead did was made up form work that gave the 20cm wide wall extenders and the slab, in the same set of form work.
This was pointlessly complex and arduous, and took at least a day to build out the form work.
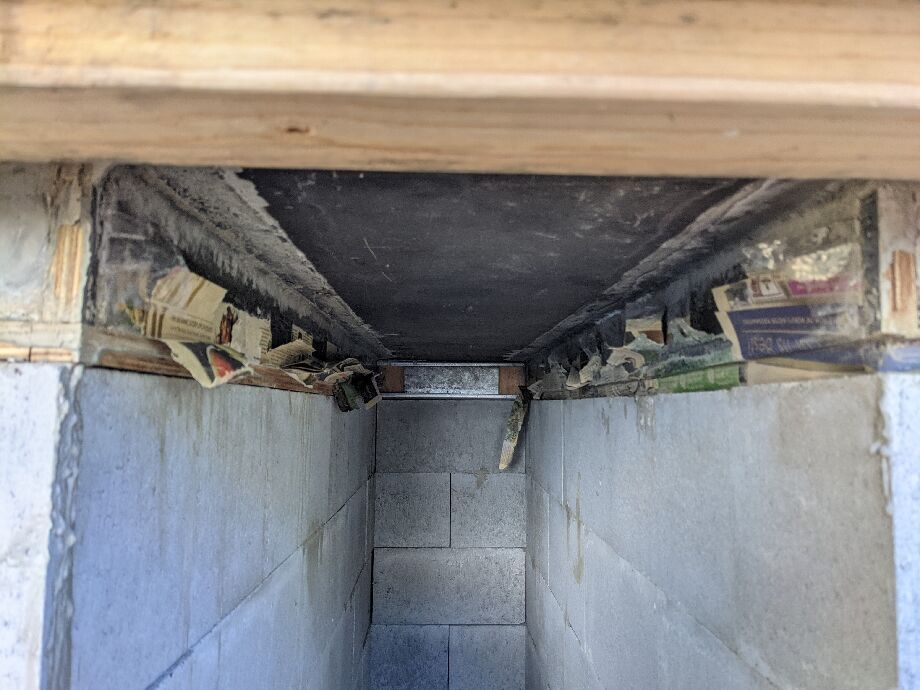
 Recess ends - sacrificial (they stay there forever)
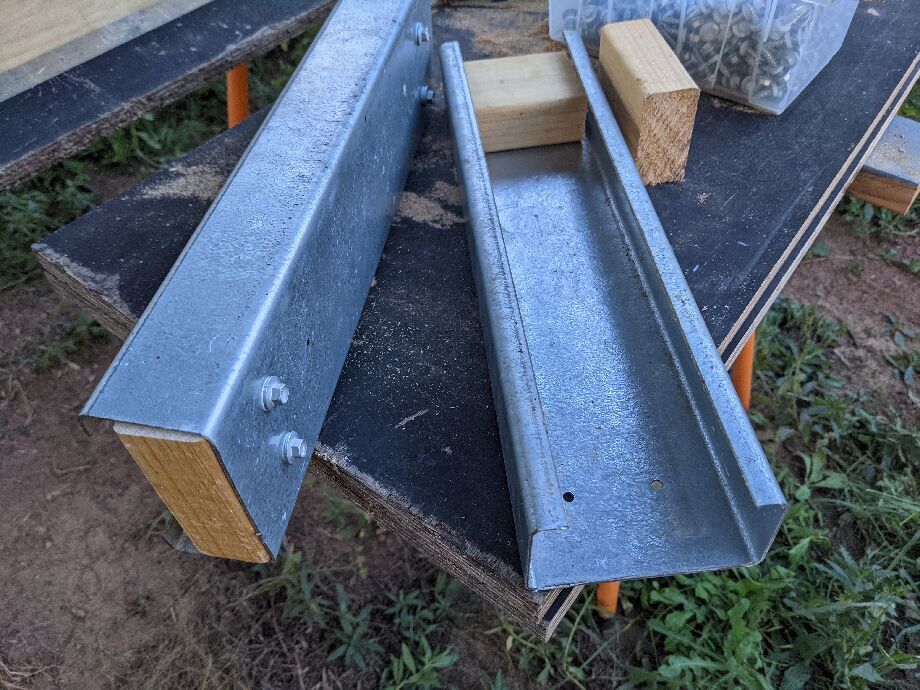
The above picture shows the sections that sit at the ends of the recesses, and the next picture shows the sides of those recesses (walls) - using C beam to give me 100mm, and then marine ply on top of that which gave me another 20mm.
I would then build up a frame around that to give me an additional 100mm or so of actual slab.
 Starting the form work
The idea was that most of the formwork could be pulled out, but some (small) pieces would be left in situ.
These long pieces of C-beam would be extracted - they sit on two pairs of 5-high besser bricks (diagonally placed, so they can be levered out later) with small spacers (6mm MDF) between the C-beam and the besser bricks which could be wiggled out to free the temporary support bricks later.
The long C-beams there would be screwed up into the ply on top, and those hex-head screws could be removed later by crawling into that space.
This next picture shows the same approach that I adopted on the underside of the wings (cantilever) plywood - holes made, screws placed adjacent:
 Timber screws with holes in C-beam
For the inner-recesses, in case the wet concrete flexed the C-beams at their lower edge I made up some timber spaces to sit in the channel and keep them rigidly apart:
 Timber spaces for C-beam form work
Having a bandsaw wasn't strictly necessary, but some of these structural ply were pretty low-quality, and without a panel saw or table saw, it would be tricky to make cuts along a narrow 1.8m long piece.
 Cutting long-side form work pieces
 Working on the form work
 Using a circular saw track system to whittle away at my temporary workbench
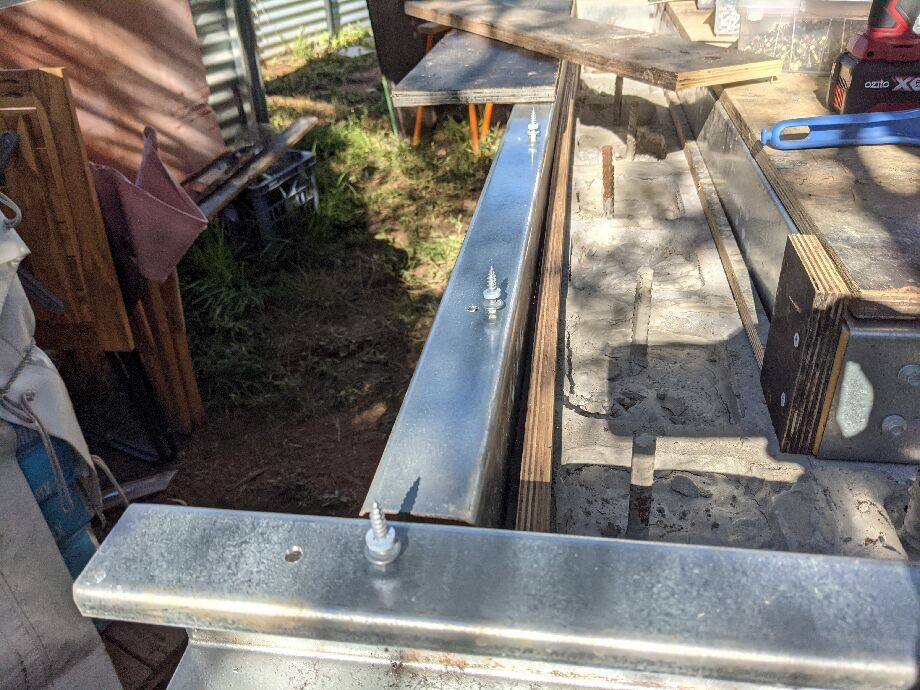
This next photo shows most of the base of the form-work in place. There are two long picees that are on top of those long C beams - that will bear all the suspended mass of concrete -- most of the remainder of the concrete will be directly supported by the besser bricks, with a small amount on the cantilever / overhang edge.
 Suspended slab form work base done
 Suspended slab form work with outer walls
Here I've got the 10cm high formwork edgings -- on top of the sizing, there was also some small correction needed for level, as the besser bricks each have slight variations in sizes, and the in-ground slab may not have been perfectly level.
The above, and next, pictures show the sturdiness that I was building -- the blocks of wood attached to both the side-walls, and the base, were to ensure that even with the mass of wet concrete, combined with the vibrator action, the whole thing wouldn't burst its seams and make me give it all away.
I had small sections of c-beam dynabolted into the besser bricks, as well as timber chocks on the sides and rear, supporting the overhang form work.
I was very paranoid something may go horribly wrong.
 Suspended slab form work side view of walls
 Hefty 16mm rebar
Reinforcement bar for the suspended slab was no-mucking-about style.
16mm thick bar, at 140mm spacing. I had additional lengths (hard to see in this next photo) along the top of the besser brick walls, rod-tied onto the uprights that came out of the besser bricks from the ground up.
 Reinforcement bar laid out, on chairs, rod-tied, ready to go
Running the numbers ...
The rebar was overkill, by a long shot. Given the circle of the oven, and the weight-bearing part of that circumference, it meant that only about a quarter of the oven was not directly over the besser brick walls. So that's about 250kg - across 4 different suspended sections -- so say 60kg over each.
That's less than me standing on those areas.
It's easy to worry about the mass of these structures, but really, the weight distribution means that per unit of area there's very little stress applied.
Also, out of curiosity, I calculated how much space the rebar takes up, as I was trying to estimate how much concrete I was going to go through.
Using 1750mm lengths of 16mm rebar, each of those consumed 351,858 cubic mm.
23 of those were in play, which meant 8 cubic litres of rebar was in that slab -- which equates to about half a bag of premix concrete.
My 10cm rises on the besser bricks I calculated would need 21 bags of premix, and the slab itself was going to be about 35 bags.
(Though I did use some portland GP, with washed sand, and some of the 20mm aggregate along with 5-10mm sharp aggregate, to get those first sections filled in. It's all compression there.)
Upper slab pour
 Mixing up 40kg at a time
 Vibrating the wet concrete
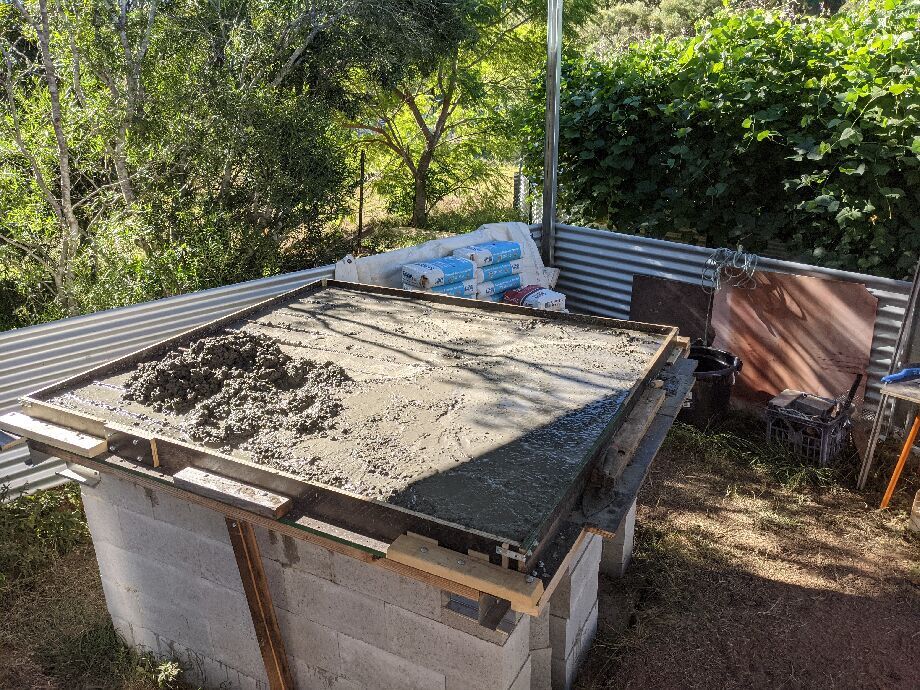 The pour nearly done
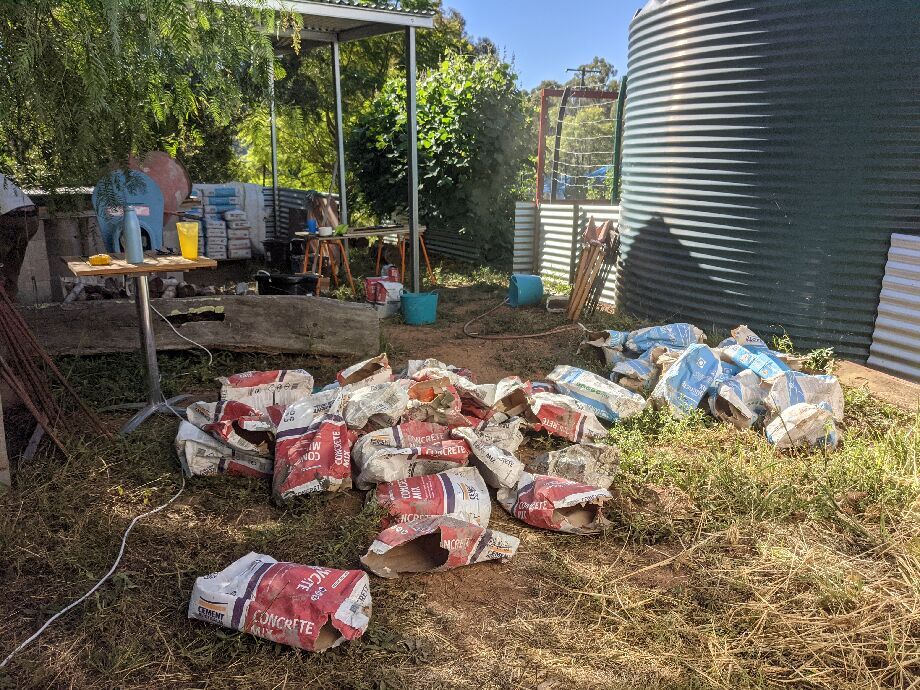 Lots of empty pre-mix and cement bags
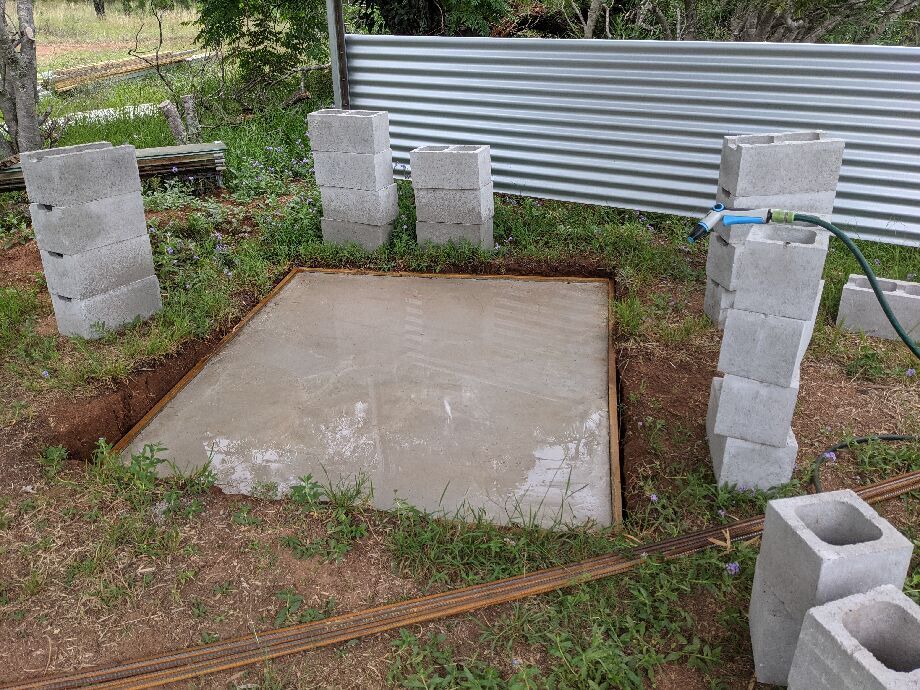
 Suspended slab completed and screeded
 Suspended slab - sprayed down
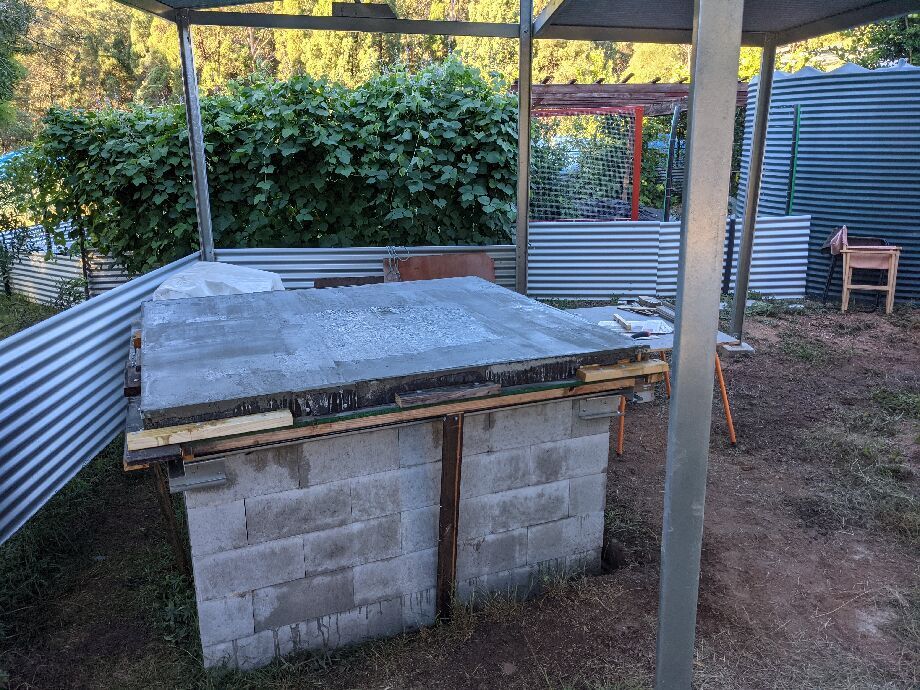
Removing the formwork
Three days after the suspended slab was poured, I removed all the form work.
Well, nearly all of it. Two lengths of plywood were impossible to shift.
 Slab nicely set -- such a superbly wide, flat, robust workbench
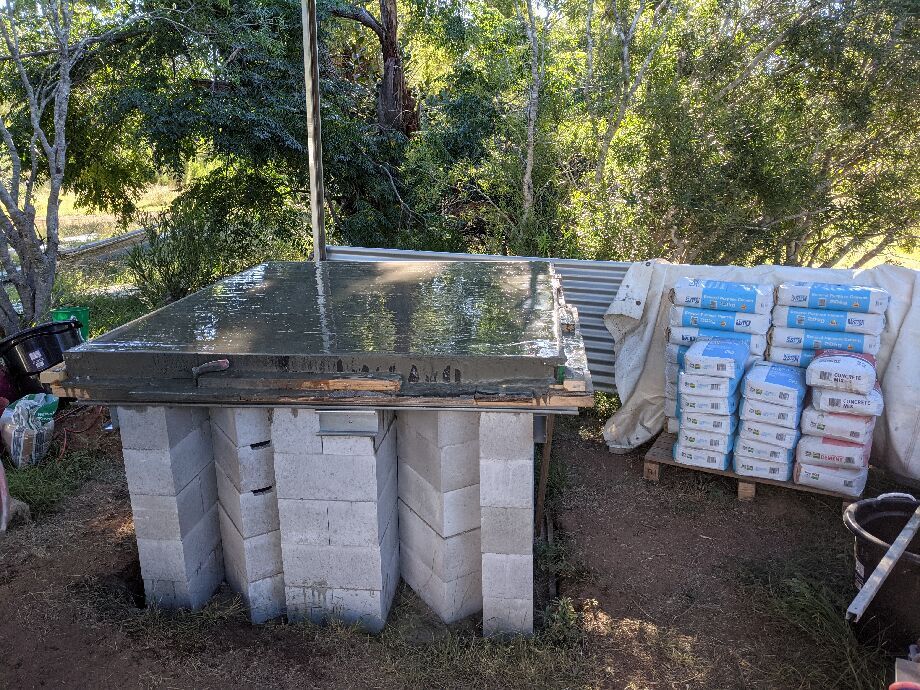
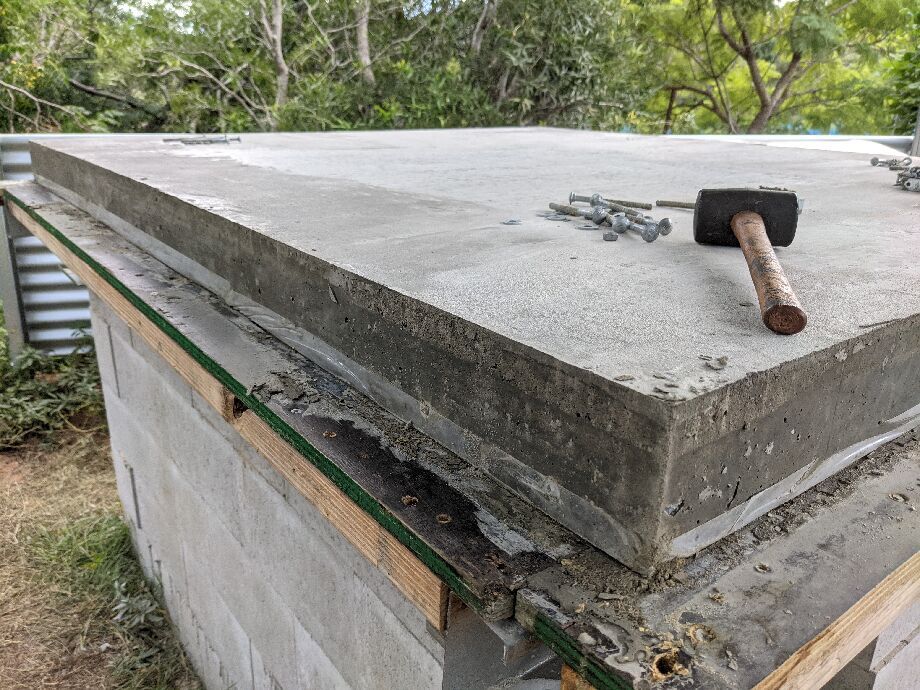 View of the side of the slab
The above photo shows the edging -- a few small bubbles where I didn't do enough with the vibrator, but pretty good I think.
The edges are all due to be covered up (with tiles) so I was mostly concerned about strength / exposure of the rebar to moisture, more than aesthetics.
You can see the bottom edge where we had wide sticky-tape between bottom plywood, and side plywood, to minimise any oozing out of the mix through small gaps.
 Suspended slab with form work, from the front
The front of the slab had a length of timber all the way across, which was screwed into the two lengths of plywood sitting on top of the C beams within the recesses, and in turn holding up the middle and side sections.
I tried to be careful with placement of countersunk timber screws, but some sections of form work, once removed, were not really salvageable.
In the next picture we see the removal of those long C beams - they were screwed in to the ply in two places, so it involved crawling into that space with a driver. Not much fun.
 C beams removed, leaving plywood
The newspaper and stickytape and thin lengths of plywood, were mostly to stop the mix coming out the huge numbers of very small gaps - the top of the besser bricks were not totally flat, because there's a fair few manufacturing artefacts on the edges of those things. Also, using a vibrator is a great way of finding all the holes in your form work, so we went a bit overboard with closing any possible gaps.
As noted earlier, I used 4 pieces of timber (as below) to keep those C beams rigid -- again, the design intent was to be able to punch things out and recover things easily, once the concrete had set.
C beam spacers
 Nearly all done except those blasted bits of plywood
I couldn't shift those two bits of ply -- I was 99% confident I'd had them wedged, at the far end, on top of those sacrificial C beam (short lengths), and they were now just wedged between them and the slab above them.
As it turns out, they weren't, but they were very useful there (once I chocked them up from underneath) as extra places to put tools for the next bit.
What would I do differently?
Most importantly - get the walls to the right height before trying to pour the suspended slab.
I'd probably have made the slab slightly larger, too, so I have more useful space on the stand around the oven (see the very top of this page for some notes on space there). The cantilever could have been another 100mm in each direction without any risk to the integrity, as the oven would still sit over the same parts of the besser brick walls.
Alternatively, with that size that I've got there, I could have faked it with some timber edging, if I'd cast the top slab in line with the besser brick walls. I contemplated embedding (within the formwork) some 25mm wide holes, maybe with HDPE pipe, at specific locations, to allow for an easy add-on extension, but that was all a bit messy.
I also contemplated, and probably should have, put in some thin strips of sacrificial timber - say 20mm wide by 5-10mm high - under the cantilever edge, just in from the outside edge, that I could remove after the concrete set, and then locate aluminium tracks for some low-power LED strips. Also, run some tiny PVC conduit through the slab and besser bricks, or even some low-power wiring, down and out somewhere unobtrusive, to provide power there later. A small cosmetic thing.
I would write down a precise de-form-working document - ie. noting down each and every screw to remove to pull out formwork.
Take more care with countersunk screws in formwork, specifically covering with plastic sticky tape or masking tape, so the screw heads did not fill with cement and become near-impossible to remove.
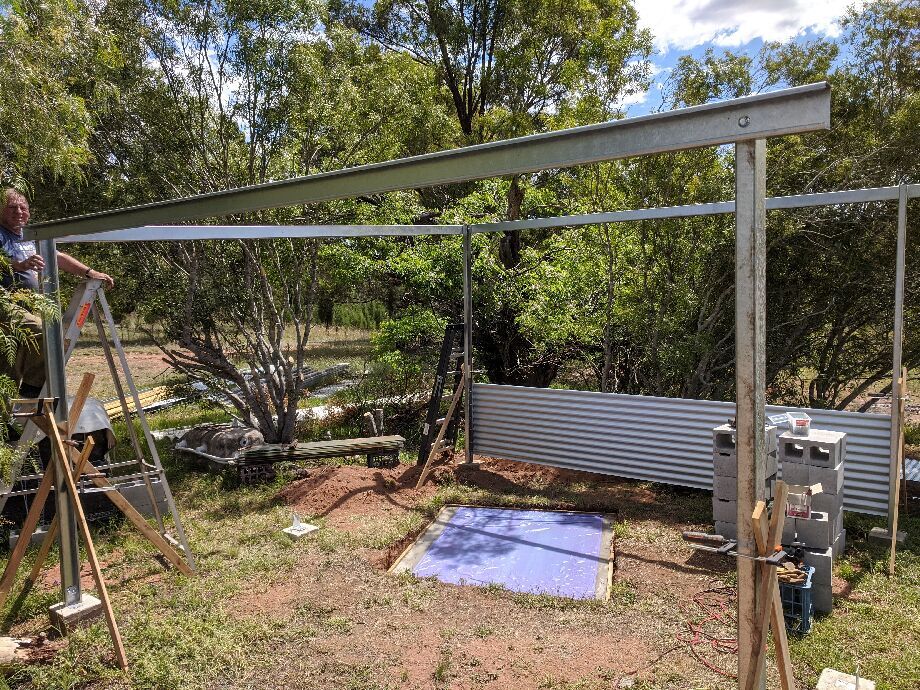
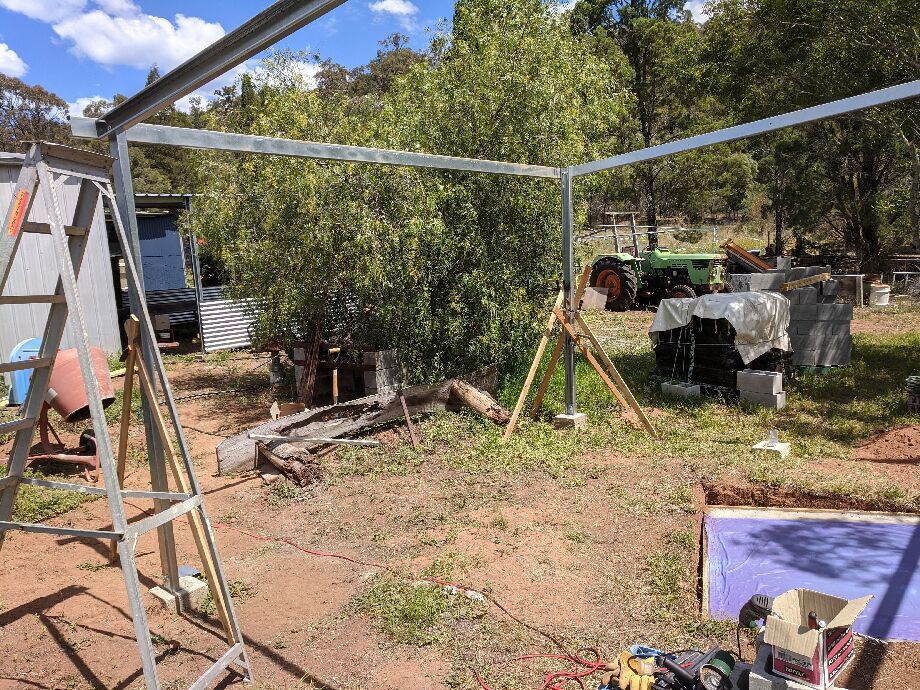
Building the pizza hut
Stepping back in time a bit, a brief description of the hut construction.
Having a metal bandsaw is crazy useful for a lot of things - though there very much is a risk of it becoming a 'once you a metal bandsaw, all your problems look like C beams that need to be cut to size' thing. Using an angle grinder is objectively faster, but a) it consumes more of your time (you can't just set it up and walk away), and b) the cut is always sharp and looks horrible.
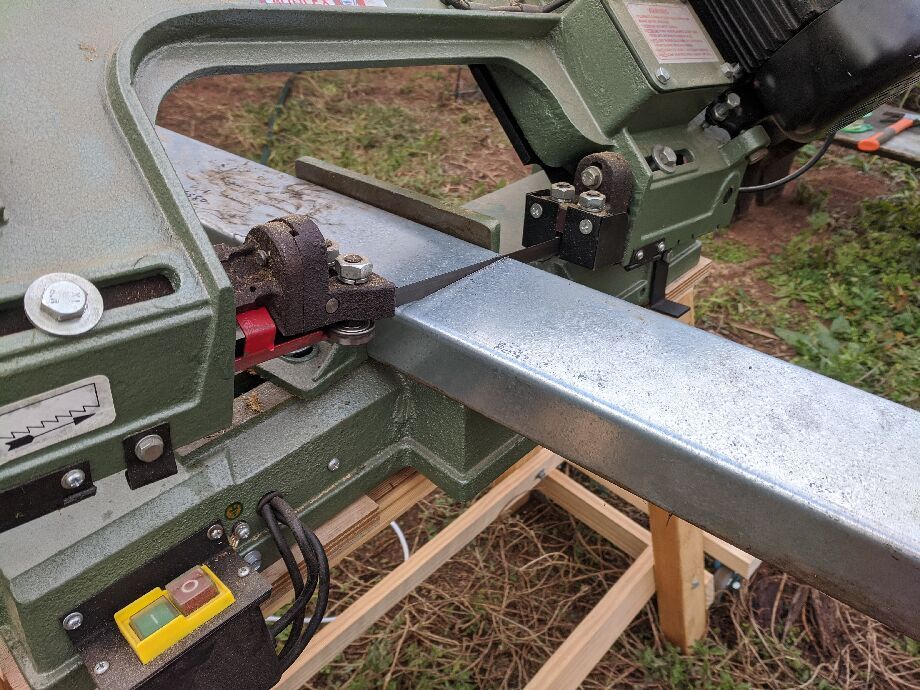 Cutting C Beam
 Uprights were pre-drilled
This shed went up in October 2020 - just after the base slab was poured, but before I got the besser brick stand started.
 Pickets were used to support in one axis
 All four uprights now attached
Above you can see the bottom slab was still being seasoned, the pizza oven kit on the right in the background, and on the far left background a 'shed extension' done with similar materials, for a similar size, but a vanilla skillion roof there.
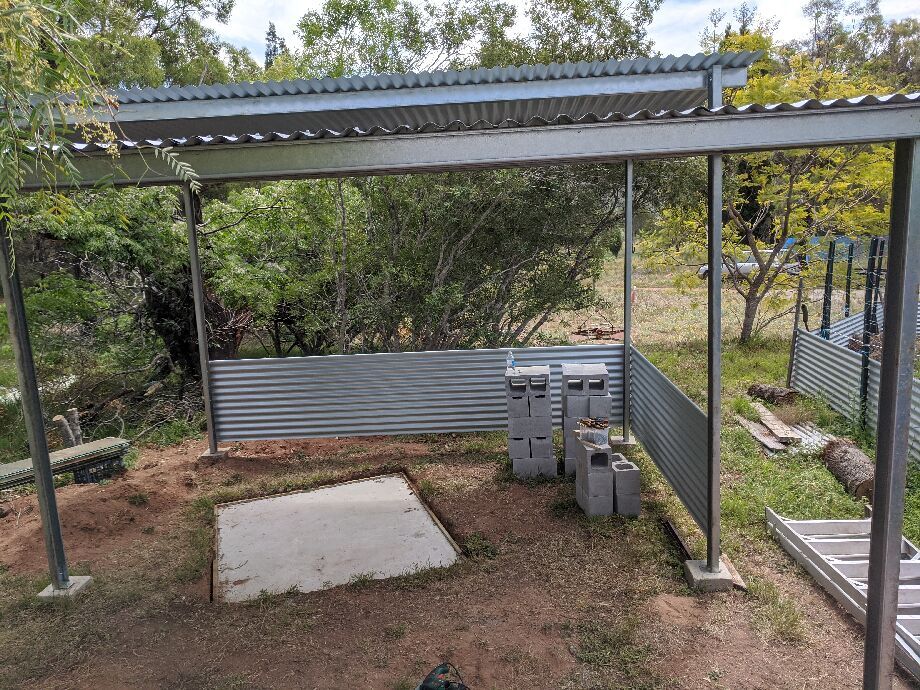 Both halves of the roof are on
The higher-half of the roof was 3 metres, the lower half (closest to us in the photo above) is 2 metres, with a small overlap, say about 200mm.
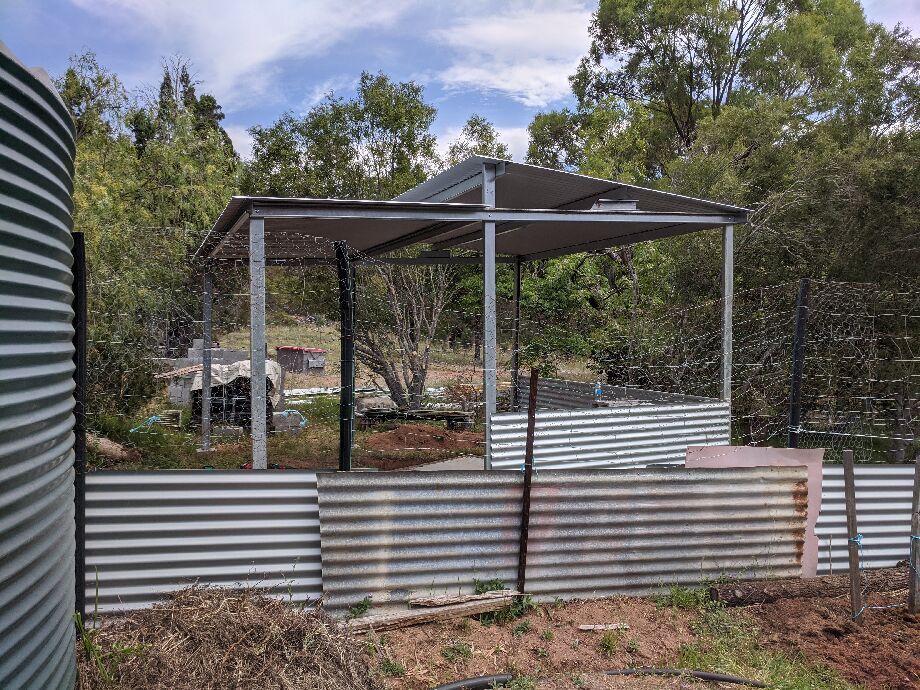 Side view showing clerestory structure
What would I do differently?
The other free-standing shed I built (in the background in some of these photos) around this time, I used two x 12mm bolts on each of the 100 x 100 joins, which gave some small additional amount of rigidity, and I certainly would do that next time. This build has only 1 bolt at each end (and middle of the sides) top laterals. The shearing force on those 12mm bolts is enormous -- in the order of 2 tonnes I believe -- but nonetheless.
Made it slightly wider. The dimensions are good, but a slightly larger area would reduce stormy rain getting blown onto the oven, and really, 5 x 4.5 metres turns out to not be that much free space once you stick a 1.8 x 1.9 oven stand (out a bit, and at an angle) under there.
The 100x50 C beams nominally should be supported every 4 metres, but in practice, for a sheet-metal roof only, you could easily go 5 or more metres in a single span. Or, as I'd done here, have the over-hang on the east & west walls, so the uprights were slightly closer than the hut width.
Increased either the angle of the main (shared) side beams, to increase the angle of the slope on the lower side, and/or had a longer overlap on the top roof section. During gentle rain, and the very rare (for us) southerly storms, we get some rain coming in through that clerestory gap. I'll resolve that at some point, but part of the problem is that even gentle straight-down rain 'bounces' on the lower section so you get a fine spray of water coming into the middle of the hut. Wild and woolly storms, there's not much you can do there. I don't want to try to enclose the whole area, and will ultimately rely on the sealing properties of the acrylic paint, and, maybe during long periods of no use, a big tarp wrapped over the oven stand.
Unpacking the kit
So, on the 1st of May 2021, I finally took the kit apart and looked at what the local wildlife had been up to over the past year.
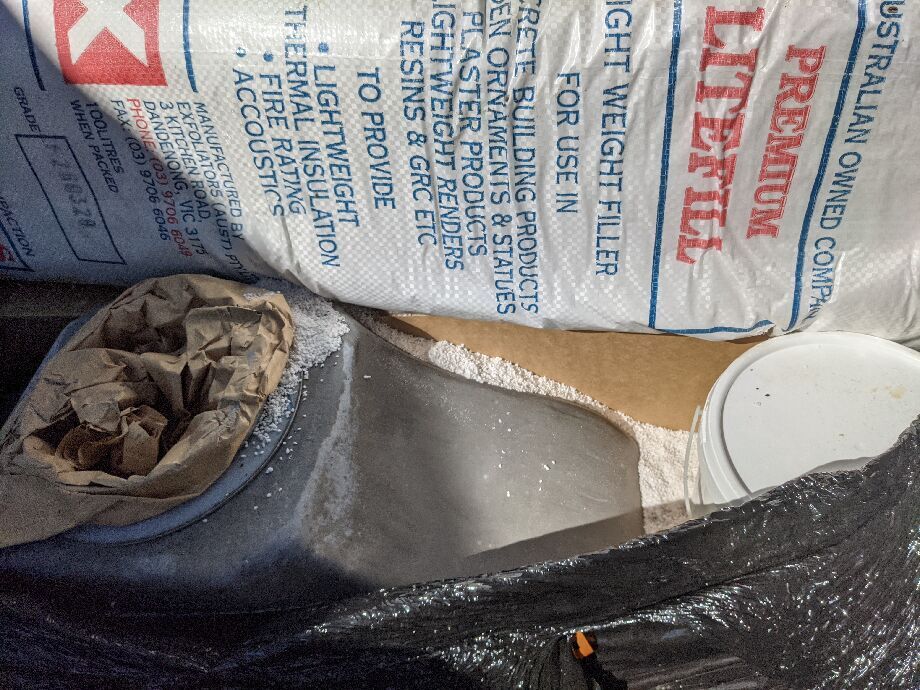 The perlite bags had split slightly, perhaps during shipping
There were tiny splits along one of the perlite bags, but that was easy stuff to recover, and no great shakes if some went into the garden.
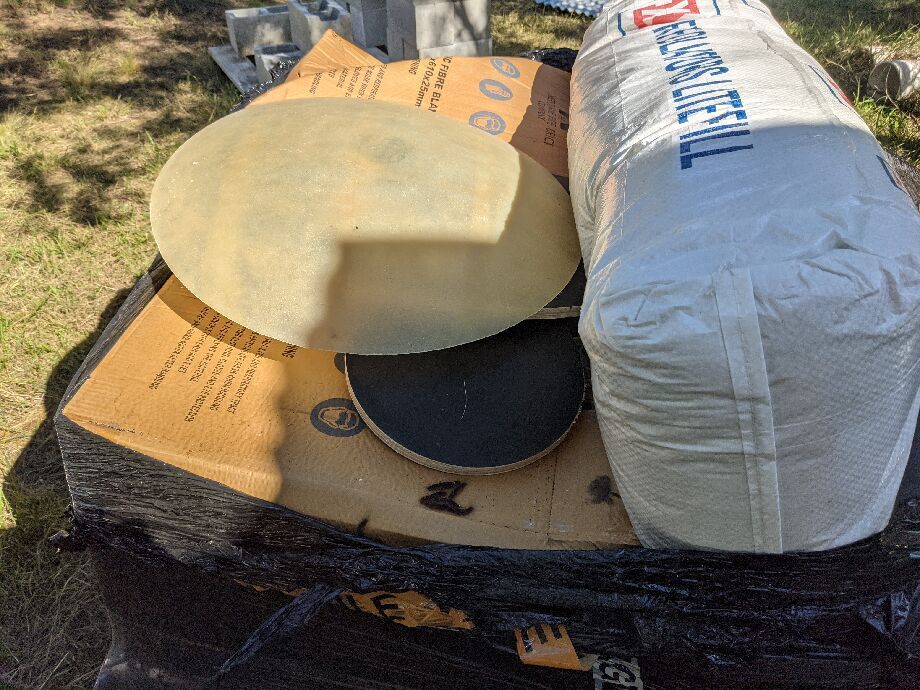 The perlite, plywood and fibreglass for the dome
The boxes here contained the insulation blankets, and they'd been warped slightly, perhaps by the final delivery (using slings rather than forks).
I didn't inspect the contents until much later, when I was ready to put the blanket on, but they were fine.
 Yukkies
We had a mouse plague during the first half of 2021, and it was mildly surprising there weren't more dead rodents found in this stack.
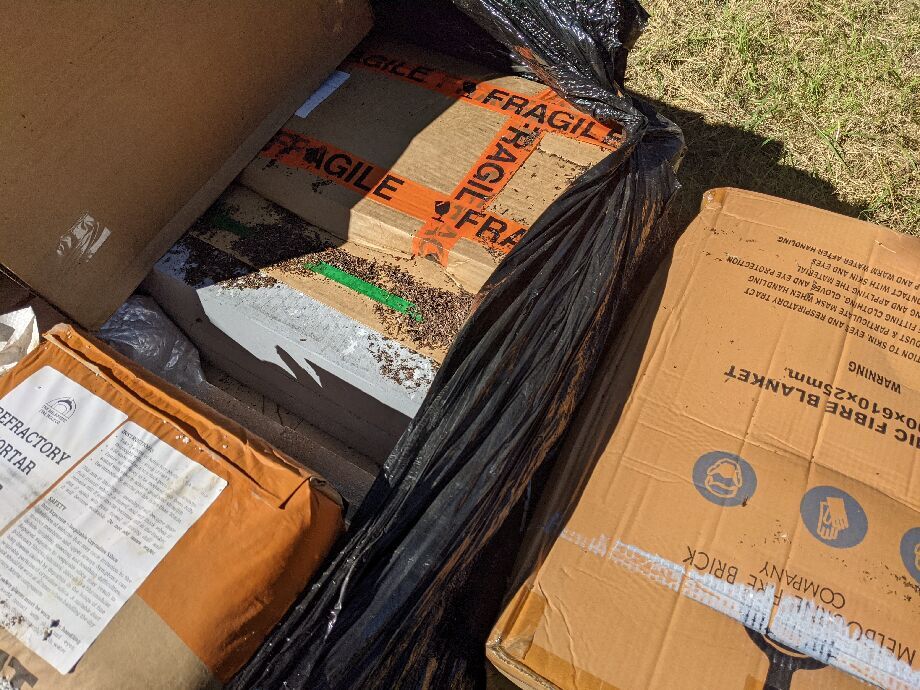
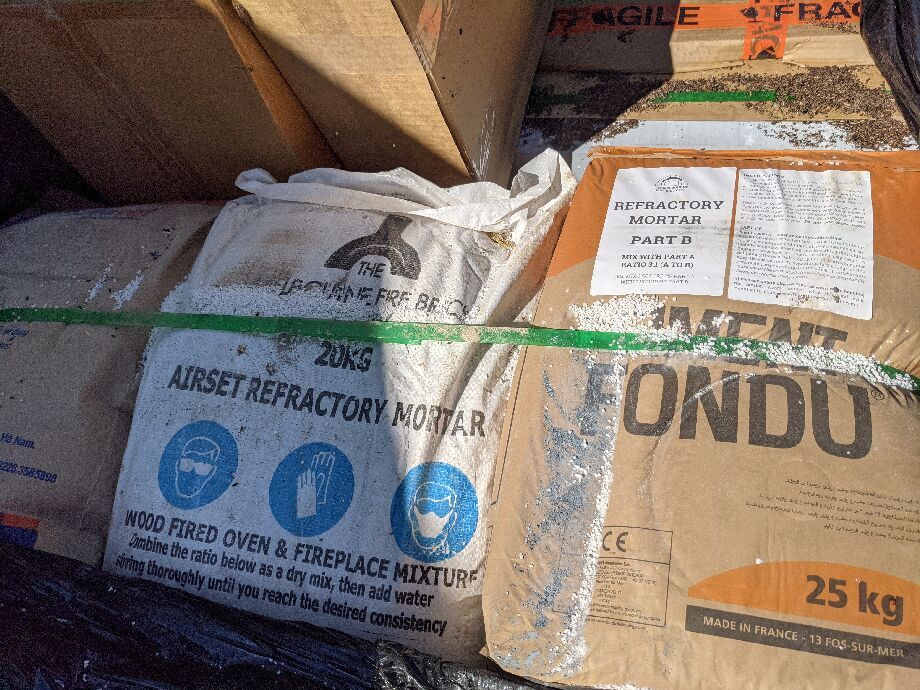 Mortar bags
The packing of this kits is very thoughtfully done.
I didn't trust the waterproofing of the plastic-wrap from above -- we had a couple of massive marquee walls tied over the pallet since it arrived -- but I was impressed with how well things had fared.
 Signs of life 1 / 2
These two photos showed that various things had found a home in here, as there's no way wind could have blown this much stuff up into the pallet.
Opening in mid-winter, and given the favourable thermal mass of all those bricks, I was half-expecting to find a snake hibernating in here.
 Signs of life 2 / 2
 Laying things out on the slab
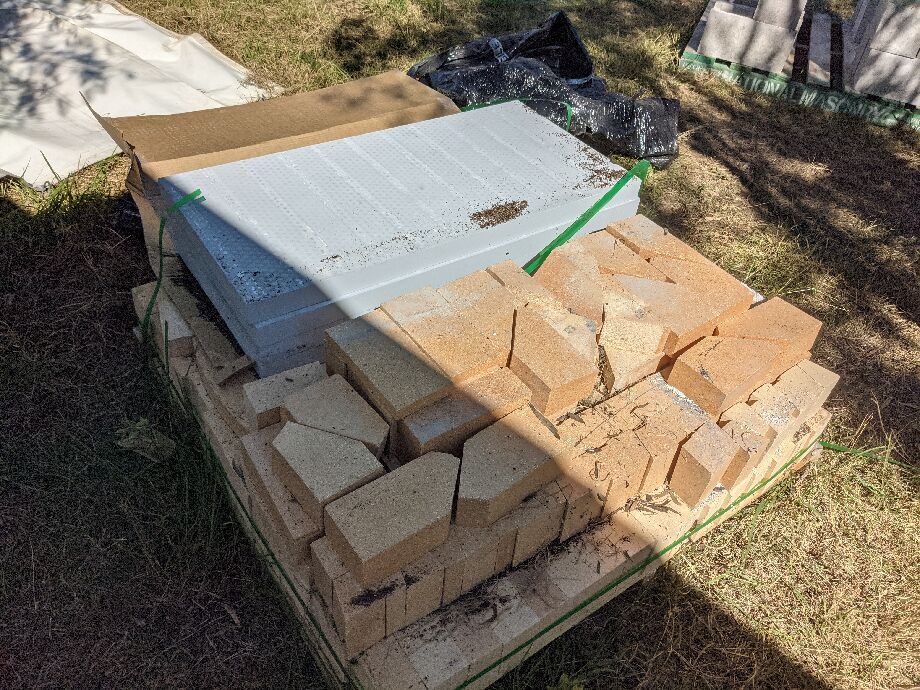 The fire bricks and the calcium silicate (calsil) sheets
I did check the obvious things for damage, such as the flue (wrapped in brown paper, and in its own undamaged cardboard box), and the big black granite landing (also very well packed).
What would I do differently?
Ordered the oven only after I had poured the top slab and was ready to go. (Although it was about 6 weeks from when I ordered it, until I received it, partly due to having to double shuffle a ~ 1 tonne pallet out of the nearest depot they could deliver to, which is about 50km away.)
Calcium silicate sub-floor insulation
The fun begins, finally.
This is on the same day that I did the unpacking, and I had Big Expectations on powering through this quickly.
Ha.
 Laying out the cut sections of the cal-sil base
Pinning the large sheets of paper to the calcium silicate, and then cutting it with a jigsaw, was straightforward.
Arranging it precisely on the center of the slab was a bit of a challenge.
With the larger models, and indeed earlier iterations of this model, a pour of mortar would be done on top of the calcium silicate board, which would make the subsequent floor tiles much easier.
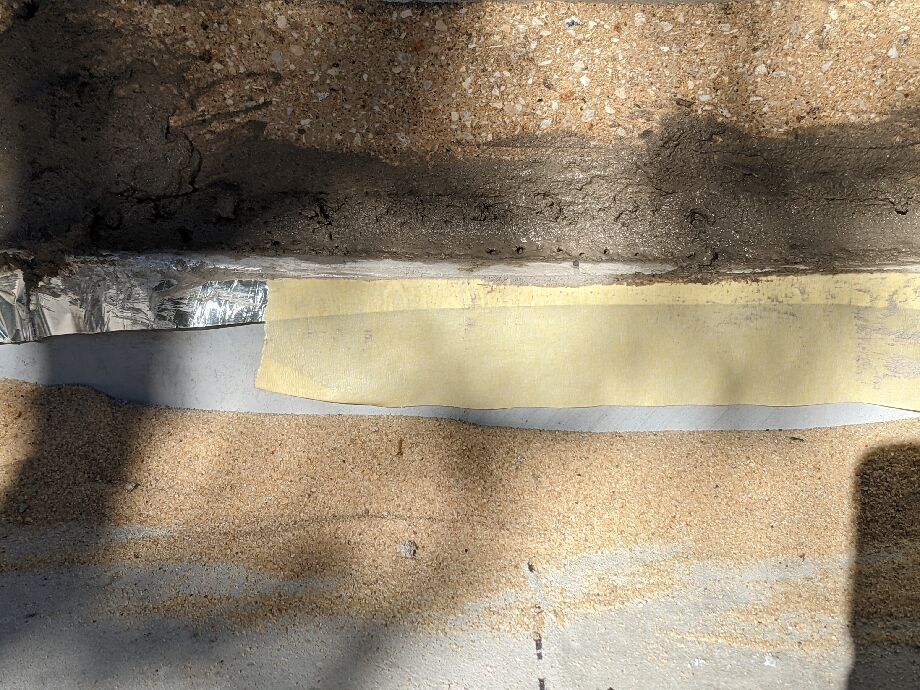
At some point in the recent past they'd decided that was not needed here, so the floor tiles are mortared directly to these insulation sheets (albeit with some aluminium foil placed over the calcium silicate so that the mortar didn't a) wet the calcium silicate too much, and b) dry out too fast and consequently cure poorly.
I also noticed that my screeding of the suspended slab had been less than perfect - the back left corner was a little low, and there were some undulations in the middle of the slab.
They recommending applying some sand, as thin a layer as possible, under the calsil. This sounds more straightforward than it was, in practice.
I did not want the calsil to crack, later on, as the oven gained mass, so I was exceedingly cautious with this process, and got a perfect amount of sand. I reasoned each piece of calsil needed to be flat and well supported, but not necessarily perfectly aligned with every other piece of calsil, as we'd be putting mortar over the whole lot, and the only thing that mattered was that the fire bricks were flat (and ideally perfectly level) later.
Having said that, I was pretty close to perfectly aligned with all those cal sil boards as it turned out.
I had sand pushed-up around the lower edge of the calcium silicate right up until I put the insulation blanket on, some months later. I was mildly concerned that wind may remove some of the sand from under the edges. It didn't.
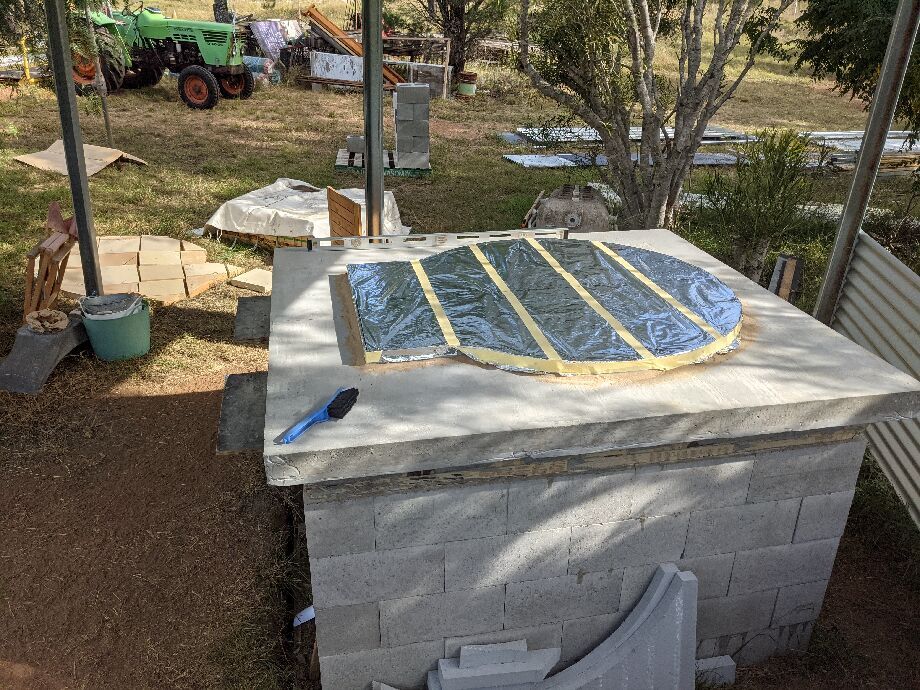 My plans were foiled
The foil is to stop the calsil sucking all the moisture out of the mortar that holds the firebricks into place. I think it also really helps hold the calsil boards together, as you do the floor tile laying, as there's really not much mass in those insulation sheets.
The theory is that those bits of masking tape will effectively burn away pretty quickly (or pyroysis, probably, given there'll be no oxygen there) and the foil is likely to not melt (though aluminium does melt around 600C, so it's not beyond the realm of possibility) but even if it melts, it's not going to do any harm, as the calsil is stable at up to 700C.
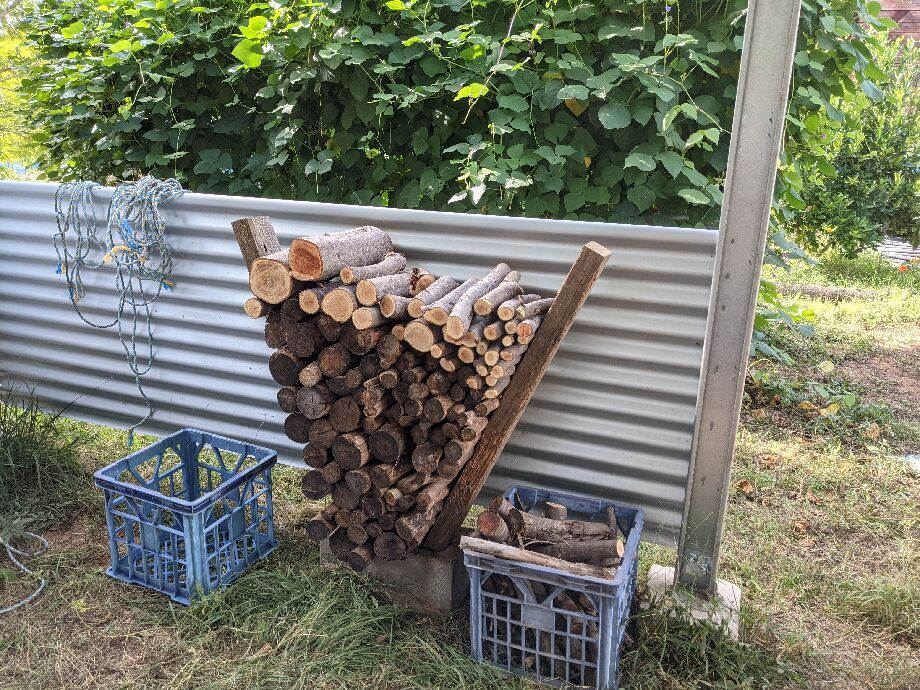 Fire wood stand
A twee little firewood stand idea that we found somewhere - and I had some only-marginally-damaged-by-white-ants lengths of hardwood beams available.
Realistically, at ~30kg of hardwood to get the oven up to temperature, firewood storage is going to need to be a bit more sophisticated than this, longer term.
If you're noticing things green up as this story progresses, that's Dolichos lablab in the background. An extremely rampant vine. I think that was just two plants. It stunted my nascent navel orange tree by a year.
What would I do differently?
Not a great deal - this part of the process went quite well.
Floor tiles
The floor tiles are fairly easy to lay out, though I was a bit confused by the presence of a spare full-sized tile.
The only one you've really got to keep track of is the full-sized tile with the pilot hole in it - everything else can be rotated (if symmetrical) or flipped upside down to find the better side. Pragmatically you'll not notice rough edges or chips within a short while, as the gaps will fill with ash after a few fires.
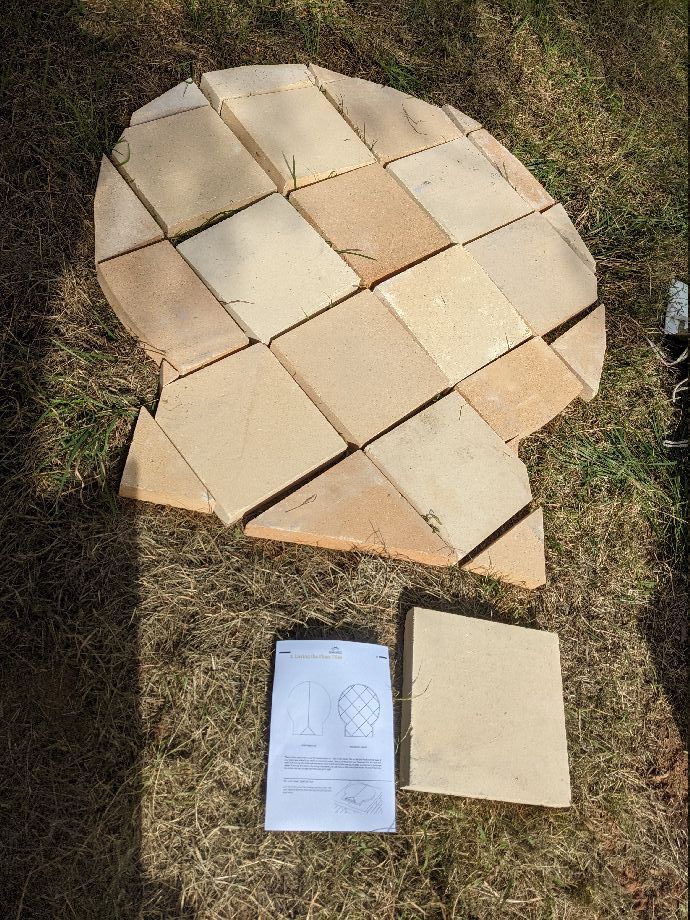 Dry run of the floor tile layout
I laid these the day after I'd set out the calcium silicate board. I think by the time I'd unpacked everything and got those boards cut, placed, taped & foiled, it was a bit late to start this bit.
 Mortaring in the floor tiles
A long straight edge is necessary, though the spirit level aspect is less so (it's hard to get this really wrong, unless you're doing wildly different amounts of mortar under different bricks).
Ultimately some undulations are probably fine, the big thing you want to avoid is any slight differences in height, particularly where a rear brick is slightly proud of a brick in front of it, as it'll annoy you when sliding a metal pizza tool across the floor.
I got mine plenty good enough. If there's some bumps that you think will annoy you later, you can take the edges down very slightly with a masonry disc on your angle grinder, but exercise great caution there, as one slip can ruin your day.
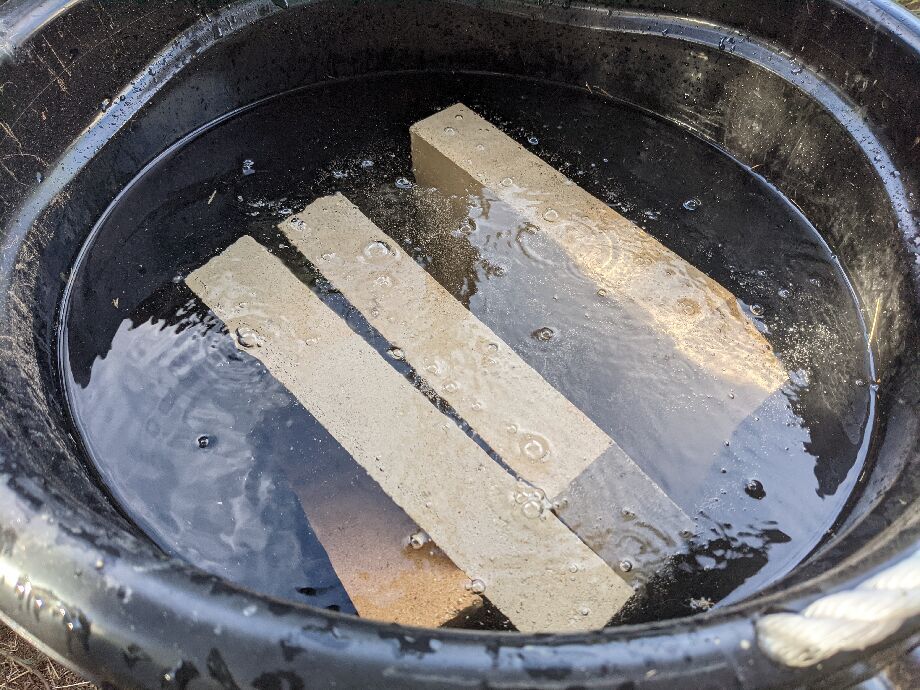 Soaking the tiles
This never got boring - watching the fire bricks bubble away for ten minutes or more when soaked in water.
This is done to ensure that they don't immediately suck out all the water in your mortar, and ruin the bond.
 Floor tiles, mostly done
 All floor tiles are done
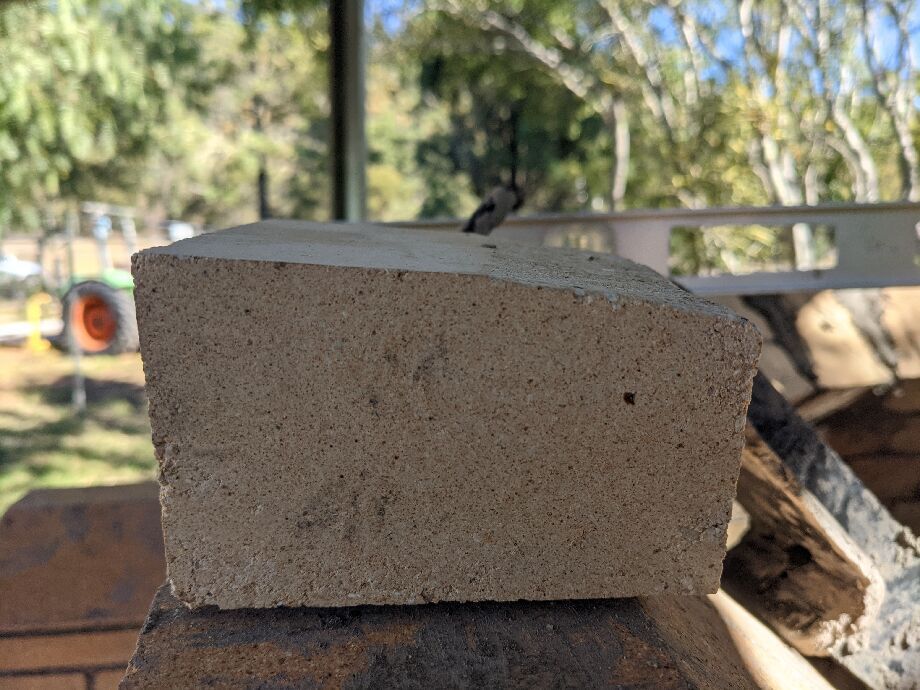
The outside 11cm or so of this whole structure (well, sides and rear) will never be seen, as the dome is that thick. So those two little tiny bricks near the neck of the oven, and some of those triangles at the back, you don't really need to be terribly cautious with, as you can sort that out (up to an extent) when putting down the first layer of your dome.
Of course, the next step is much easier if everything is perfect -- that's true at every step of the way.
But knowing what you can take shortcuts with is something that makes it so much faster for someone that's built one of these before, compared to someone building their first one.
 Floor tiles, from the front
There's a lot of standing back and admiring your handiwork, especially early on.
At this stage you can start to visualise what the oven's going to look like (well, it takes a fair bit of imagination, sure).
The frustrating thing, and I come back to this a few times, is that the very first floor tile you lay down is the most visible one for everyone that ever looks at your oven.
It's regrettable that you can't start at the back, for that reason. Look, laying these tiles isn't rocket surgery, but still, the pressure is on from the very start with this. By the time I was laying the tiles at the back, some of which won't ever be seen again once the dome goes on, I was feeling quite proficient.
 A small amount of sand pushed up around the calsil base
What would I do differently?
Buy a deadblow hammer before starting this. I had a rubber mallet, which was good, but later, using a deadblow with the dome bricks, I realised that's definitely the much better tool for this work.
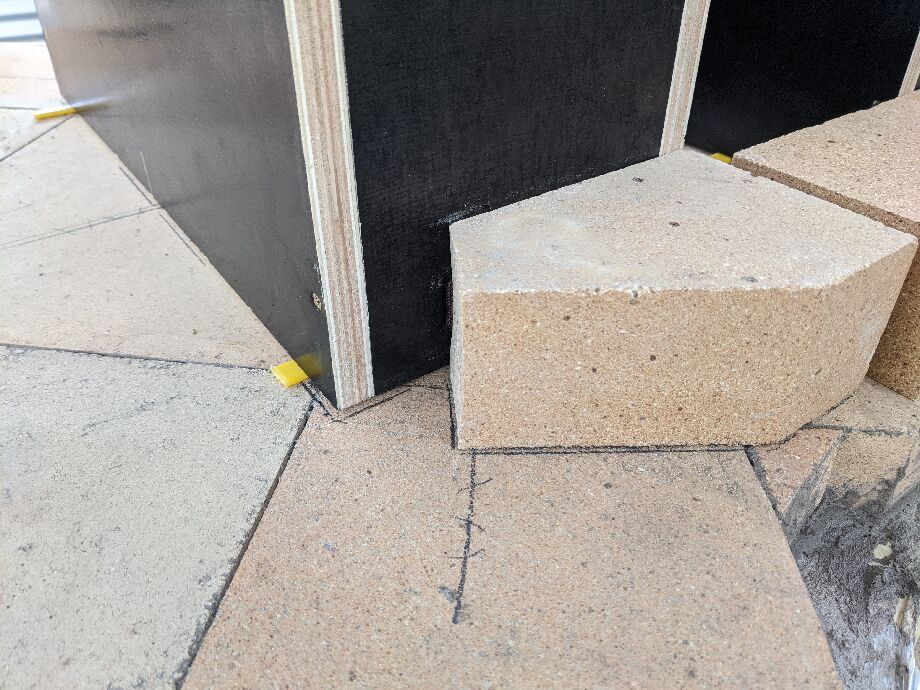
While I thought I was close, it turns out I had a bit of a skew with the tiled base in relation to the slab. Later on, when I put the landing in place, I noted that the distance from the front left of the floor tile edge to the front of the slab was about 10mm different than on the right side of the oven entrance. Not end of world, and a 5mm delta at the front and back of the landing won't be noticed (by anyone except me).
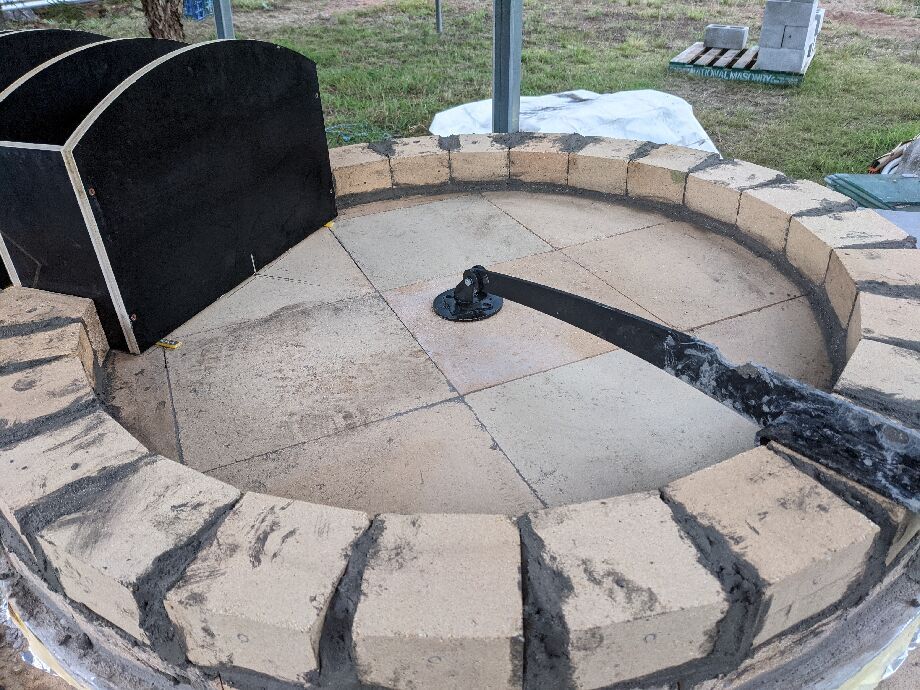
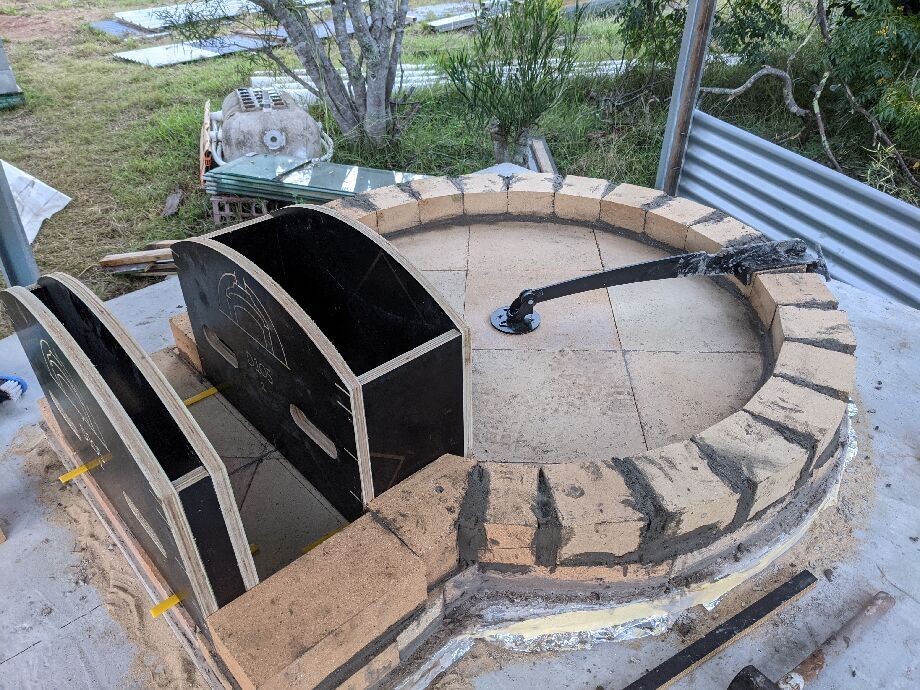
Building the dome
While the calcium silicate board, and the floor tiles, are technically the real start of the oven, actually starting to make the dome is when, for me, it first started to feel like I was building a pizza oven.
It's fun, and while I took more weekends to do this than I should / could have, I was pretty happy with the process itself, and the outcome.
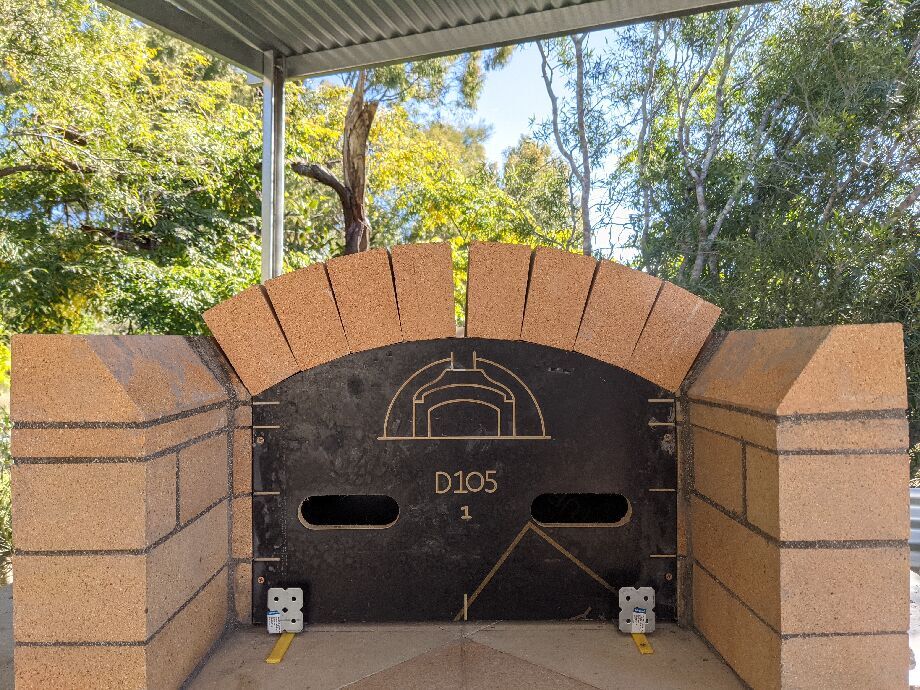
As elsewhere, I'll note that in this particular instance the very first brick you lay is one that will be seen by everyone looking into the oven, but the first layer is pretty straightforward, except perhaps the front tunnel. More on that in a minute.
Layer 1
I started on this about 5 days later - wetting down the tiles with some sponges before starting, as the mortar's particularly susceptible to flash-drying (because all these bricks are very good at sucking up moisture).
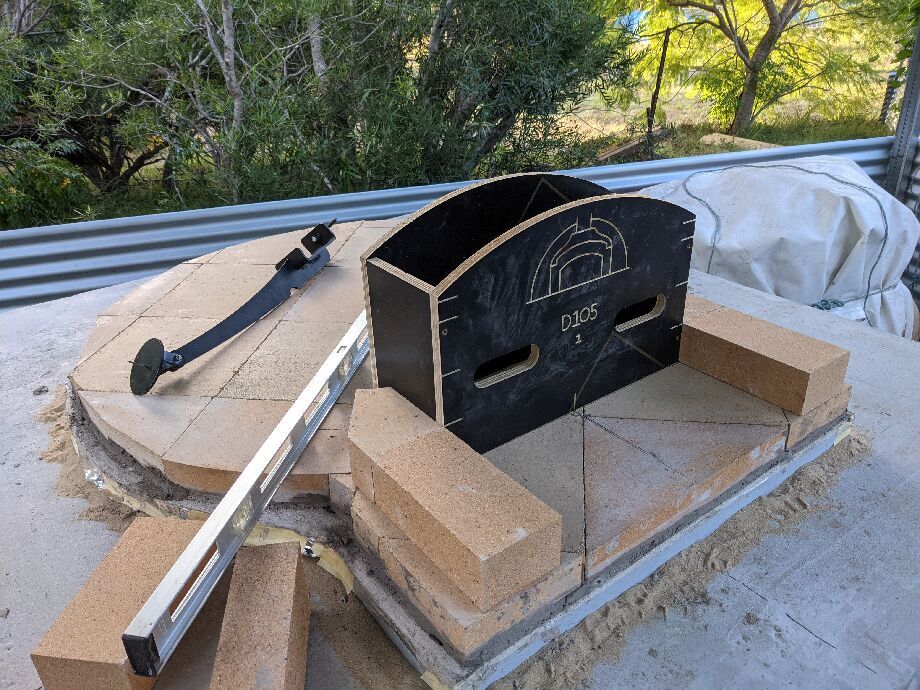 Setting up the front arch location
This process is a bit fraught, and I made two small mistakes here.
The intent is simple enough -- identify a centre line from front to back, and you should already have that marked on the slab, and you should have transferred that onto the calsil and then tiles. In practice, there's some tolerances involved.
The ply arch template is marked front and back with a centre line, and so in theory if you have those two notches lined up with your pencil, you should be good to go. The challenge is that you're juggling that left/right (or rather, around a virtual perimeter of a circle defined by the hole in the middle tile) and trying to keep the front arch bricks roughly equidistant from the edges of the floor tiles.
 The inner arch bricks - they'll have 2mm of mortar between them
 The trammel tool is in place
The photo above shows the circle that you draw using a pencil held against the inside of the trammel tool - that has a little bit of tolerance as the inside edge of the tool is angled slightly, so keep the pencil near that edge to minimise the (ersatz) parallax error.
The next picture shows where the side bricks should line up to, against where the inner arch should be.
At the time I had no idea how much a small discrepancy would muck up later stages (as it happened, not so much), so it was all a bit fretful.
 Lining up the arch bricks with the inner perimeter
The next picture shows the placement of the inner and outer arch supports - with the centres of both meant to be on a direct line (through the center point) to the center of the front of the tiles, which should be the center line of the slab.
Note that the arch layout does declare this is a D105. I pinged the Melbourne Fire Brick Co about this, and they assured me that the two ovens share an arch size, and it should have come with a sticker over that. Anyway, it did all fit fine, of course.
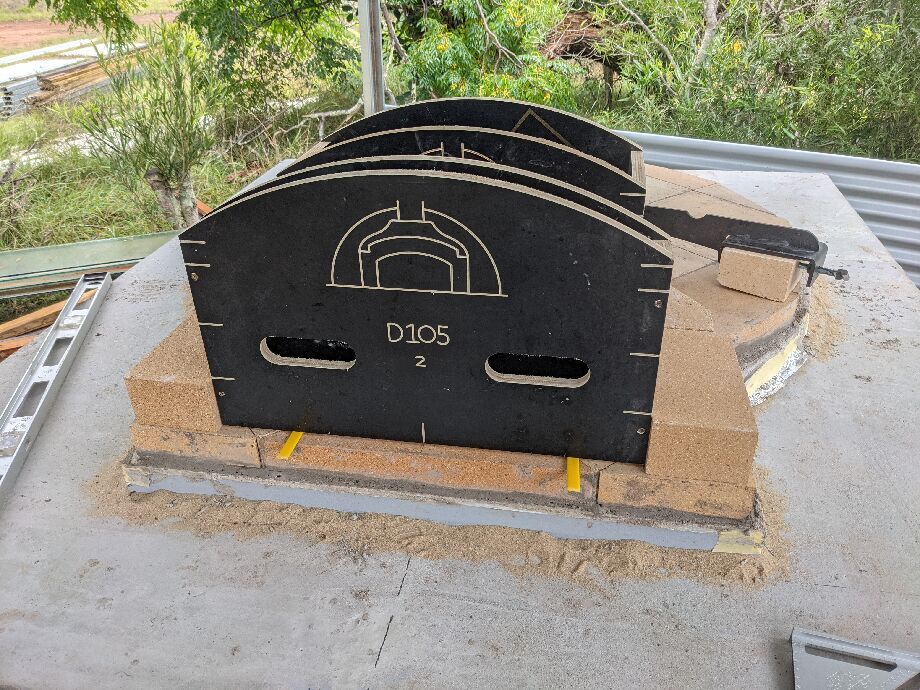 Lining up the arch templates
During this bit of the process, I must have bumped, or just lined the arches up slightly wrong, such that the front first pair of bricks are slightly offset, by about 5mm, to the left. This had a few knock-on effects later, but nothing hugely substantial. The aesthetics look a bit wrong, if you happen to notice, now -- I'll point them out later, but basically where those front bricks meat the inner-arch support there should be about a 10mm exposure / rebate of bricks on both sides, but in my case it's 15mm on one side, and 5mm on the other.
I left large-ish notches in the mortar between most bricks, generally to ensure a better mechanical strength when they got filled up for the next layer of bricks. It's important to ensure that there aren't gaps in the mortar from front to the back of each of these.
The next two photos jump ahead slightly, after I'd completed the first row. I wasn't sure how long the mortar would really take to go off, given it was May (very late autumn), where we still have reasonably warm daytime temperatures.
I was using a fairly stiff mixture, and found it was going off reasonably quickly - much more so than the official videos suggested their mortar was turning. Nonetheless I did like to leave the mortar to properly bond for a day before doing each row, but that meant my clean-up process was repeated way more often than had I tried to get a lot more on in one go.
 The first row is complete
 The first row from a different angle
Layer 2
More of the same, basically.
This was two days after the first row.
The first got a good dosing with a sponge to ensure a good bond.
It's frustrating that the back of the arch templates, at least the front one, don't also include notch markers to show you where each new brick should come to, and the recommended mortar thickness, but a spirit level should get you to the same place.
(In retrospect this whole thing is much more forgiving than I was worried it might be, though that may be my increasing tolerance of tolerances as the project dragged on, and I just wanted to get it finished.)
 Checking the level of the second arch brick
 Second row front arch brick
 Second row almost complete - arch exterior tidied up
Layer 3
This is 5 days after layer 2 was completed.
By this time I was feeling happy with the mortar, the bricks, the trammel tool, and the progress.
In this first photo you can see the slight difference in the rebate on the front left and right sides, at the second arch. It's slightly wider on the left side than the right side. At this point I'd been cleaning up the mortar very well after each new render (and drops & dribbles down the previous rows). Later on I was a bit remiss with one layer, and the right-side subsequently looks like a big mortar join. I doubt anyone else will notice.
The first few rows it's easy to keep the brick-pattern on the rear wall, though later on I accidentally put some joins above each other.
 Layer 3, starting from the back
 Left-side front - mortar joints are on point
The previous and next shot show the left and right sides, with the mortar joints being bang on the prescribed size, and the second row lining up quite nicely.
 Right-side front - mortar joints are also on point
The next two photos show where things went a bit skewy briefly.
 Row 3 on the left-side of the arch
 Row 3 on the right-side of the arch
 Row 3 on the right-side of the arch, with spacing
The above three photos show that on the left side I was fine, with a few mm of mortar, to get those two bricks into place without being proud at the front. On the right, though, even down to 1-2mm of mortar at the back, I'd have no room for the middle joint, without that front half-brick really sticking out.
So I had to cut a little off the back brick, and because it's too tall to cut through with the wet tile cutter - and also because this was a few months before I bought the wet tile cutter - I used an angle grinder.
 Trimming a front arch brick
 Angle-grinding a fire brick down by 5mm
 Angle-grinding a fire brick down by 5mm - also
I will note at this point that when you watch the official videos, everything looks fantastic, but there's a few bits where you wonder if they came back and fixed things up, or they just avoided dwelling on those areas in the subsequent videos.
For instance the top-right side at this point does look like the front and rear brick don't agree on their top edge:
 Official video showing right-side of the arch, row 3
They also moved MUCH faster than noobs could even dream about. The inside of the oven wasn't cleaned until they'd laid down 6 rows - albeit on the D105, that's still getting pretty steep at row 6, and the mortar needs to be pretty sticky to keep from moving all the adjacent bricks around as you bed in new ones.
 Official video showing 6 layers of bricks before any cleaning up
There's certainly some significant time advantage to doing that many over and above the 'get it done in one day', which is that cleaning up is done much less frequently.
I was doing significant cleaning processes, scrubbing bricks, floor tiles, etc, with wet, then nylon, then dried sponges, etc, every row - and that process was about an hour a go.
I think the videos were made when they were using a different mortar blend than I received in my version of the kit. The A / B mix that I bought seemed to go off much faster than the stuff they were using back then. Delaying cleaning by a few hours would have required some serious chiselling, I suspect, for my mortar.
What would I do differently?
Back-tracking a bit, I'd have made better care around getting the front straight-bricks being equidistant from the arch-entrance bricks, though I thought I'd already got that right at the time, obviously.
I don't know if that was the (partial) cause of the right hand side being way too proud without some trimming (see above) but I expect it either was entirely, or at the least exacerbated it.
As noted in the official documentation, the mortar can cope with up to 70mm spans, so I should have been happier to have slightly larger spans everywhere, even if it made the front a few mm longer during the initial dry-run layout.
Layer 4 and 5
Everything feels like a home stretch at this point, but you're starting to realise that the home stretch is still an awfully long way away.
These rows were put down on the 22nd of May -- some 22 days after unpacking the kit and getting the cal-sil boards into place.
Aside - I found it preferable to finish a session by putting the first brick, in the rear-center, to give me a great anchor for the next session (day).
 Layer 4 started from center to left
On these lower rows, the choice is between just going in one direction, where the next brick helps hold the most recent brick in place, as you wiggle / bang it into location -- or go left/right on each new brick, allowing the previous brick the extra couple of minutes to bond into place, by focussing on the other side. Here I chose to just go in one direction.
Part of it's also the moistening of the previous row. Given my progress was slow -- a row a day, with a few days in between -- a non-trivial amount of my prep time was spent getting the previous row wet enough again to ensure a good bond with the mortar.
There's also the aesthetic considerations, primarily around keeping a brick-like view, with no vertical joins above each other, but for the first four rows it's unlikely you'd get anything like that visible from the front of the oven.
 Left-side row 4 brick against the template
 Right-side row 4 brick against the template
 Row four of the dome bricks done, and the front arch bricks
And then onto row 5 -- where it's getting a bit steeper, and the bricks, while not slipping down immediately, are certainly more affected by gravity than the earlier rows.
I had to bump up the plywood arch template slightly, as I'd become a bit lax in my commitment to the 2.5mm mortar joins. I had some 2mm metal brackets that worked well here on top of the plastic sparky's push sticks that were bundled into the kit (about 2.8mm thick).
 Using 2mm extra spacing to bring the framework up
This meant that my left and right sides were once again aligned in preparation for the angled bricks to be mounted on the arch sides, to have the actual arch stuck to them.
 Bringing balance back to the force .. or vertical alignment, at least.
 Row 5 - the front bricks done, and the dome partly done
You can see in the above picture where that disparity between left and right side straight bricks had been accentuated by some leftover mortar (on the right) making it look darker, and accentuating the 5mm disparity there.
Inner archway
We are 29 days after setting the base in place.
 The rear arch template spacing guide was spot-on
The above picture shows a sponge slowly moistening up the inner-arch connection to the arch-wall bricks.
They emphasize that this join is very important that the framework aligns precisely with the corner of that brick, and who am I to argue?
 Dry run of inner arch bricks
A dry-run showed that I had a fair bit of space - so we'll work from the outside in, but basically trying to get a 1mm gap (at the lower edge) on all these bricks, and the flat-edge touching the framework at dead-center.
This bit won't be readily seen, and the strength will be more than enough, even if badly done, to support a 15kg pre-cast flue, so it's mostly the feel-good aspect of doing a decent job.
 Inner arch mortared in
 Row 6 of the dome bricks going in
As noted elsewhere, but shown in the next photo, I'd bond one or two bricks for the next row, before wrapping up. Every brick is soaked, so bonding is good, and the trammel can stay in place (if needed) while they set. I then had a well-anchored brick to tap and wiggle up against when I came back for that next row.
 Row 6 of the dome done and the inner arch cleaned up
Interlude - bricks remaining on the pallet
(light at the end of the tunnel)
 Running out of bricks - at flippin' last
Row 7 and up
Here we are getting into the steep -- and therefore slow -- territory.
We are at the 6th of June, some 1 month and 6 days after opening up the pallet.
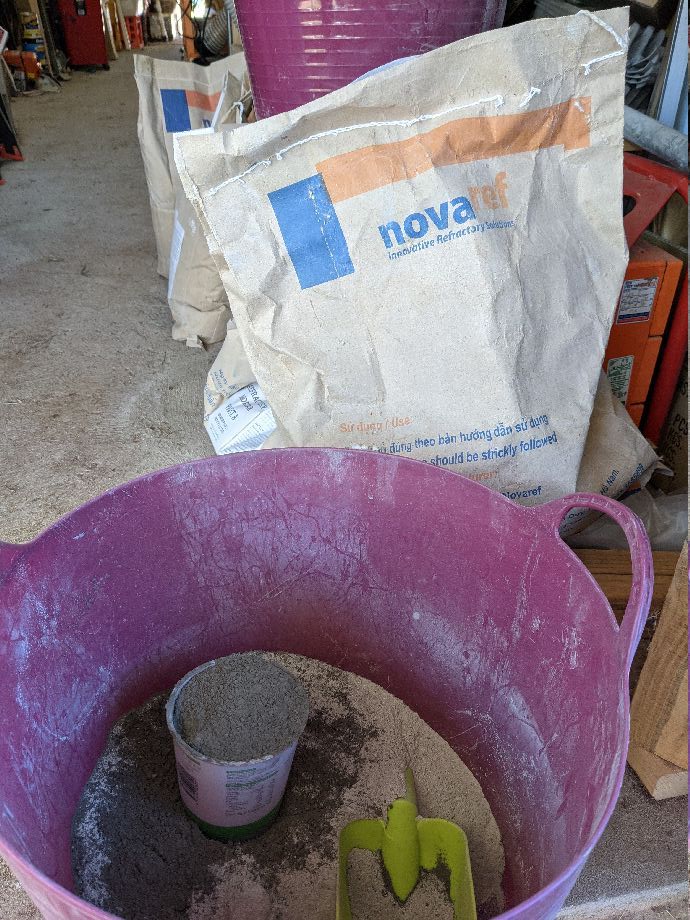 Measuring mortar mix
A slight regression. Here we see how I was measuring out the ratios, using 1 litre yogurt containers, which worked well.
The mortar components had survived their 12 month hiatus reasonably well, though I'm not sure what they would have looked like had they been twelve months younger, but they were workable, bonded well, and set extremely hard, so I have assumed that wasn't a major problem.
 Using pine struts to hold bricks in place
For the higher rows, I used some cheap and cheerful 19x40mm pine struts, with a block of wood pinned to it with some spring clamps, to hold the most recent brick in place as I put the new one next to it (there's a lot of heaving and tapping with this process).
This worked well for me, and I was moving at a slow pace, with a pretty stiff mixture of mortar.
 Pine struts at the base, against the inner edge
In the video #6 there's a reference to avoiding a tear-drop shape as you get up to this course - a reminder to keep it round, but no hint on how you can do this, given the trammel tool by definition will define a sphere, but not a circle at a given elevation.
What I did here was use a spirit level across the front to back, and aimed at getting the bricks sitting on top of the arch to be level with the bricks at the back of the oven. This, combined with the assured equal distance from the center point, should guarantee a circle.
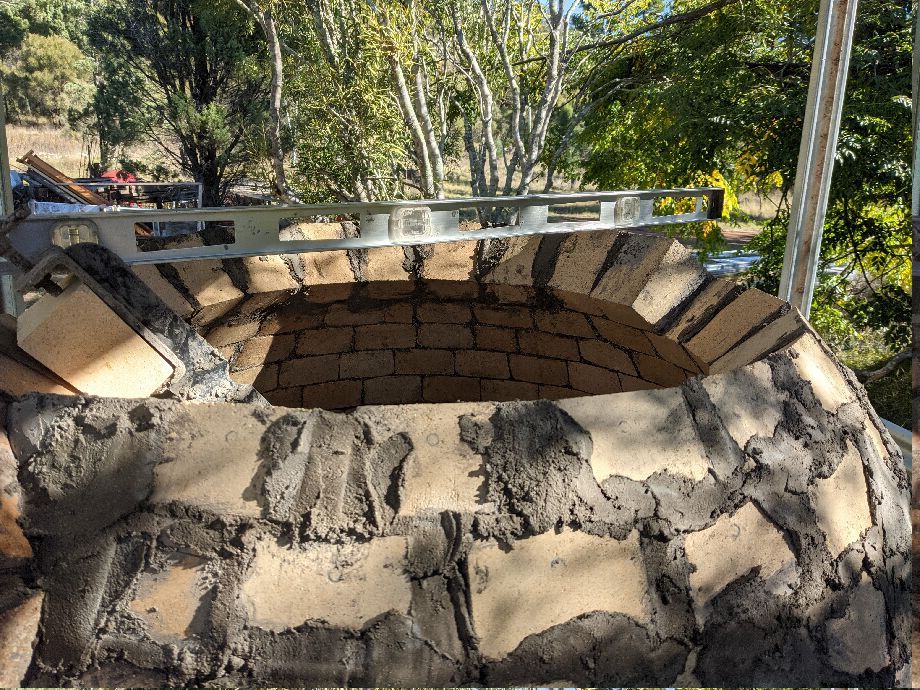 Using a spirit level for over-the-arch brick
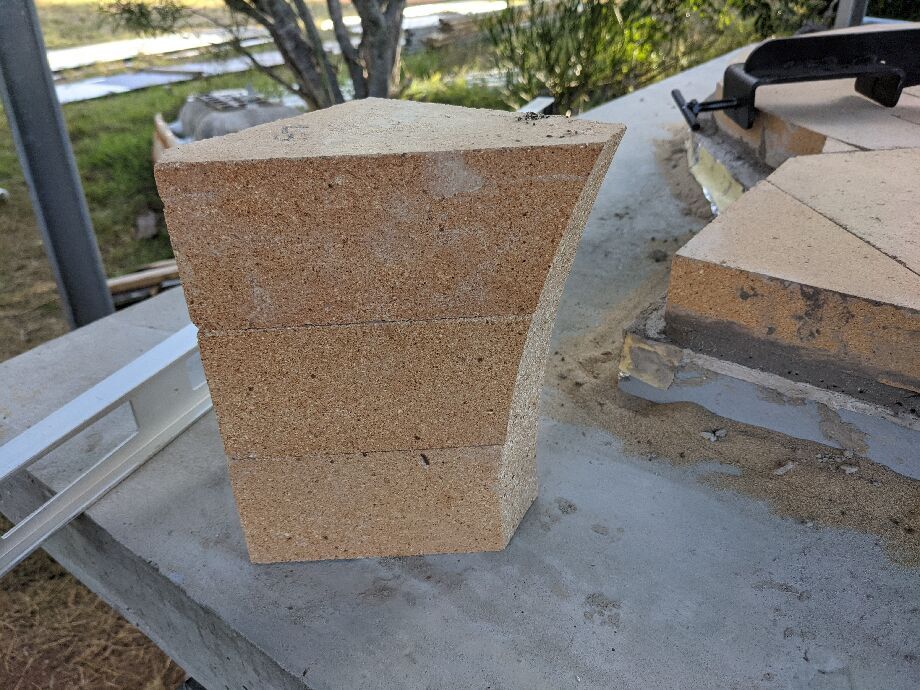
Some bricks did need to have their lower corners removed with the angle grinder, to get them to sit down properly.
 Bottom of a brick ground back
 Row 7 complete - the first full course
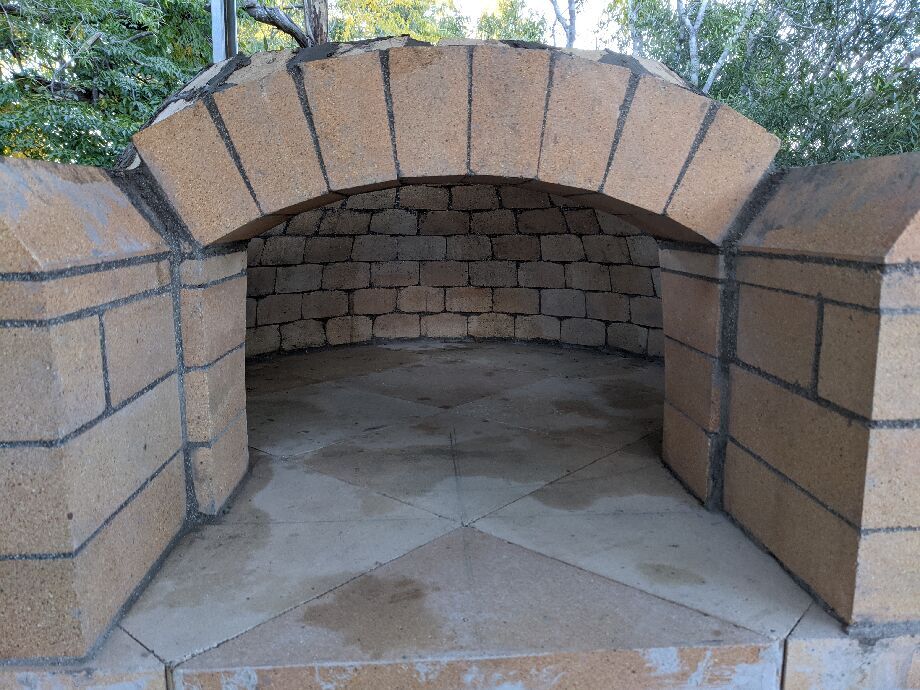 Row 7 done - view inside, from the front
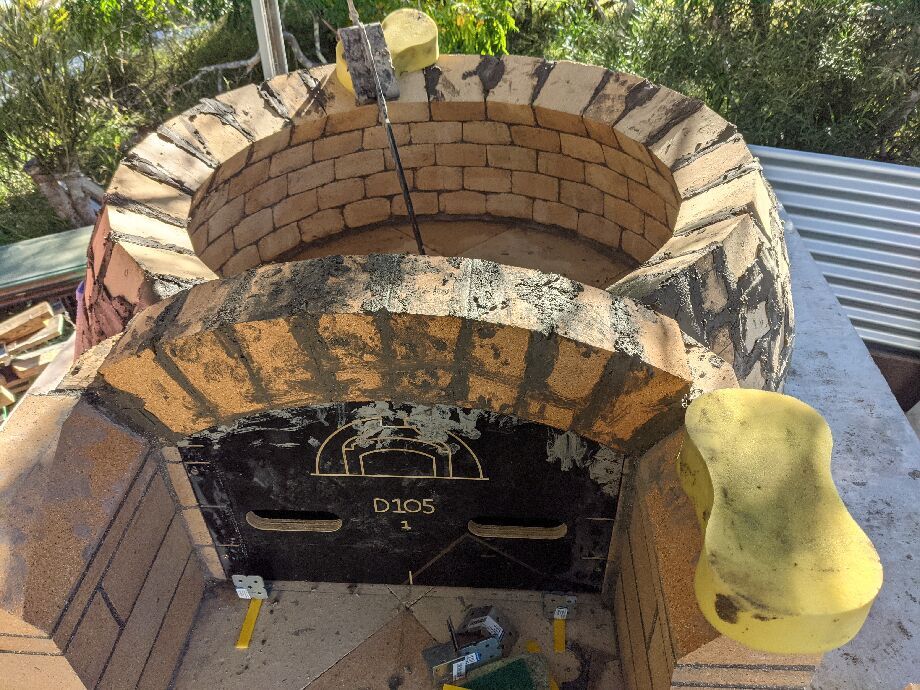
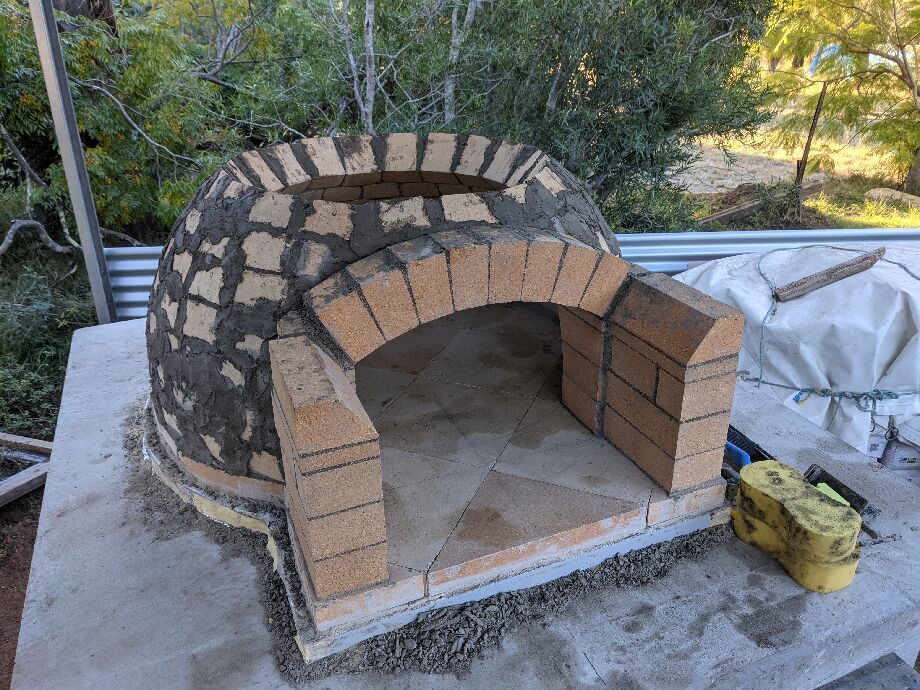
The final two rows of bricks
At this stage you think you're nearly done.
Depending how fast you're moving, that may be true.
Having a helper is very .. helpful. Here we see my assistant using two big sponges to get the bricks in course 8, laid perhaps two weekends earlier, nicely wet.
While we're using the fibreglass dome to keep the next two rows of bricks in place, and once that sets they're effectively keystoned in, we still want as good a join as possible.
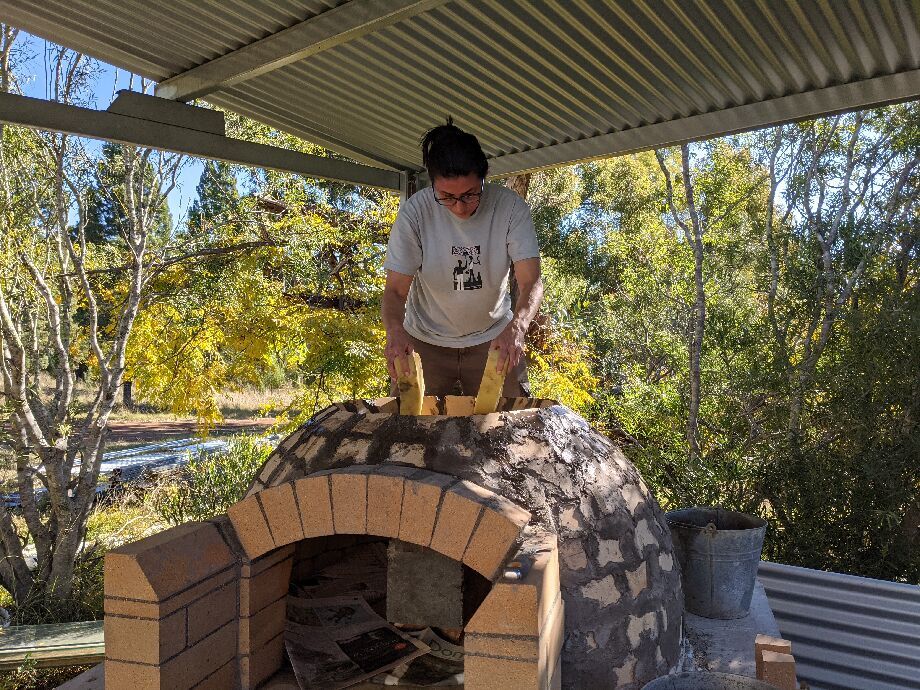 Wetting the previous course
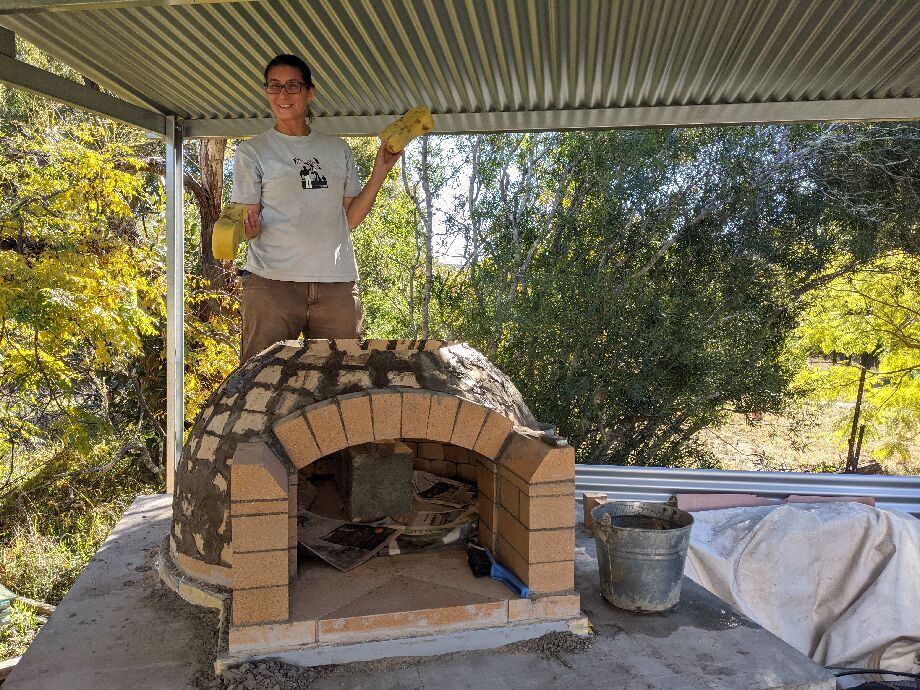 Taking a brief (but unauthorised) break
And this is what it looks like once the last two layers are done.
The trick seems to be to try to get the bricks crammed in as good as possible, being not too concerned with the bleed-through of mortar onto the fibreglass dome.
 Final two rows are in place
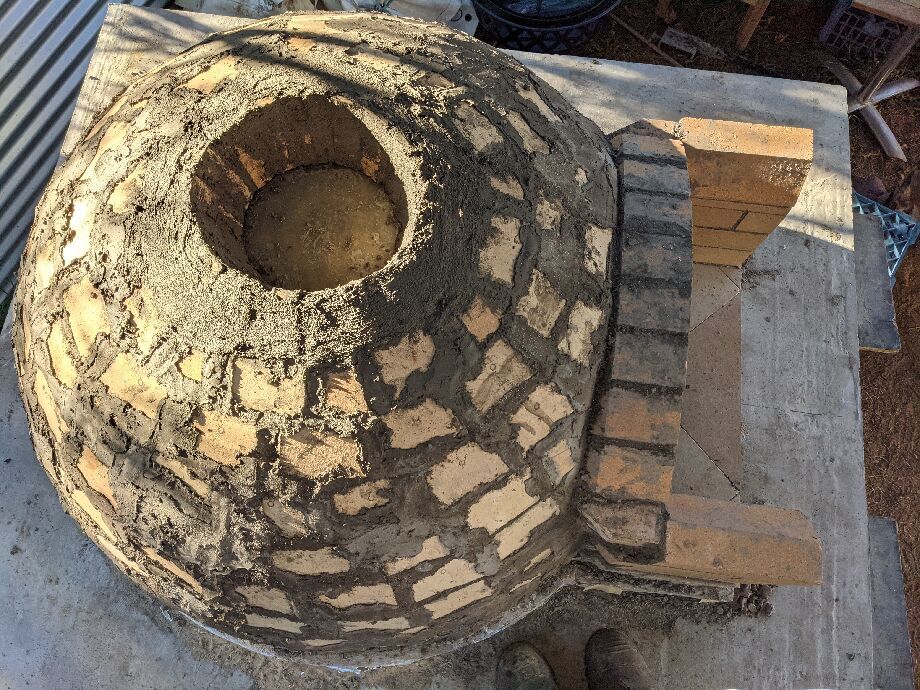 From above
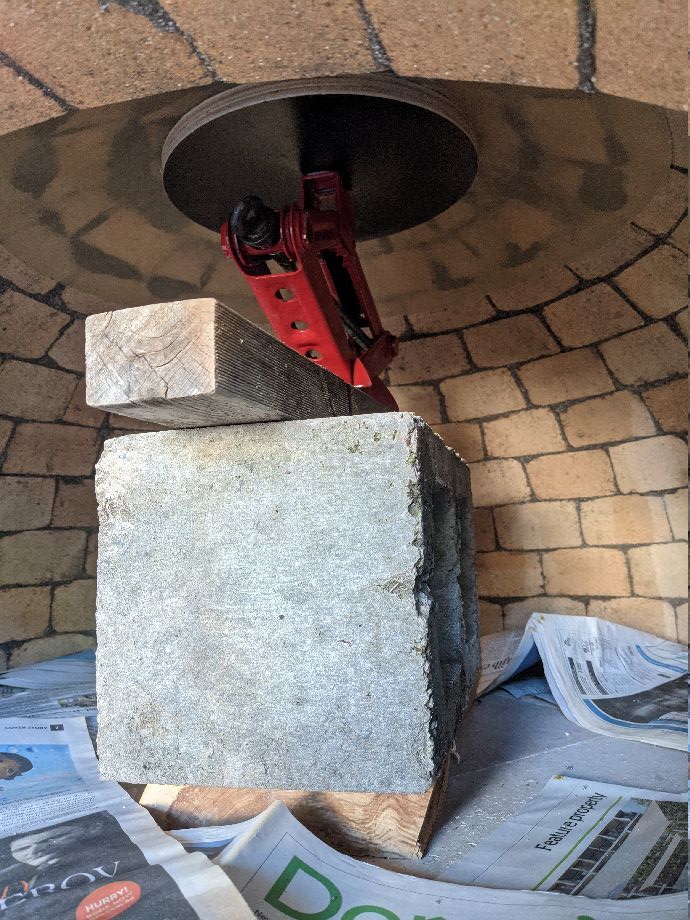 Fibreglass dome from inside
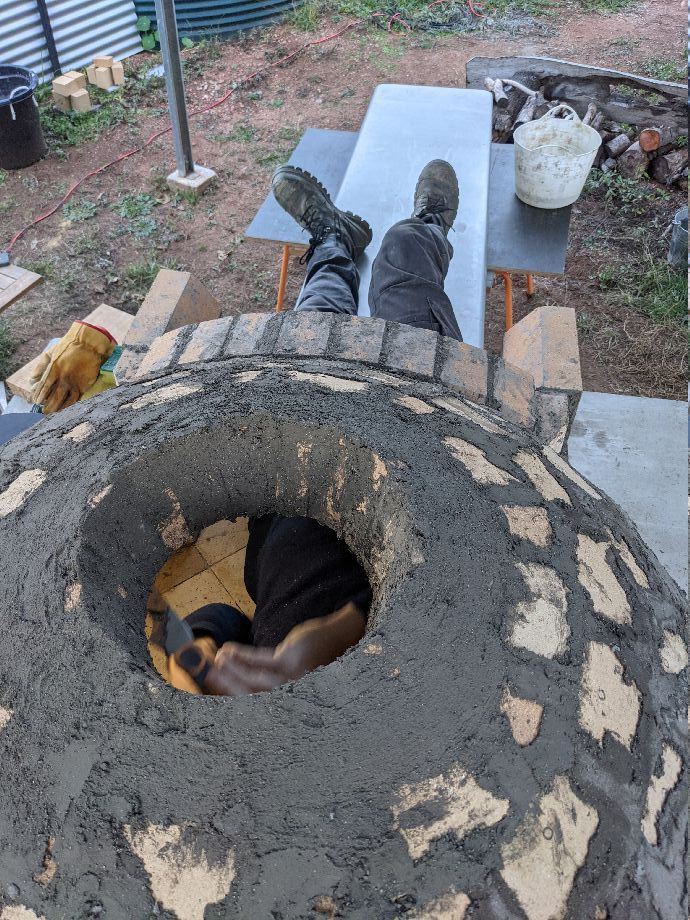 Jedd in the oven
They are right -- this is a hugely unpleasant part of the process.
I'm tall, and not as slim as I was, but the craning of the neck, the mortar bits falling onto my face, not fun. I'm not claustrophobic, but I don't think anyone could really enjoy this.
Also, as they note in some of the media, you really need to get back to this the same day, as I think 12 hours later and you'd be needing a chisel, not a scraper, to tidy up the inside.
I think I left about 2-3 hours before pulling out the fibreglass support, and getting in there - the mortar had certainly set plenty strong enough at that point, and it was getting late in the day (for natural light).
Inside it looked a bit like this - so I'd been cautious with putting too much excess mortar in, which was easy to fill up and tidy.
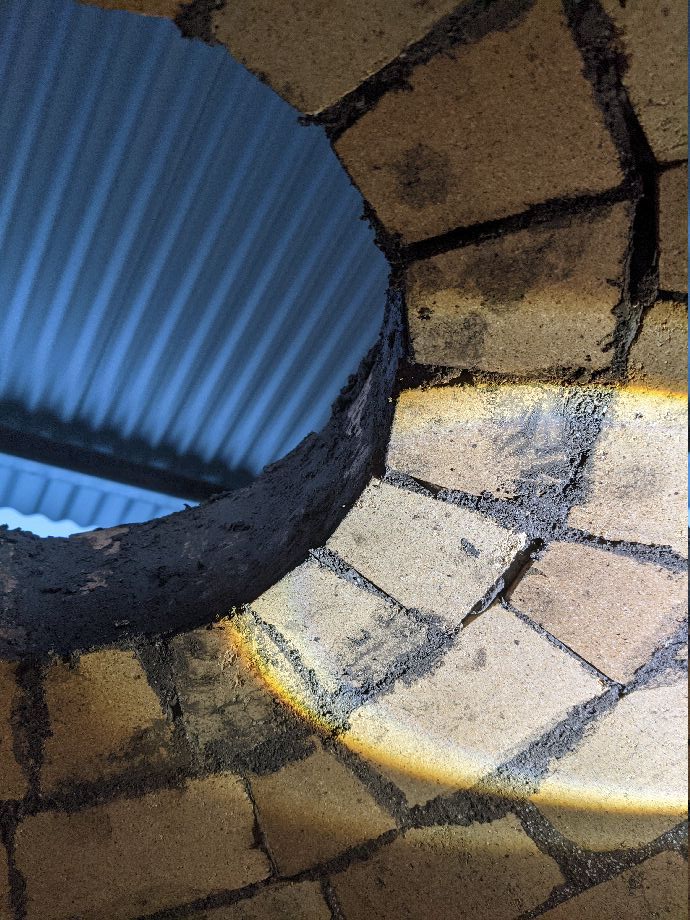 Last two rows before tidying and pointing
Pouring the keystone
Partly because it was so horrible climbing into the oven to point the last couple of rows (see above) I tried to work out how I could ensure much less leakage down between the fibreglass and the bricks, when doing the keystone pour.
First, I thought a nice stiff mixture - though the preference is for fewer air bubbles over strength, as there's not much strength needed here, and fewer air bubbles means a softer mix that I could vibrate better.
(I did not use the concrete vibrator, though I did contemplate it. It seemed inappropriate for this job, and there's no 'low' setting on the thing.)
I had some paper-based twine-like material, that's about 3-4mm thick, and I experimented with getting a piece of that wedged under the edge of the bricks, and between the fibreglass, as I lifted that up, but that wasn't workable, mostly as it meant the fibreglass would not get snug up against the bricks, and the keystone would then be proud by a few mm - but also because of the unevenness of the last row of bricks, it wouldn't actually solve the problem.
Then I settled on the idea of using some masking tape, which wouldn't stick well to brickwork, but would stick to the fibreglass dome, and I could have it angled up slightly, only a few mm into the dome, but enough that the keystone pour would be less likely to ooze through.
I reasoned once the residual bits burn off, I may have a millimetre or so groove, perhaps 5mm deep, around the edge of the keystone on the inside, but no one's ever going to see that.
So that's what I did.
I still smeared on some vegetable oil to the fibreglass, so it didn't stick, but it did mean I didn't need to rush to remove that fibreglass mould immediately, and could let the thing cure properly, more slowly, for longer.
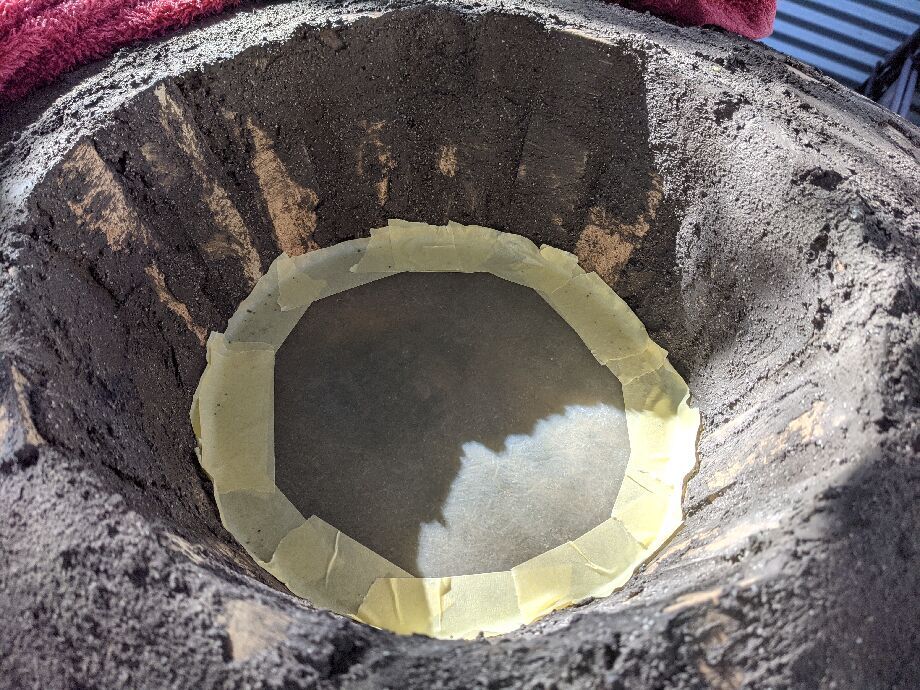 Paper masking tape around the dome top
As it happens, I'd made up about 1/2 the dry-mix for this pour, but accidentally dropped in more of the container of water than I should have, so it went a bit sloppy. I then had to add basically the rest of the dry-mix to get it back to a reasonable consistency, which felt like a huge waste (I made a few little square trivets with the leftover).
Even so, because it was a mid-winter (July) afternoon, and perhaps not quite as stiff as it should have been, it was taking a while to go off, so I did as recommended and set up a small fan heater in there to run overnight, which worked well.
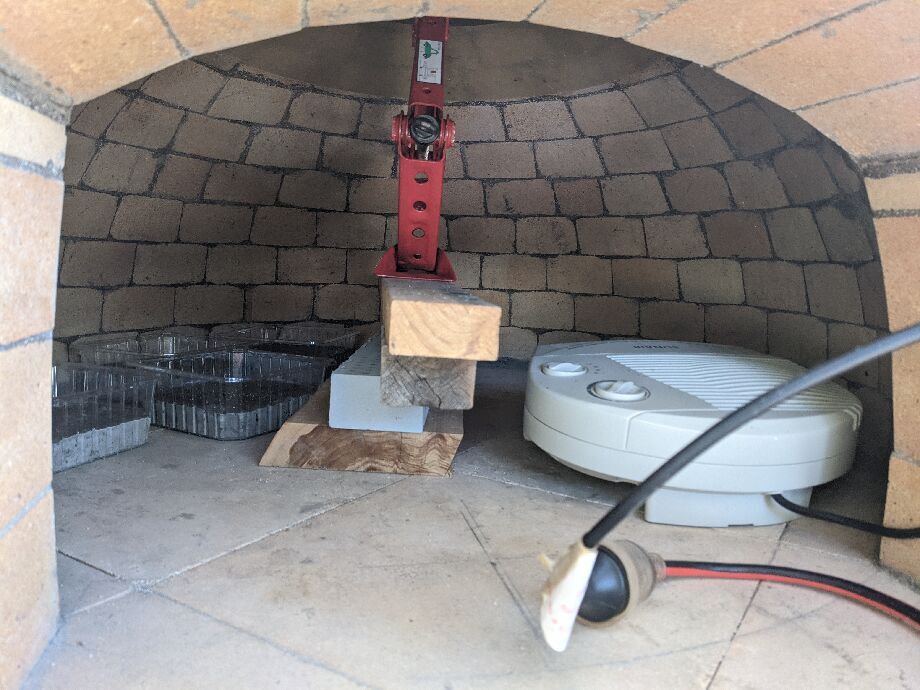 Fan heater curing the keystone - trivets at back left
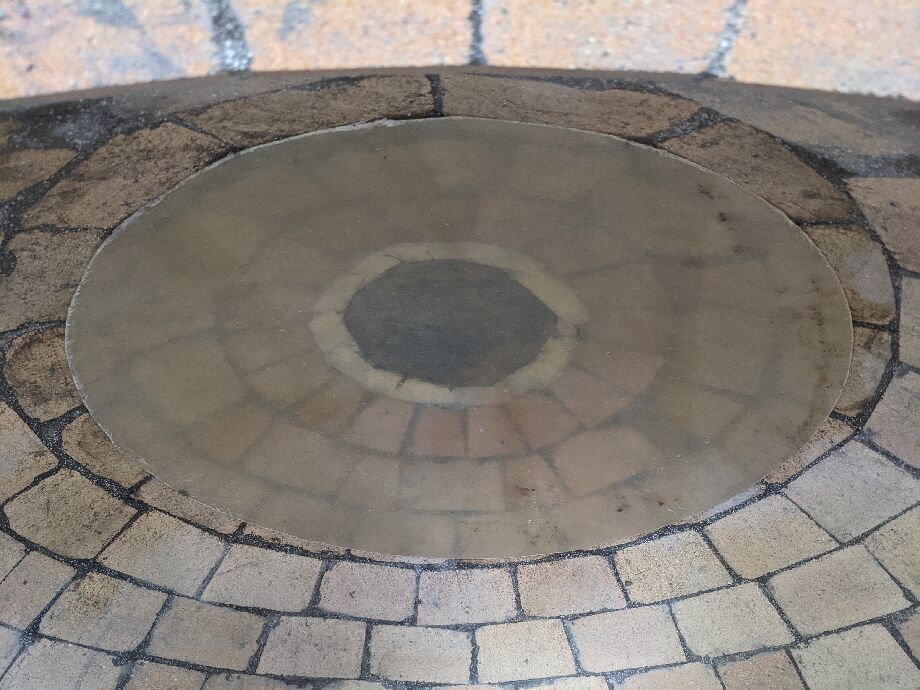 After the keystone pour, from below
Because I could see no bleeding through, and we had some non-inspiring weather, I had no need to rush back to this, so a couple of days later I pulled the jack out and dropped the fibreglass dome.
Point work from the last two rows of bricks wasn't quite as beautiful as I remembered, but the result was pretty good.
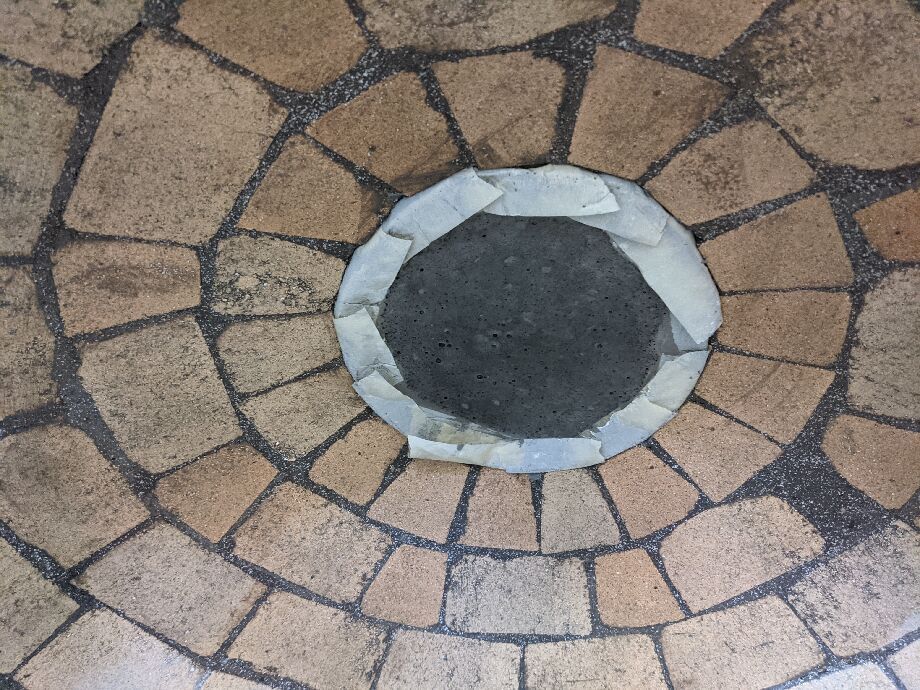 Keystone from underneath
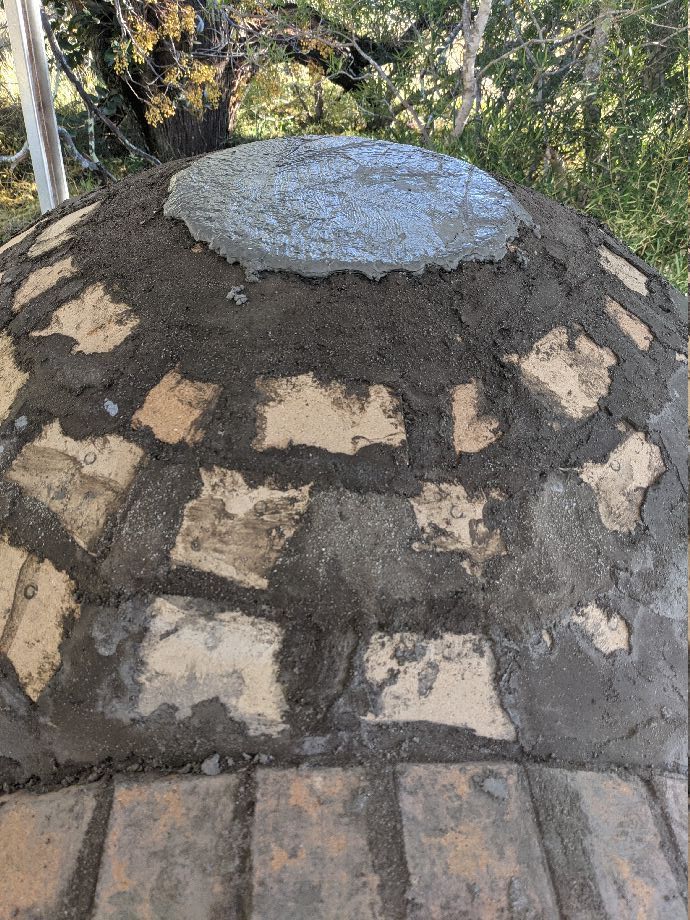 Keystone from above - a bit proud
On top, once I removed the glad wrap, looked to be a bit proud, so I subsequently added a slight bump on top, and smoothed the sides of it, with some mortar mix. (There's a picture a few pages down.)
The front arch
My mortar mix had a pronounced speckled white pattern, perhaps tiny pieces of perlite, but who knows. It may be due to the bags being older than optimum, or just the nature of this mix. The videos that Ben made I believe were using an earlier mortar mix, a single bag ready-mix, whereas I was using the two-part A / B type. Either way, I've no idea if this is normal or otherwise.
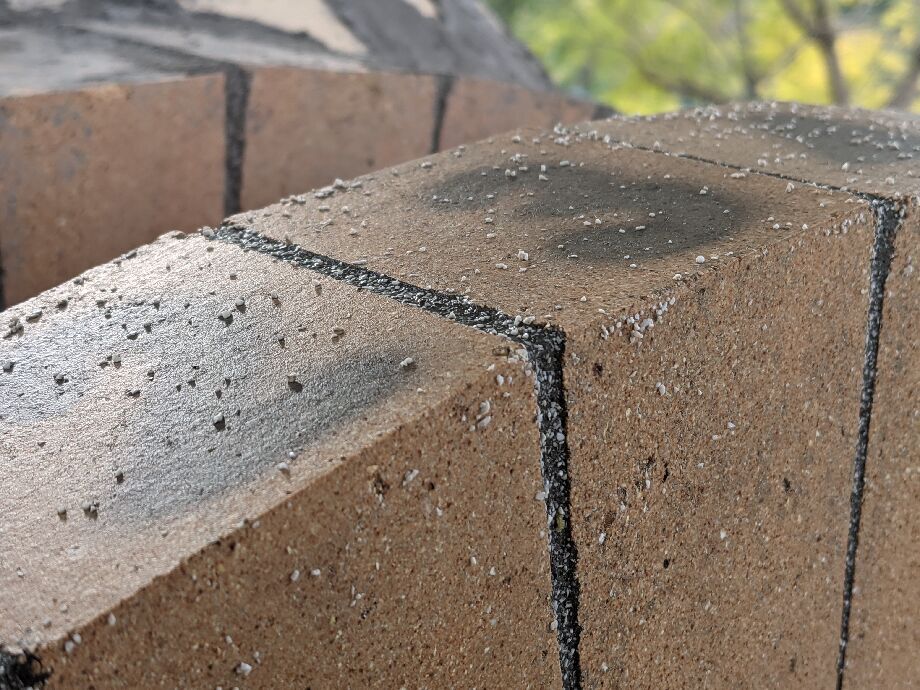 Close up or white aggregate matter in mortar
I don't believe it made any structural difference, as the mortar set ridiculously hard, much faster than the single-blend style that was used in the videos. I would typically have to cleanup within a few hours of doing any mortar work, otherwise it was never coming off.
This meant a lot of my actual time construction time was spent cleaning off bricks. That bit didn't get any more enjoyable as the project wore on.
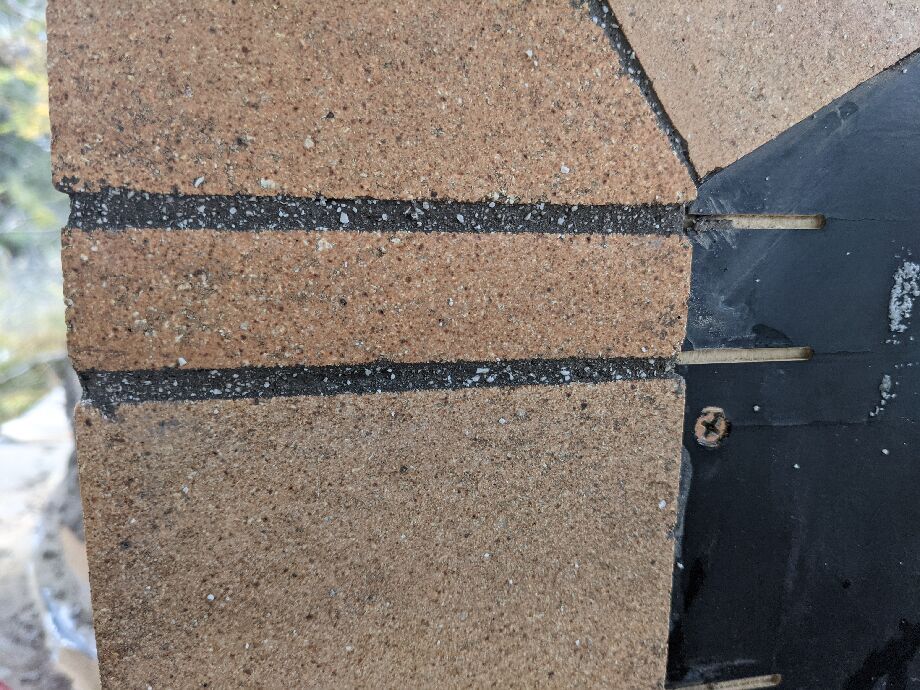 Front arch - acceptable alignment
After the front arch went on, I used the extra mortar I'd made up to fix up the top of the keystone / dome so it wasn't quite so flat-top looking.
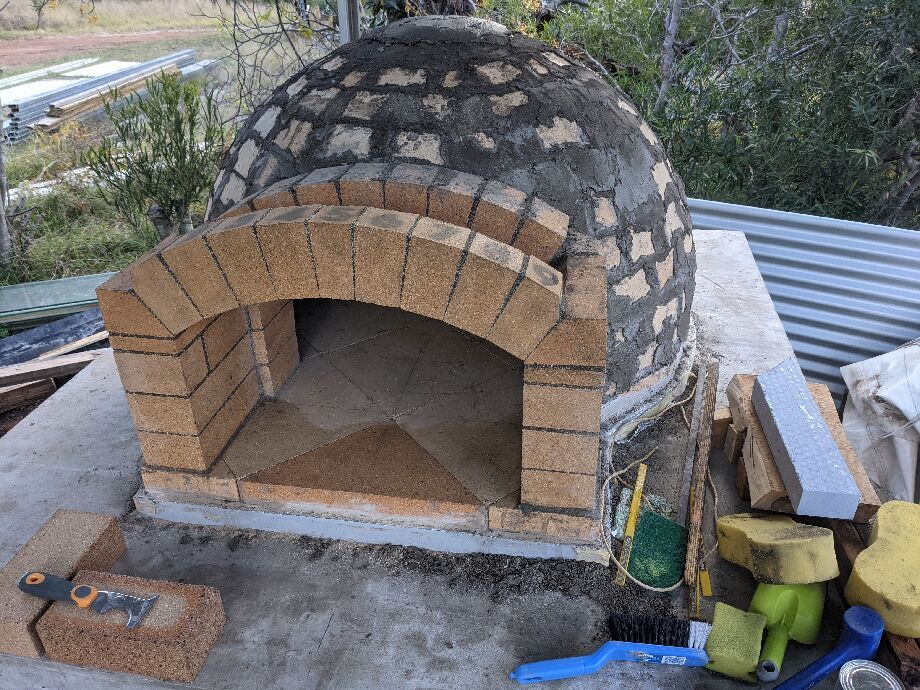 Front arch is completed
What would I do differently?
I'll note that I got 8 bricks (four from each side) in place, with what I thought was minimal clearance at the bottom of them all, and then discovered that the final brick, brick #5, simply couldn't fit in, and there was no give in the others to move them along.
So I pulled them all out, scraped off all the mortar, gave that a good stir, and started again.
Ben does say in the videos that there's basically, by design, no gaps at the bottom of the front arch bricks - well, perhaps a few mm to share around the 10 joints, but in practice, assume zero.
So, next time, I'd start with that assumption - make sure the bottom edges of the bricks have close to zero mortar there, and wibble them, dead-blow hammer them, as you go, such that they are brick-on-brick.
Installing the pre-cast flue
Here I was mildly concerned that the slight disparity (5mm offset to the left) of my arch supports might make this stage a bit messier, but happily no problem, as the front arch is wider that the rear arch, and the bottom of the pre-cast flue has straight edges, and no expectations beyond that.
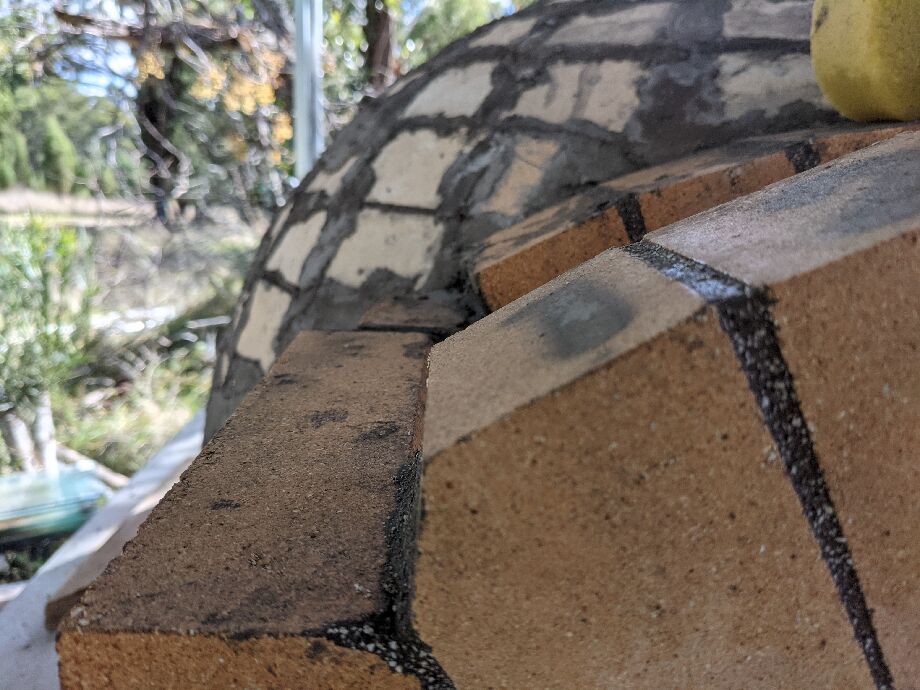 Front and rear arch - left hand side alignment
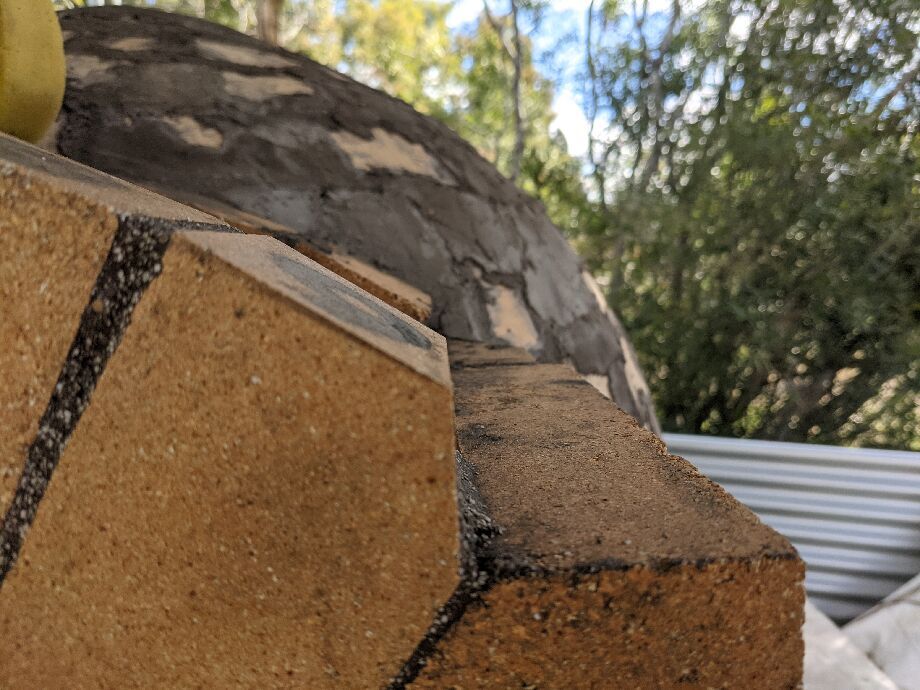 Front and rear arch - right hand side alignment
In the above two photos you'll also see my big yellow sponges, that were getting these arches wet again for the mortar to better bond.
I was putting the flue on about 1 week after the front arch had been laid.
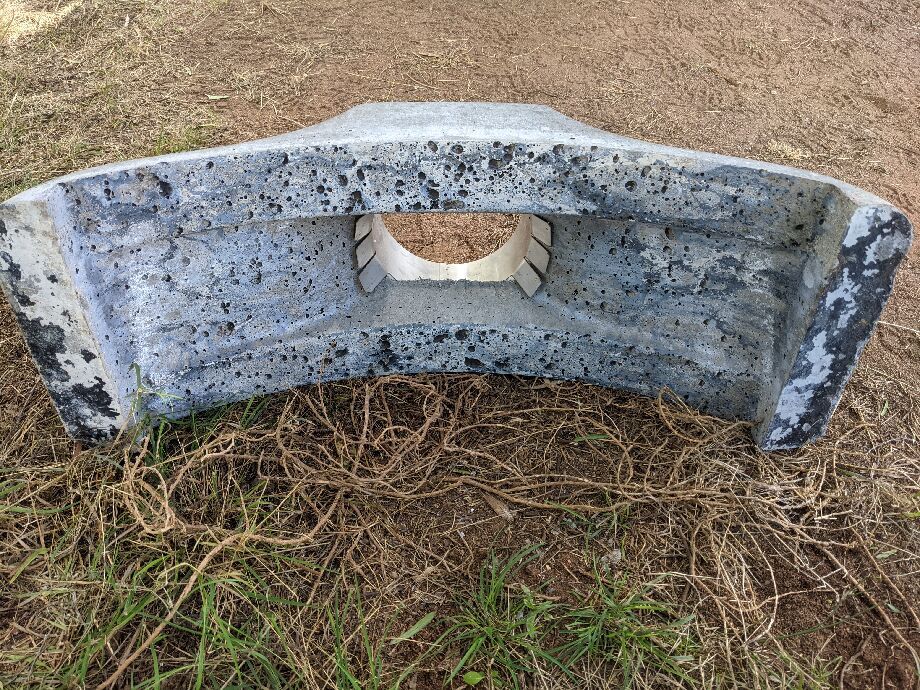 The pre-cast flue from underneath
The pre-cast flue is very heavy, and there's not much room for fingers, especially gloved fingers, when getting it into place.
Two people, as recommended, is basically essential. Don't try this by yourself.
Also, for something that's been hugely well vibrated when it was cast, that's a LOT of bubbles in the bottom of this thing, and gives me some confidence in my keystone cap that I poured, which doesn't look half as bad.
Also also, note the side internal edges there, they are straight through.
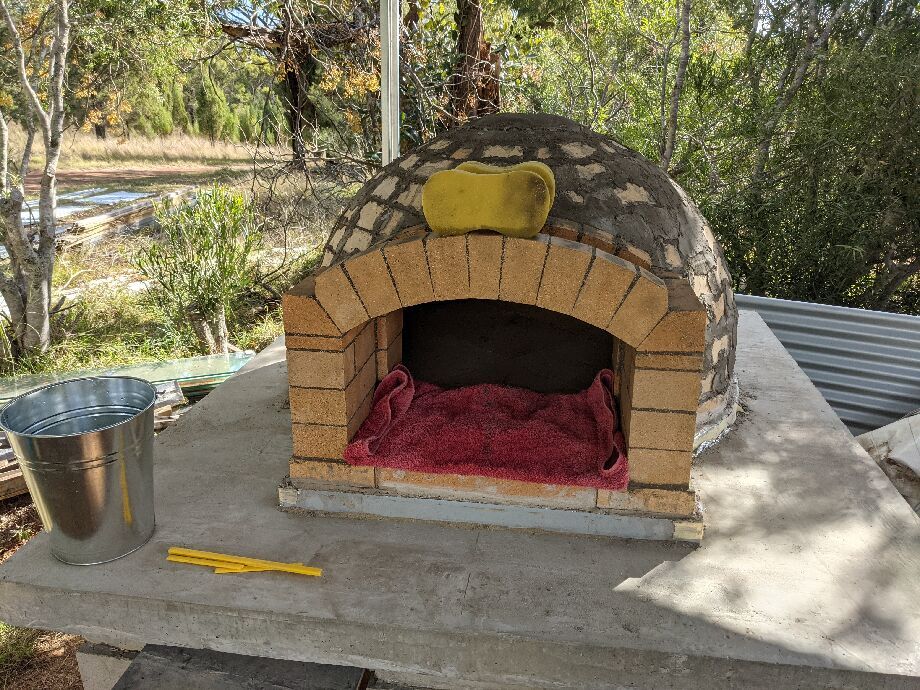 Wetting the arches
Really getting those things moist here, as I didn't want a poor bond on this, as it'd possibly result in cracks that smoke will come out and leave a black sooty mess.
No photos of the process as my helper and I were both tied up with the actual placement.
We did do a dry-run first, and worked out how to get up two ladders, shuffle this thing into place, etc.
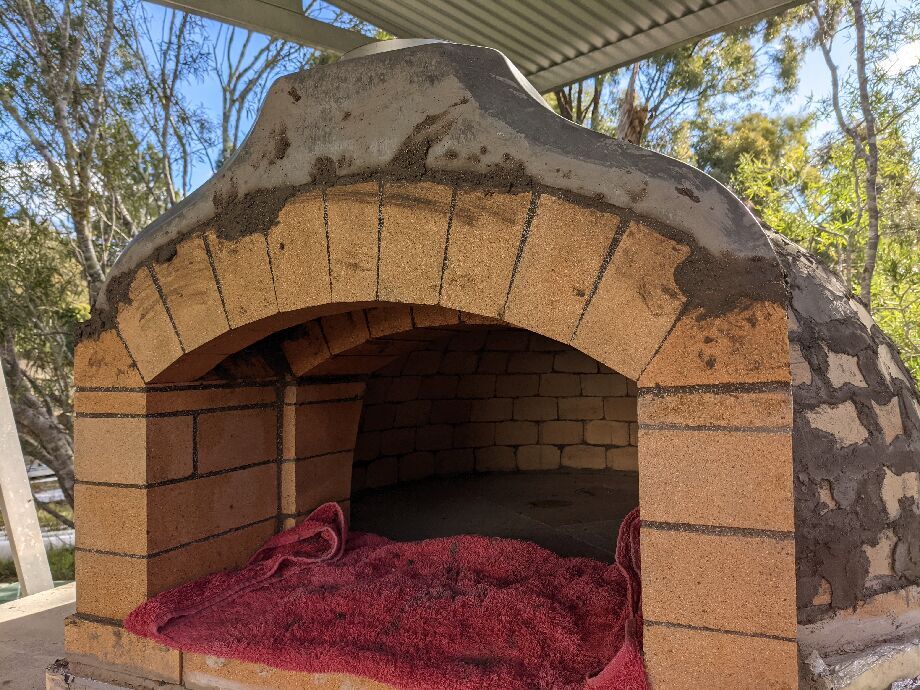 Flue in place
The front of the arch was either a mm or two forward of the sides, or the flue was at a very slight angle backwards, it's hard to say for sure, but to the casual eye it looks like it's consistently aligned between the flue and the bricks.
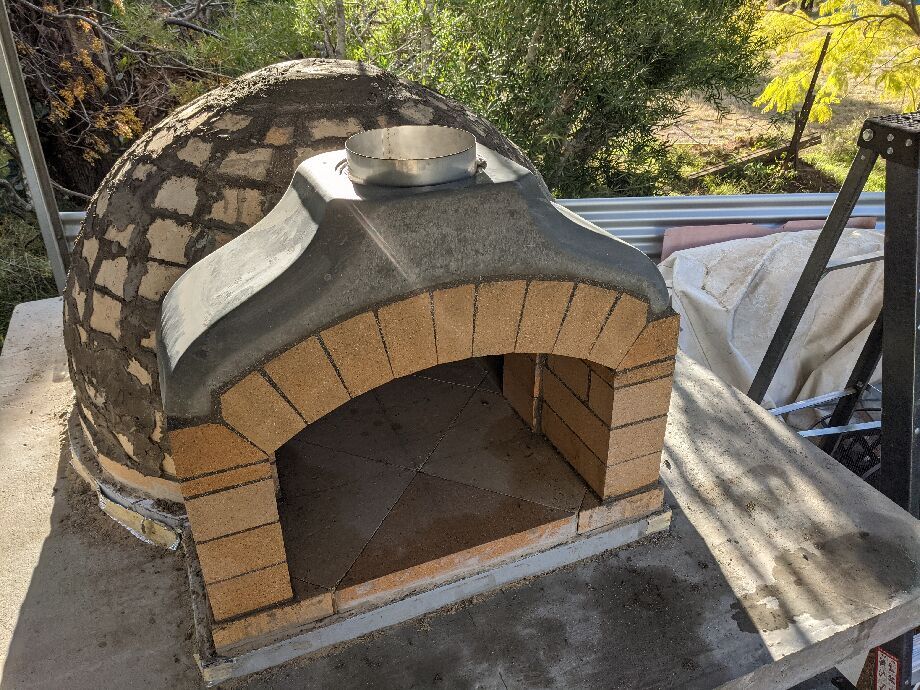 The flue is done
Installing the granite return base bricks
The optional black granite landing is enormous - about 1100mm long, 300mm deep, and 30mm thick.
Every time I touched it was I was petrified I would drop, break, or chip it.
The next few stages were a bit complicated insofar as some things relied on other things, but prevented yet other things.
Loosely - the black granite landing needed to go on before the main stand granite tiles I had, mostly because I did not want adhesives from the landing dropping down onto those other tiles. It makes sense to do stuff that's higher first. (This was probably not as worrisome as I had anticipated, but then this was my first time doing any tiling.)
The 'green butterfly' stand tiling needed to go down before the render went on, because, as noted in the videos, it's infinitely easier to do rough cuts of the tiles where they meet the ceramic blanket, than to try to do perfect curved cuts to line up with final render over the dome.
It's feasible to do one coat of render, and then cut and lay tiles, then finish off, but I couldn't see any benefit to that.
The grout, at least under and near the render, should go on before the render, for semi-obvious reasons.
The side-returns of the main granite landing should go on after the first layer of render, but before the subsequent layers.
This was partly because I wanted to get render all the way in between the return support bricks and the dome insulation -- but also because the chicken-wire holding the insulation in place ended up sticking out so far that the side granite pieces had to push that into the blanket in order for them to fit in.
I am jumping ahead a bit here, but suffice to say, the sequence that follows was all done for some very sensible reasons, even if they don't appear so.
Anyhoo, my other half picked up some plain bricks, enough with spares to basically in-fill the area under the landing, as my expectation had been to just get the height right, and then put my butterfly green granite onto the sides of the concrete / brick riser there.
Then I noticed that the brick textures were similar, or at least complemented, the fire brick texture.
And I thought that black granite butted up next to the green butterfly granite might be too much granite, and also a touch jarring, visually.
Which is why I landed <ha> on the idea of doing the end-brick pattern at the front, long-brick pattern at the sides, making a feature of it, to highlight the whole brick aspect of the oven (which is otherwise non-obvious from outside the oven anyway).
Also, I had not done enough brick cutting yet, so this was a good opportunity.
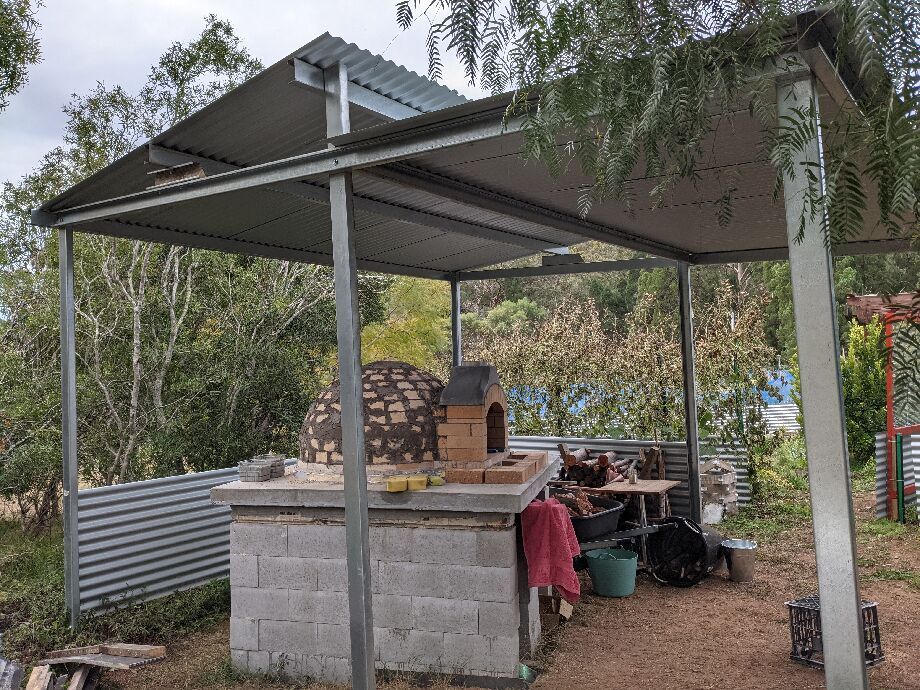 Showing the layout of the front landing brick support
I knew I wanted a slight over-hang on the sides to match the overhang on the front (which was fixed and non-negotiable) -- this was about 10-15mm.
So I lined up the bricks to give me the span of the landing, less 30mm or so.
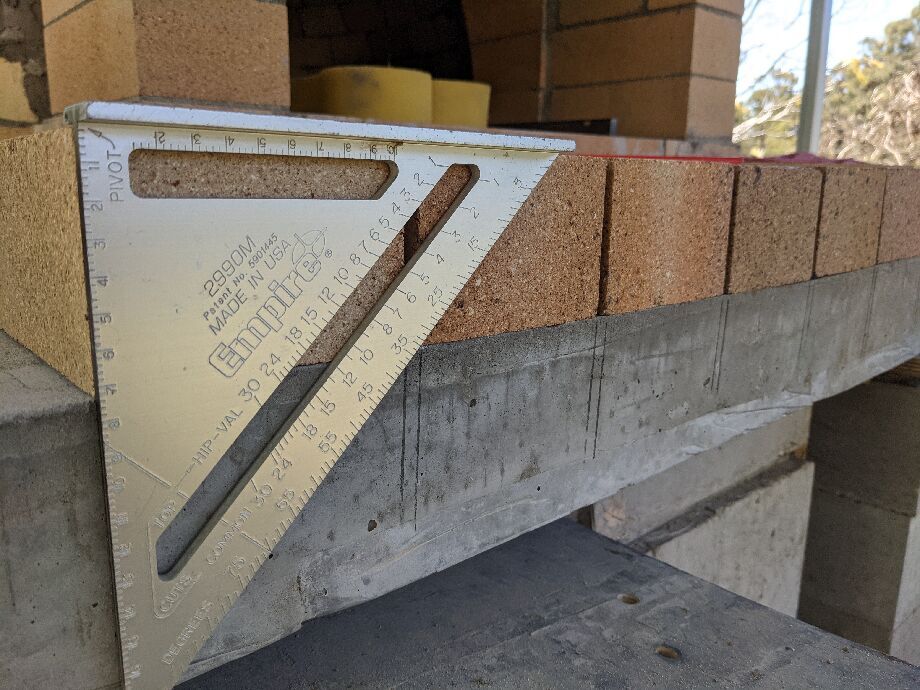 Showing the layout of the front landing brick, up close
There was some variation in the end textures of the bricks, so I selected for symmetry first, and then for the front left & right bricks to have a more cream, less burnt, texture along their long edges, as they'd obviously be seen, and needed to more closely align with the front arch support textures.
The gaps between the bricks worked out to be 6mm precisely, so I spaced them all with a piece of 6mm MDF, and then marked on the side of the slab where my joints should align to.
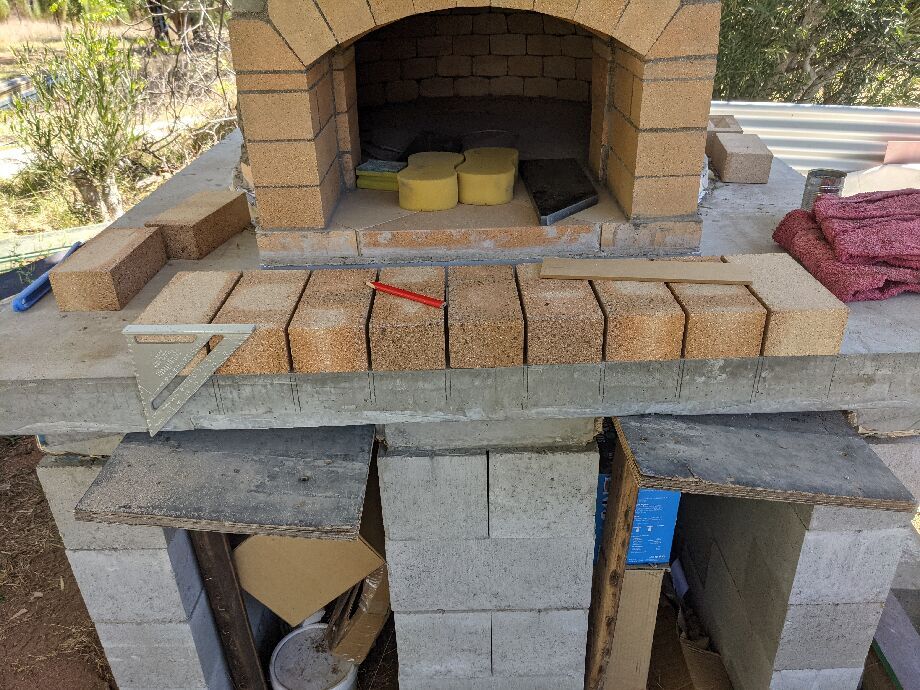 Showing the front bricks patterns and spacings
The landing granite is about 30mm, and I needed to get the back of that perfectly aligned with the front of the floor tiles in the oven.
In the remaining space I needed the brick (fixed at 90mm), the mortar underneath and the adhesive on top.
The mortar underneath could be adjusted, as beneath that, along the front of the slab, I anticipated putting green butterfly strips, so I could adjust those to be slightly higher if needed, to hide an extra-wide mortar strip.
Adhesive I thought I needed 10mm - but later this turned out to be wrong, I could have gotten away, should have used, a much smaller amount.
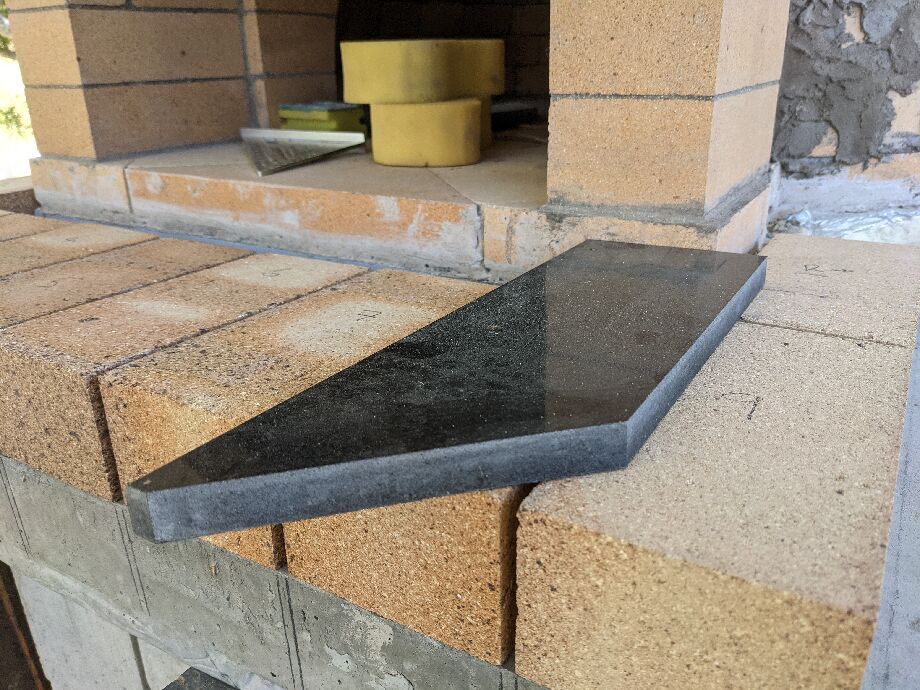 Working out how high the granite needed to be lifted
I wet down the front of the slab where the mortar would be applied, so it didn't rapid-dry and give me a weak join with a crumbly texture.
 Soaking the slab
The next two pictures show the result.
I put in the full front row, and the two full-sized side bricks. I didn't put the third one in on the sides at this time, as that would require some cutting, and I wanted to get it just right once the insulation blanket was done.
 Landing riser bricks in place
Happily, slight variation in the heights of the backs of these bricks weren't too much of a problem. I did get them all pretty perfectly mortared in (I had an oven's worth of practice at mortaring bricks into place), but because only the front would be seen of most of these, it was more making sure the left/right spacing was spot on.
 Landing riser bricks - perfect alignment! : )
What would I do differently?
I'd have selected bricks for their complementary colour and texture to the fire bricks.
It just happened, here, that the bricks that I thought were going to be rendered or tiled over looked really good, so the plan changed.
I'm really happy with how it all turned out, but I only had 5 or so spare bricks, and so my pattern / texture choices were slightly constrained.
I did ponder using some of the speckled-effect mortar mix, even if only at the very front of these bricks, but that seemed a bit too energetic, plus I needed to keep some of the last remaining amounts to fill in between the floor tiles and the granite landing, and then on the dome itself to bump up the thermal mass.
The insulation blanket
This was fairly horrible.
I was gloved up, masked up, goggled up, and very steamed up, on a warm-ish September day, happily with no breeze, but nonetheless it's a highly unenjoyable task.
The instructions (and video) are pretty clear, and so I used the only decent mask I had -- a spray painters device.
For the D95, there's a LOT of blanket left over, but unfortunately not enough to do a full third layer. I contemplated doing a partial layer, but that seemed like it'd be a mess to then deal with at the render stage.
There were two rolls - a long and a short - in the kit. The long roll does a full sit-on-the-floor-tiles perimeter. Then up over the top of the dome section. And then all but 15cm of the second round-the-dome (sitting on the base this time) perimeter, so I instead used the second roll for that second layer.
The kit came with 5 metres of stainless steel chicken wire. That's sufficient to cover the whole dome, however the instructions suggest that after doing an east west (over the top) you then start behind the archway and go all the way around to the other side. That's not what they mean, though, as there simply isn't enough wire to do that. After the east-west over the top of the dome, I cut a length to do (most of) the back of the dome, with enough to attach to that first over-the-top piece, and then cut strips for the sections behind the arch.
That bit of the process wasn't too bad - to a large extent because I had full access around the whole of the dome, and there was no breeze.
 Masked, goggled, gloved, extra-gloved, putting the first layer on
 Smoothing down the blanket after cutting small V shapes
One thing that's not hugely clear from the videos is how far forward you want this to come. I guess you can work it out based on the ~50mm of render that will be subsequently applied, and where you want the render to reach to the sides of the arch.
Here I basically came to within a few cm of the recess on those arch / dome interlock bricks, on the assumption that I wanted to lock in some dome render behind those recesses, and at that point we're in front of where the door will sit (when you've sealed it all off).
Fiddling with sizing for dome and granite returns
Some time prior to doing the insulation blanket, I had pinged the Melbourne Fire Brick Co with two questions around both the white particulate matter in the mortar (see the earlier photo of the front arch, and about the need for the water-proof aluminium strip that can go around the bottom of the oven, on the outside of the insulation blanket.
If I used that, it would further complicate the cascade of front landing, tiles, render, etc, and given I was under a hut, and would ultimately have the dome sealed with acrylic paint, and a strip of silicon sealant against the granite tiles, I thought water intrusion risk would be extremely low.
I also expect when not in use for long periods, I'll have a tarp tied over the whole thing.
Anyway, I did not get a response -- perhaps I had reached some support period threshold -- so I felt I was on my own from that point onwards.
Either way, I still don't know the answer to the first question, and with the insulation barrier, I decided to forego that.
It was going to be a mess trying to work out how that would attach at the front, in between the landing support and the floor tiles, and probably little benefit there anyway.
 Insulation blanket and chicken wire is done
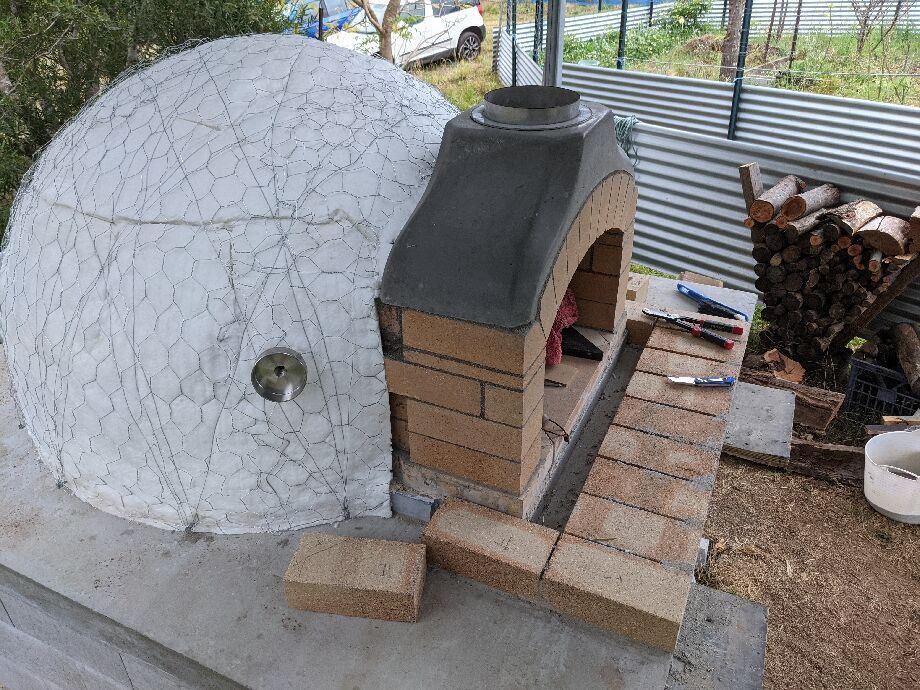 The thermowell temperature gauge holder is in place
Once the two layers of insulation blanket are in, and I'd put the chicken wire over, I knew I'd have to come back to the thermowell - this is an optional extra doodad in two parts. The first, shown above, is basically a big metal tube, closed at one end, and a wide, threaded hole at this end.
The idea is that it stays embedded in the wall of the oven, and you bring the actual thermometer out when you're going to fire her up. It looks better than a door thermometer, is more accurate as it's inside and isn't moving around as you move the door, etc.
The reason you don't want to leave the actual thermometer outdoors is because it will, slowly, over time, get some moisture inside the gauge, which can look a bit pants.
Anyway, once the insulation blankets are in place, I pushed the thermowell guy through from the inside, and felt where it was pushing the blanket, then made a small as incision as possible for it to come through, relocated to the outside, shoved it back in, then wedged up the blanket around under it again.
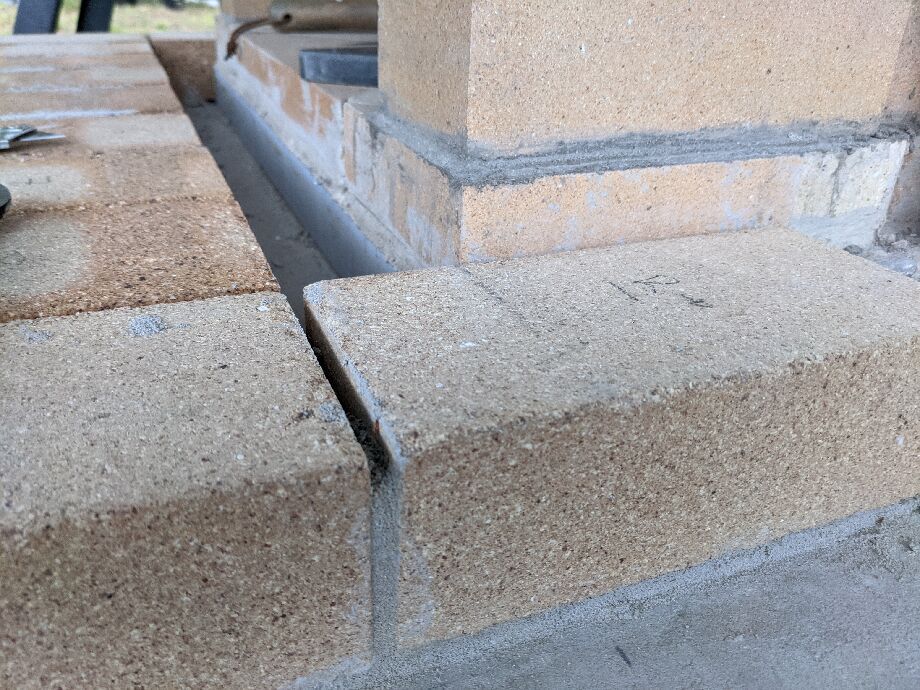 Landing bricks - side view, showing vent
The picture above shows the gap I had between the front bricks and the floor tiles - about 50mm or so - and also the groove I was leaving, on both sides, at the very top of the mortar joint between these two side bricks. The idea there is that any moisture that gets in under the granite landing needs a place to steam out, without blowing anything up.
I expect to put some mortar mix (high temp) in between the granite landing and the side / front of the oven proper, and it might not be fully sealed, but probably will be, so this vent feels like a safe and easy thing to do.
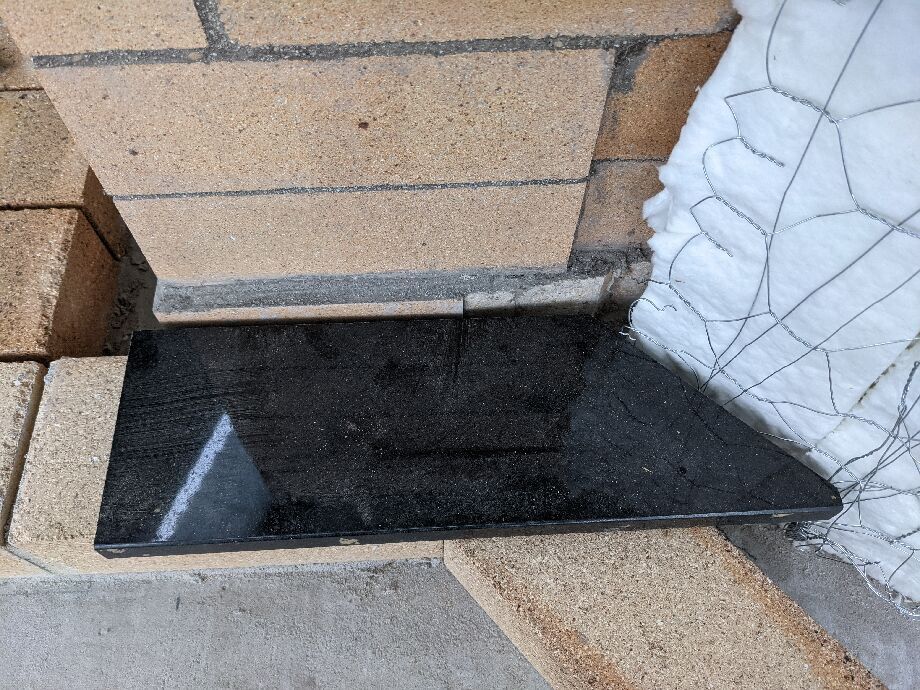 Right-side return from above - slightly longer than needed
I don't know if this is normal, but on both sides, these landing pieces were a bit too long. From the insulation blanket I am looking at about 50mm of render, and I want it covering this piece of granite, top and bottom, but also want the chicken wire fully embedded in render.
I have a wet tile cutter, so granite is easy enough to trim down, but I didn't work out why I had that problem, and I wonder if others also found it, and how they'd deal with it. I cut the right angle edge, but I guess with an angle grinder you could do a rough job of the 45 degree end, as it will be hidden in the render anyway.
I could possibly have really forced those side pieces into the chicken wire / insulation blanket, but it would have been very tight, and wanted to spring back.
Further down, in the granite side returns section, I have a photo showing the 25mm or so that I had to trim off those pieces to get them to fit, once the first (thin) layer of perlite render was on.
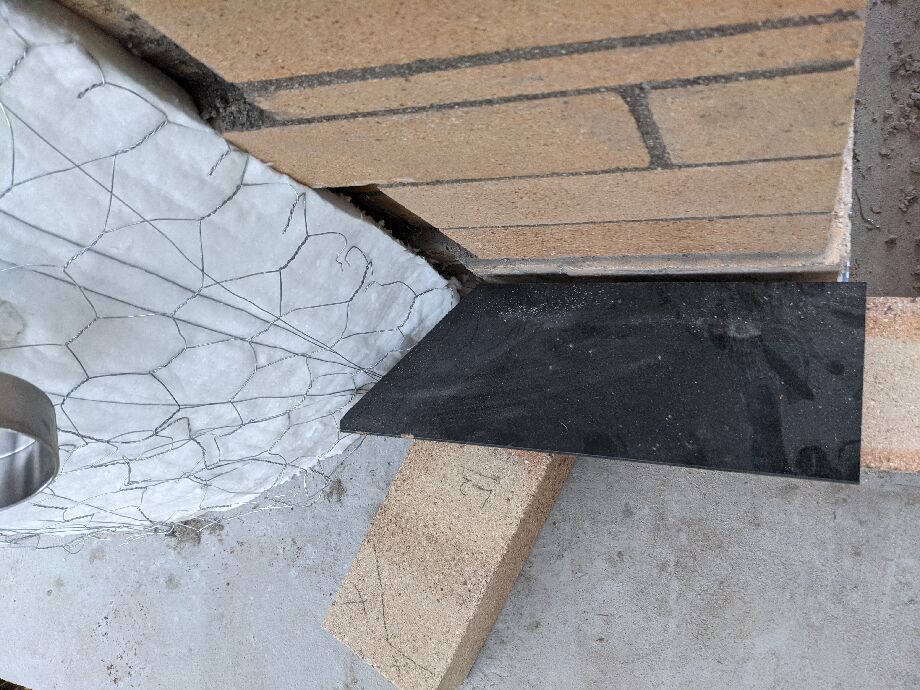 Left-side return from above - slightly longer than needed
Anyway, with the insulation blanket in place, I could then lay the final two bricks for the granite return (sides) - these required a bit of butchering with the tile cutter and an angle grinder (too thick to cut all the way through with the tile cutter). The sharp edge will be entirely hidden by render, ultimately, so neatness wasn't terribly important.
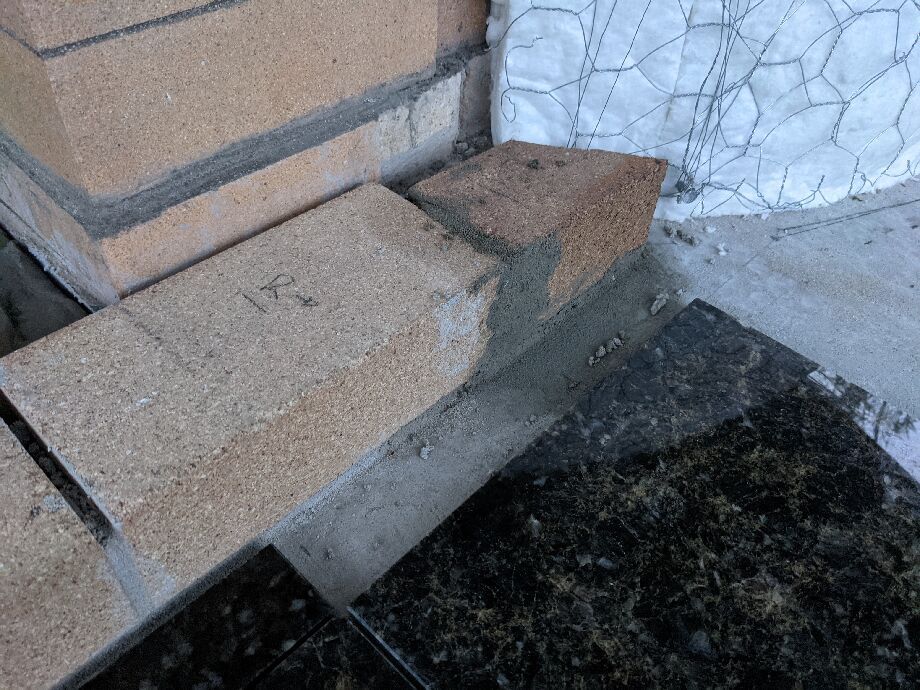 Side return riser bricks completed
Tiling the stand
I'd never laid tiles before.
I bought a 20kg bag of adhesive from Bunnings, because according to the estimates for adhesive, I'd need about 6kg - and they are sold in either 5kg or 20kg bags only. Plus I knew it'd be handy to have more, just in case.
Also, for reasons that make zero sense, a 5kg bag costs $20, and a 20kg bag costs $25
The plan was to tile the main granite landing (but not the small side returns) and the main stand granite of mine, in one go. I reasoned that tiling can't be all that hard. I was mostly right.
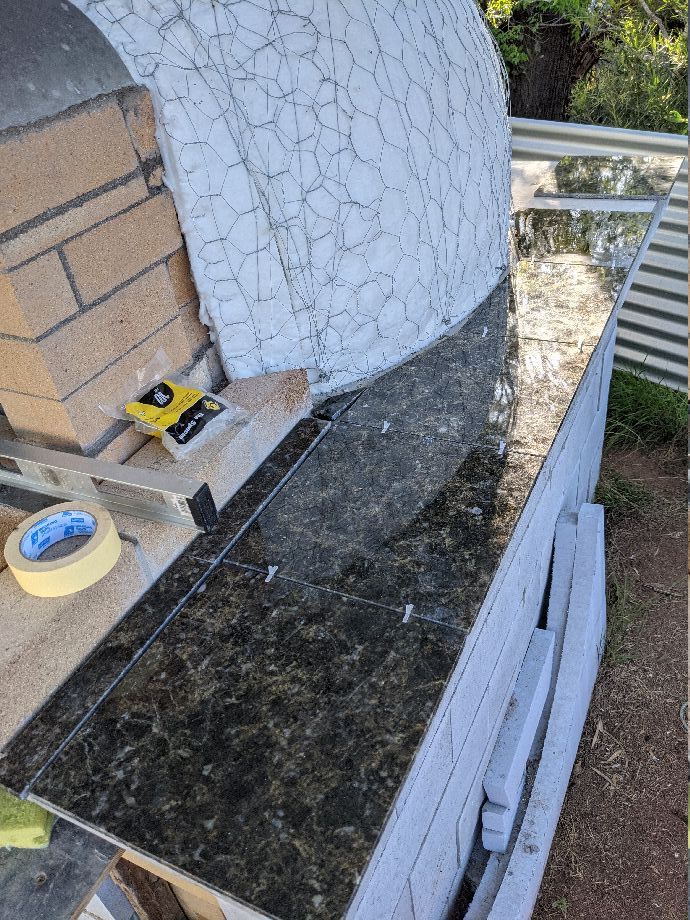 Dry run of cut tiles
I did a dry-run placement of the tiles.
Because the insulation blanket was in place, I could draw around the outside edge a 50mm pencil mark, and reasoned if I cut tiles to ensure they were within 10mm (inside) of that line, all would be well. It means all my cuts were straight lines, which made life easier.
I'm using 3mm tile spacers here.
I was using a 19mm wide piece of pine, that we'd hold up against the side of the slab, to check overhang of the tiles as we laid them.
I reasoned that so long as the sides were a straight line, with ~ 20mm overhang, then it'd look fine, and also meant when I put the 10mm tiles on the side, with 5mm adhesive, I'd have a lip on the top of the stand that would look intentional, but not be overly prone to chipping.
Once again, I was compelled to start my tiling experience with the single most important piece of granite -- at the front of the stand. If I'd started at the back, then any skew of the inter-tile gaps would really stand out, so I didn't have much choice here.
A few months earlier I'd ordered in a three square metres worth of Butterfly Green polished granite from the Marble Ceramic Corp in Sydney. These are supplied in 300 x 300 x 10mm form.
They came very well packed - a lot of bubble wrap around a foam package with plastic-sheets separating pairs of facing tiles.
Green's my favourite colour, and I wanted something to complement, rather than trying to match, the black granite landing. (If there were only a slight variation I think it could look quite jarring.)
They have a few different colours running through them, including little flashes of red, and I think they look great, fortunately, though they're not particularly green to my eye.
 The tiles arrive
I suspect I could have paid for these to have one edge polished up, and two tiles to have two adjacent edges polished up for the front corners, but it would have been expensive, and any subsequent breakage would be a massive pain to deal with, so I bought a wet polisher kit to go on the air compressor.
This turned out to be a fun, but very wet, exercise.
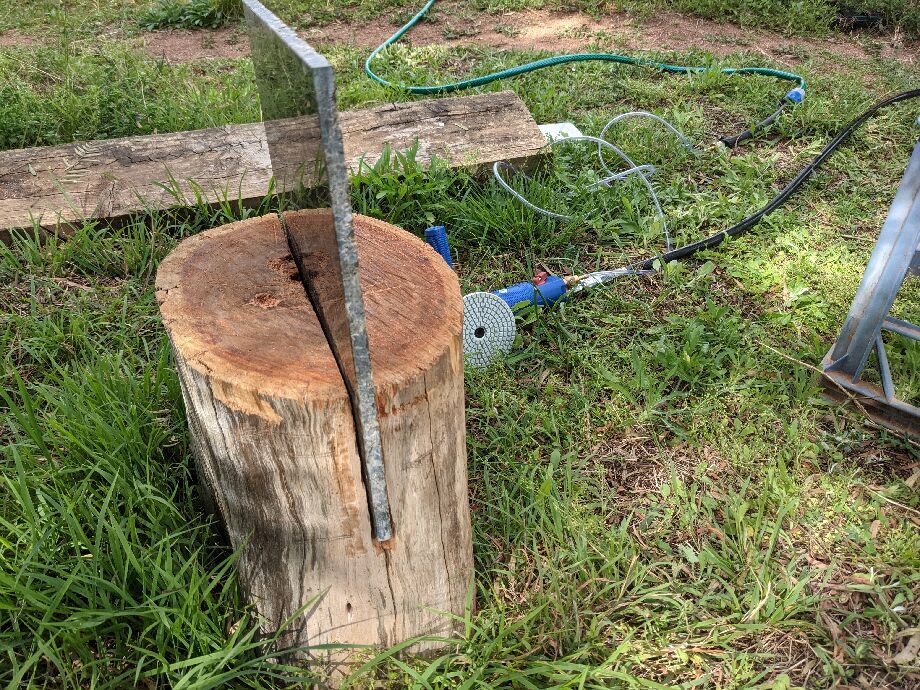 The polishing stump
To hold tiles so I could polish one side I cut a groove in a hefty ironbark log.
This worked reasonably well.
If I was doing more of these, I'd try to set up a bench with a vice arrangement that didn't mind getting very, very wet. But I wasn't, so I didn't.
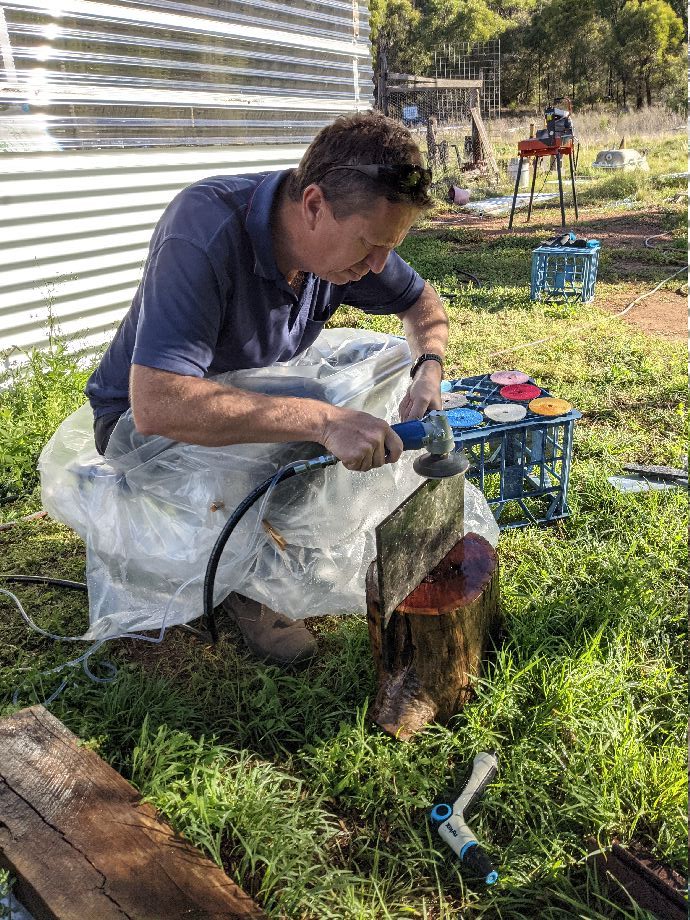 Wet tile polishing - note discs to my left
The main problem, of course, is that there's a lot of water being sprayed around.
The first time I played with this was quite a warm day, so it wasn't too bad, but did involve a lot of wet. So I started using a large sheet of plastic draped over my knees and down over the boots. This worked well, except when the wind came up.
The second problem is that my little rinky dinky air compressor would run out of oomph after working through perhaps half the sanding discs, so I'd have to give it five minutes to get up to pressure again, and then do the rest.
I'd never done any kind of tile polishing before, but this really was fun. There's discs (you can see above) that are colour coded and also have the grit written on the velcro side, that get slapped onto the polisher. You start with a very rough grit of 50, then work through the 8 or so discs, until you get to the 10000. You need to wait for the tile to fully dry to confirm you've done an acceptable job (all granite looks good when it's wet) but the results are impressive.
I needed to polish up one side of most of the tiles, and two sides of two of them for the front corners.
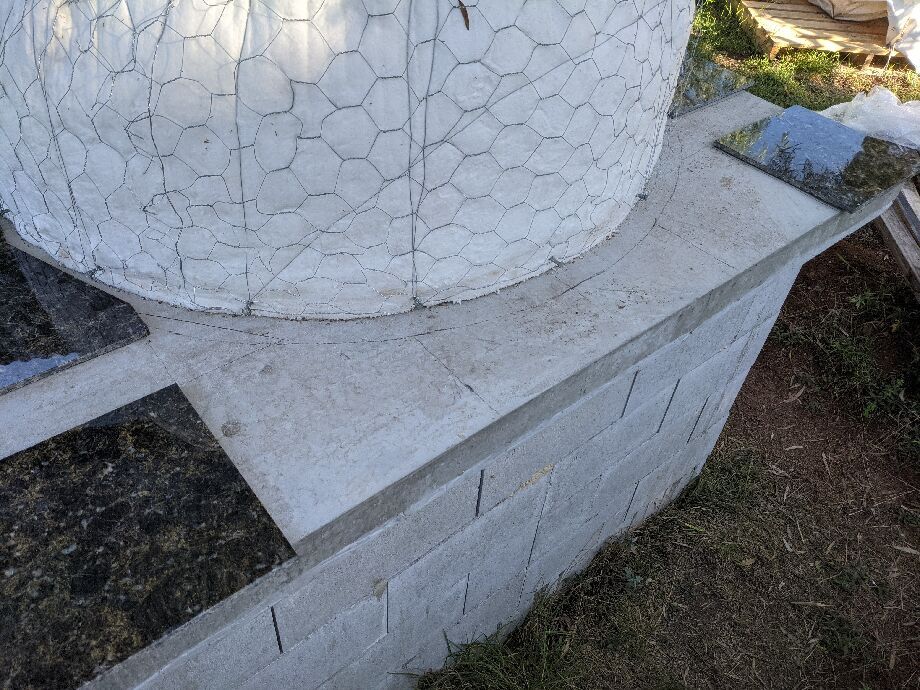 Marking out tiles and distance from the dome
Back to the dome and stand here -- this is where I was working out tile placements, mostly so I could measure the straight cuts for the edges that would be under the render.
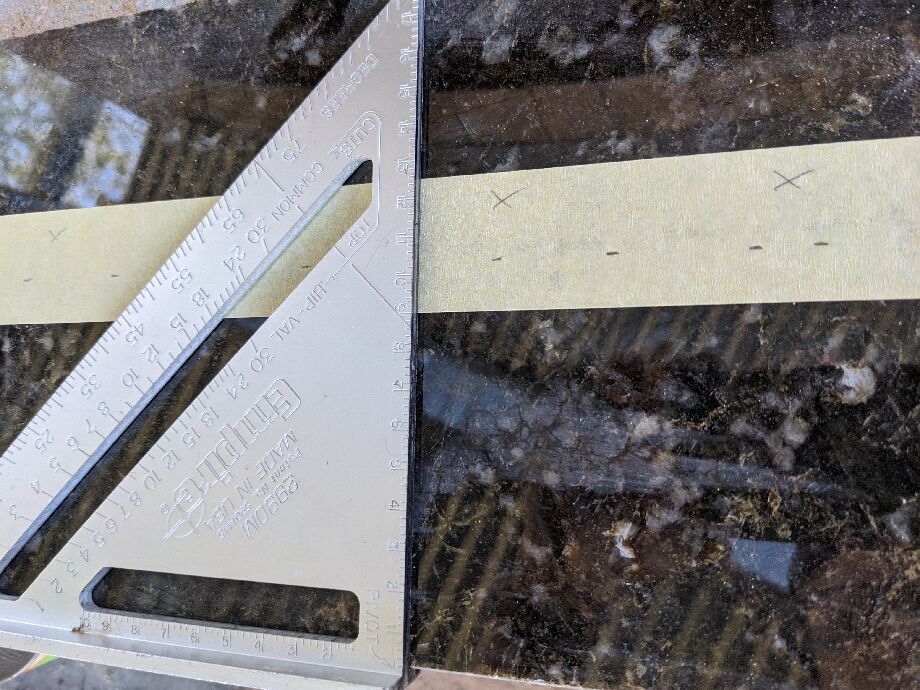 Marking out a line to cut along
Here I'm using some masking tape so I could use a very fine pencil to mark my cut. For the up-against-the-dome cuts I was using a red marker, as the cuts had 10mm or more tolerances. But for some of these cuts, say the tiles up against the landing riser, they were quite thin, and needed to be within a few mm precision, and needed to be parallel, otherwise it'd look a bit dodgy.
My wet tile cutter is reasonably accurate, but I think perhaps a half-degree off square, so the masking-tape with a fine-line, and then a firm hold with a thick-rubber-gloved hand, while making several passes with the diamond-blade, worked well enough.
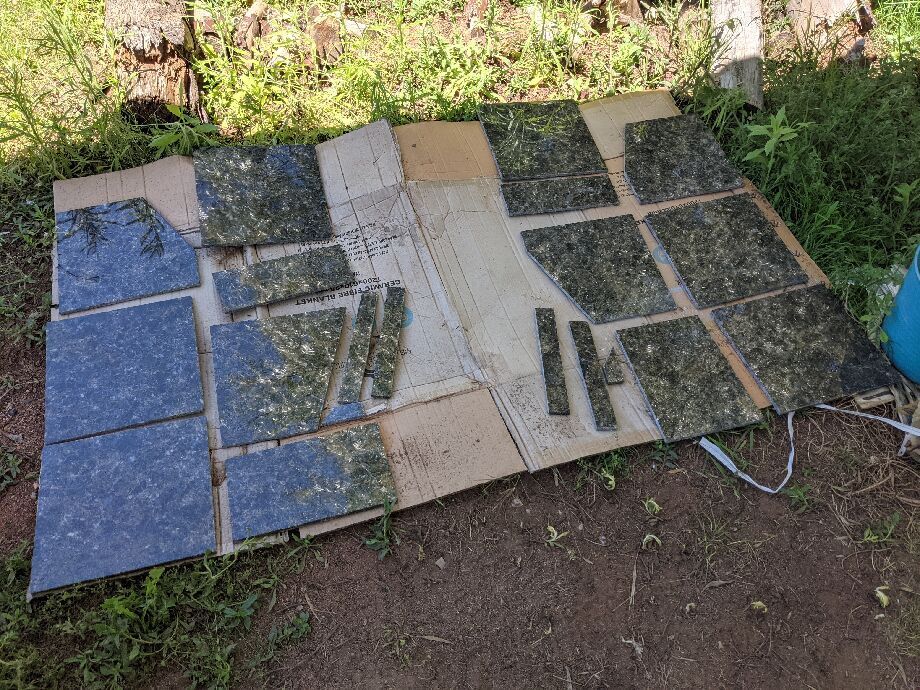 Laying out the tiles in sequence of use
Left and right sides were laid out, in order that they'd be needed, plus I also wrote numbers on the back so there'd be no risk of mucking this up once we got going with the tile laying.
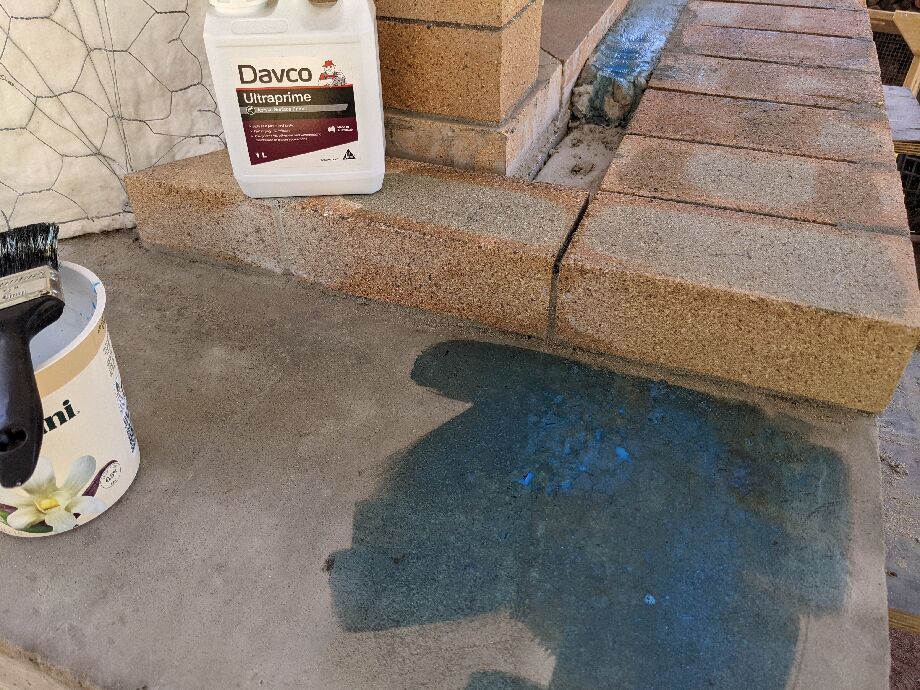 Primer going on
Davco -- the people that made the adhesive I was using -- strongly recommended that I buy more of their products.
When applying adhesive to cured concrete, they say you should definitely use a primer. This is a water based solution that does ... something. Anyway, who am I to argue.
A good scrub to get rid of dust, sand, etc, then a wetting down with some sponges so the adhesive didn't flash dry, then let that water dry off a bit to a matt finish, then a primer, and then a half hour later you can do the tiling.
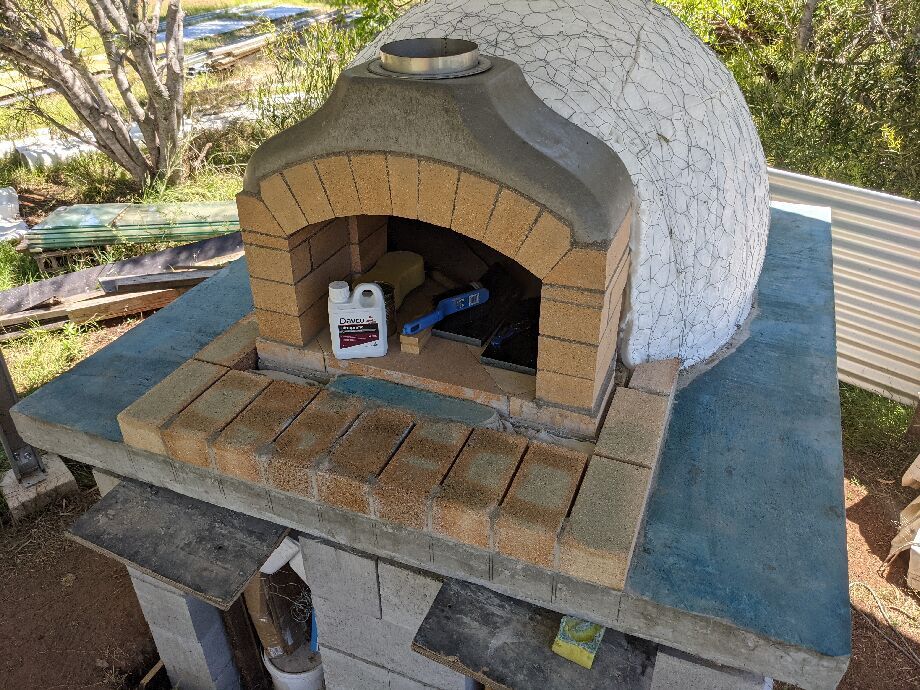 Priming all the surfaces
I primed the top of the concrete slab, and also the top of the landing bricks.
In the last few photos you can also see where I had filled in with some mortar an area between the landing bricks and the oven floor tiles. The granite landing is very strong, but I felt I wanted something to support the center of it there, just in case large cast iron dishes are coming in and out and repeated bumps cause some stress along that edge of the granite.
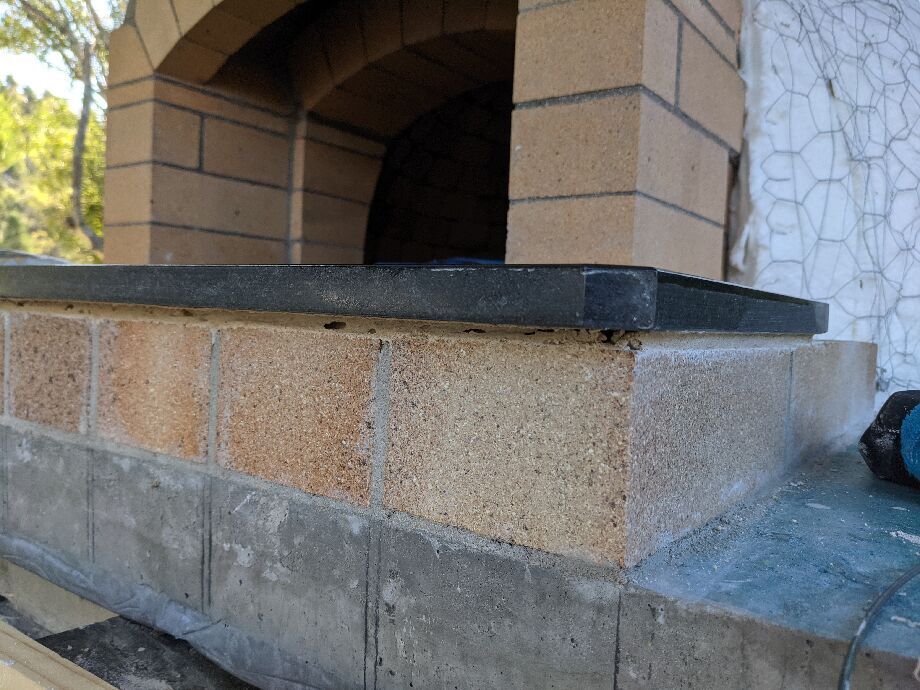 The landing has landed
The granite landing is heavy, and I had only a small overhang at the edges to hold it as I put it into place.
I ended up putting it into place by eye and by feel of finger - we'd done a dry run of course, and determined that because my floor tiles were off by just under 10mm (they were further from the front of the slab on the left, than on the right side) that I'd need to have about 5-6mm extra overhang on the left front of the landing, and a few extra mm between the landing and the oven floor. So the criteria was mostly around making sure that the side pieces would align on the outside edge, and have space on the inside (up against the arch walls). As it happens there's a good 5mm space there, on both sides, so quite a bit of wiggle room. Any grout or mortar I use there will be dark, so small variations are quite tolerable.
I'll note that my (just shy of) 10mm or so of adhesive that I anticipated having to lift was a mistake.
Using a 10mm notch would give you only about a 5mm layer of actual adhesive, I have since worked out (and should have understood before I started, I suppose).
Consequently we ended up putting on a few bigger blobs of adhesive, and running some grooves through it that didn't get all the way to the brickwork.
I'll note that Ben's tiling of this in the videos is wrong. The recommendation from tilers is to do the grooves at 90 degrees to the long edge - that is, grooves for this landing would be from the oven to the front, 300mm or so long. Ben does these length-wise - so the grooves are 1000mm long.
The reasoning is that as you wobble your tile sideways, you want to remove the air gap between the grooves of adhesive, and this works better if the air has a shorter distance - it's less likely to get trapped if you've got the shorter distance.
Also, in this particular instance, you need to move the granite landing left-and-right - and your adhesive grooves should be at 90 degrees to your settling-in movement.
This is what you learn from watching many tiling videos on youtube prior to your first foray into becoming an amateur tiler.
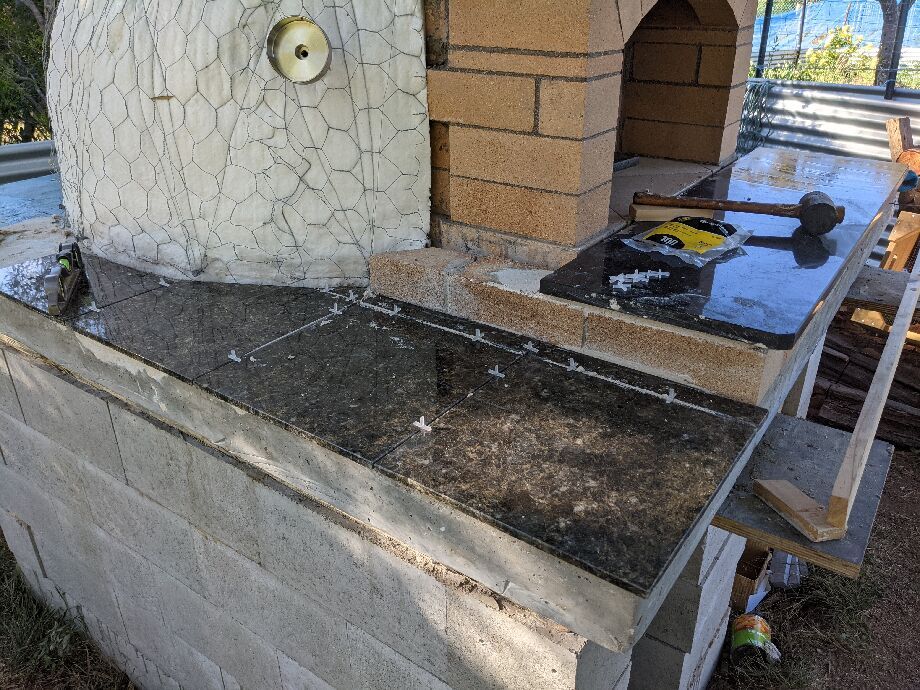 Left-side stand tiles
The smaller & lighter tiles are much easier, of course.
These went down fairly easily, and I was extremely cautious with them. I had one spare polished-edge tile ready to go, and the tile cutter ready to go as well, in case of an accidental breakage.
I had one of the tiles, when I was carefully handling it much earlier, just break along a weak grain of the granite. 10mm granite does feel a bit thin and fragile, even though it was (mostly) pretty sturdy.
The 19mm pine length on the right (above) is what we were holding up against the overhang, to give us a) a straight line for the tile edges, and b) a consistent 19mm overhang.
The back left-corner was always going to be a bit of a kerfuffle, as the slab dipped a bit there, and it turns out my slab may not have been perfectly square. (Off by a few mm in the diagonals, I suspect.)
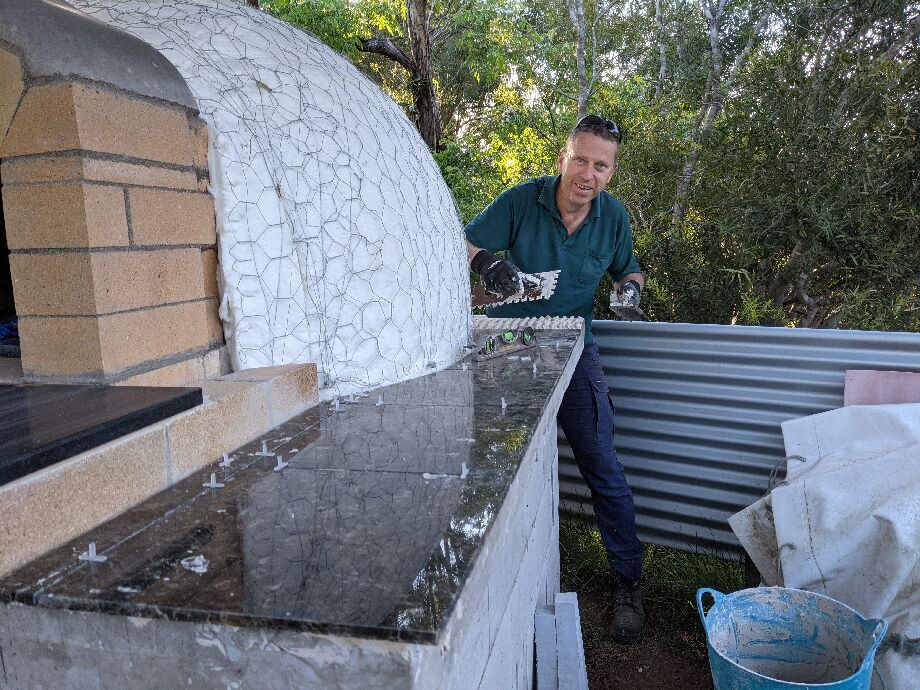 The proprietor getting into the swing
The right-hand side went down even more easily.
We used a straight edge (a 1 metre long spirit level) and a much shorter spirit level, to check the joins were the same height. I knew there'd be some gentle undulation, but I reasoned so long as there were no sharp rises / dips where the tiles met, it'd look good, and also reduce the risk of the occasional wine glass breakage if it was put down on an uneven surface.
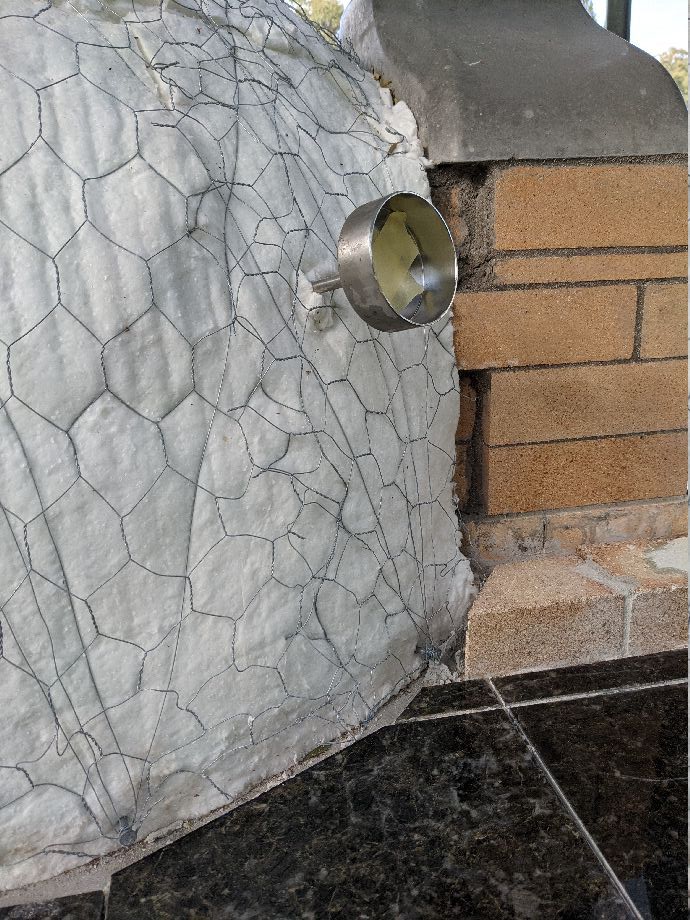 Tiles around the insulation blanket
Once the render was done, that tiny tile above ended up with perhaps 5mm visible.
Still, I know that it's there, properly spaced, and level.
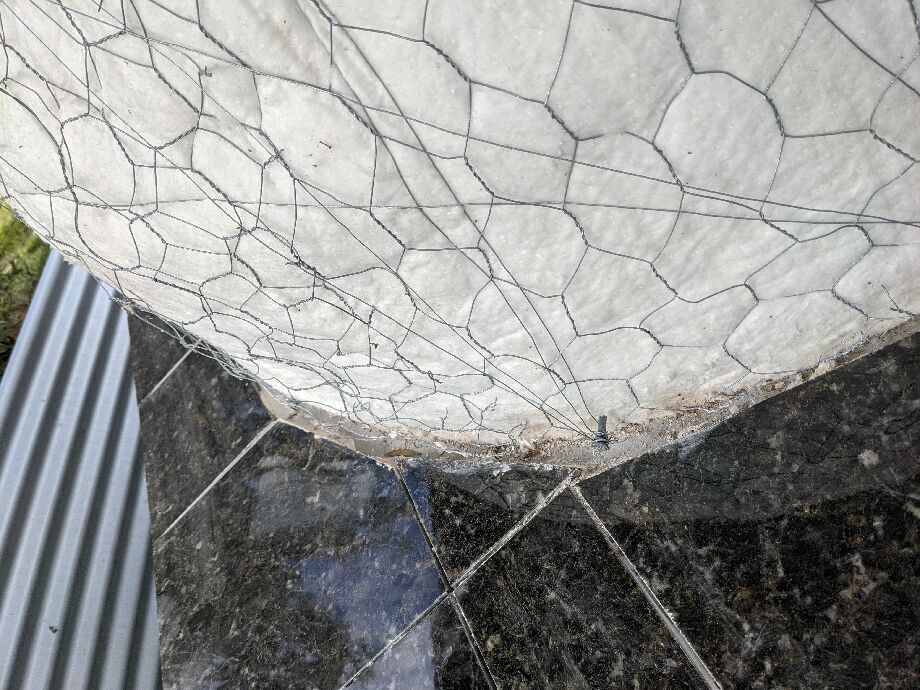 More tiles around the insulation blanket
A couple of days later I experimented with the following as a way of getting the side tiles in place. At the front I'll overlap that tile edge, so none of these needed polishing. I reason that the grout that goes on later, at the top of the side tiles, will hide any slight variation in thickness, and a straight edge at the bottom, ensured by the timber guide / support here, will give it a clean look.
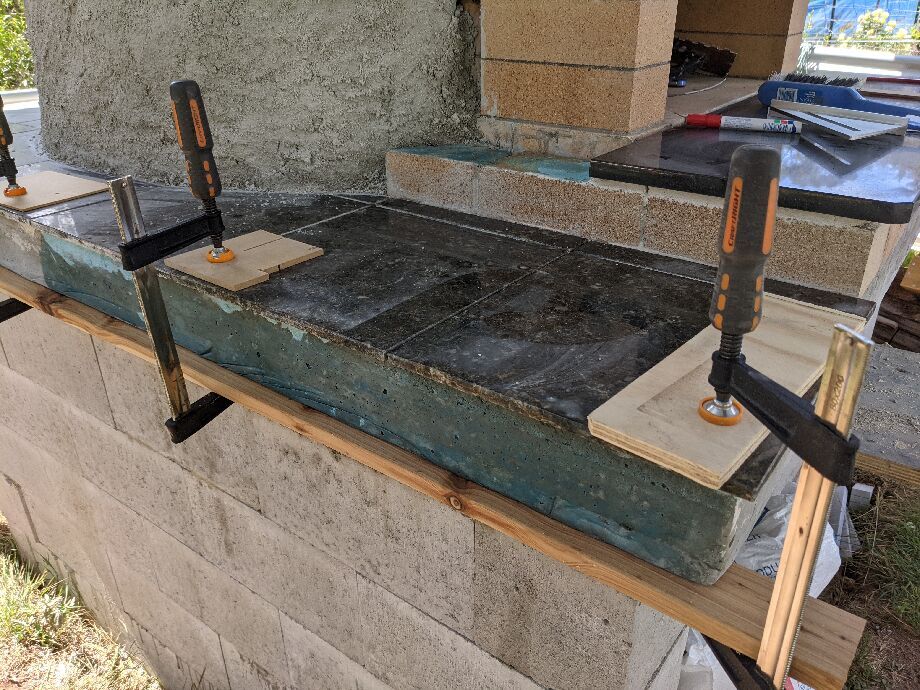 Side tiles support timber
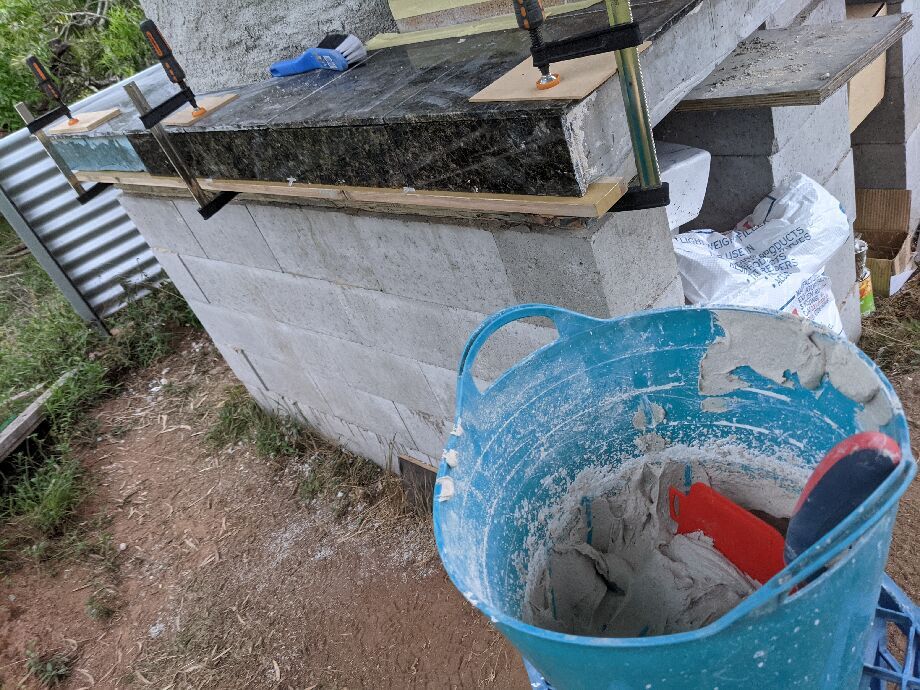 Side tiles going on, with 3mm spacers
In summary, the tiling process took two people from 13:00 through 19:30 to complete the main granite landing (but not the side returns), and all the square pre-cut / pre-polished tiles around the 1800 x 1900 base. Zero experience with tiling, and not a 100% perfectly flat slab to work with. I had to cut two custom sized tiles for the middle back, as I knew there may be some variation as I came into that area from the sides, and basically just wanted to obtain a fairly straight line at the back there (even though it'd be a very low traffic area)
What would I do differently?
The big thing - I should have assumed 5-6mm of adhesive, when I was laying the bricks onto the slab, for the granite return. Trying to in-fill about 10mm was not so fun.
A small cosmetic thing with the side tiles shown in that most recent photo. I should have cut the first (front) to be slightly shorter, such that the joins on the top surface aligned with the joins on these side tiles. As it stands, they are offset by about 20mm. (The front edge tiles will sit in front of these side-edge tiles, so the latter are aligned with the concrete slab corner, not the top tiles.) I'll rectify that when I do the right hand side.
Rendering the dome
A few days after finishing the necessary prerequisite tiling work, I started on the rendering.
The kit includes 2 x 100 litre bags of fine perlite. You bring your own cement, lime, and washed sand, mixing them all up in a 5:1:1:1 ratio.
In the videos it's emphasised that you should definitely do this in several layers -- three or so -- building up 10-15mm each layer. If you're a professional renderer you could conceivably get it all done in one go, but even then it feels like they strongly discouraging this.
Which is fine. I've never applied a render before, and was aiming for a final quite thick coat, at least 50mm. The advice given was that there's plenty of perlite in the kit for some flexibility there.
The first layer
5pm through 7pm for the first layer - it's hard to keep a wet edge going, and I probably had it too dry, worried about the workability and potential weakness of a too-wet mix, over-correcting in advance.
That first layer used about 45 litres of perlite, judging by my nine mixes of 5 x 1 litre yogurt port containers (very handy things to do ratio-based mixes).
As noted, quite dry, felt a bit like breadcrumbs, but was still able to get a slight sheen on it with the trowel once in place, but it did dry out looking a tad rougher than I had hoped or expected. I reasoned it's mostly there to bind to the ceramic blanket and chicken wire, and a rougher surface will ensure the next coat binds well to it. Outer layers / coats will be where the strength really is, so the inside layer(s) don't need to be strong, they're more for the insulation properties.
The official videos don't really show any detail of the first few layers, unfortunately, so the above was just my own estimation.
It does look like they float the first few coats, but apart from the binding thinking above, I didn't know what the 'give it a while' timing suggestion actually equated to. I did give it a quick gentle go, but found that the float caught the perlite and seemed to pull too much, rather than sand / flatten things down, so I deferred further attempts until the last coat.
Anyway, the first layer felt to be about 10mm (15mm perhaps in a few places), and given that chewed through 2/3 of the first of two bags of perlite, I did wonder about being able to build out to 50mm or more from the remaining perlite.
What would I do differently?
Used my shop-bought perlite (much larger particulate matter) for the inner / first layers.
Made the mix slightly wetter, so it was easier to work with - it may have cracked less significantly too. (I had cracks on all but the final layer.)
Measured from the tiled edge of the platform to where the blanket was - either by measuring in from the outside edge at various places, and making a note, or some masking tape with distances scrawled on same, from the insulation blanket edge. As it was, I was gauging 'that's about 10mm' and 'that's about 15mm' - for each successive layer, but that's prone to massive errors. I got some estimation from some of the tile corners, especially where I'd cut a tiny little triangle of a tile, that were then almost completely covered by render. At the front it's easy to tell, left and right, gauging from the brick arch, and ultimately how it looks is what matters most.
 Ingredients for the render
 Making up the first render batch
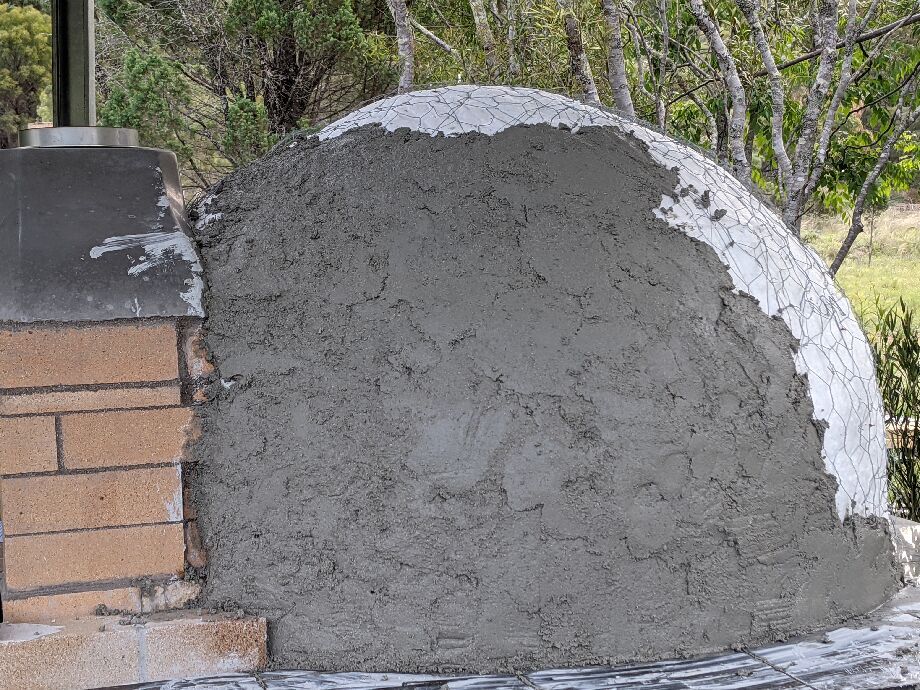 Applying the first layer of render
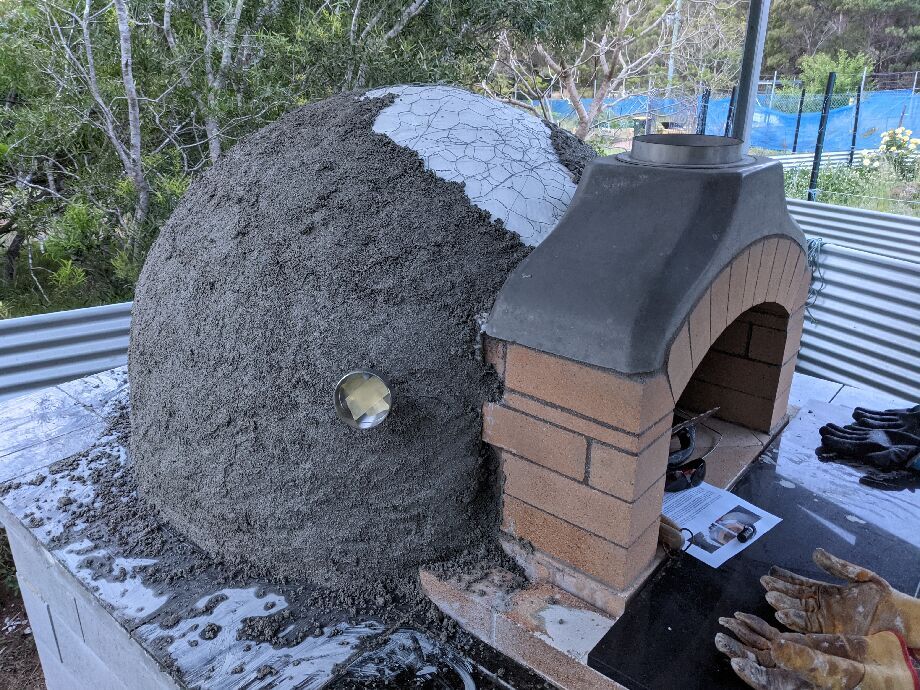 Applying the first layer of render - looking quite crumbly
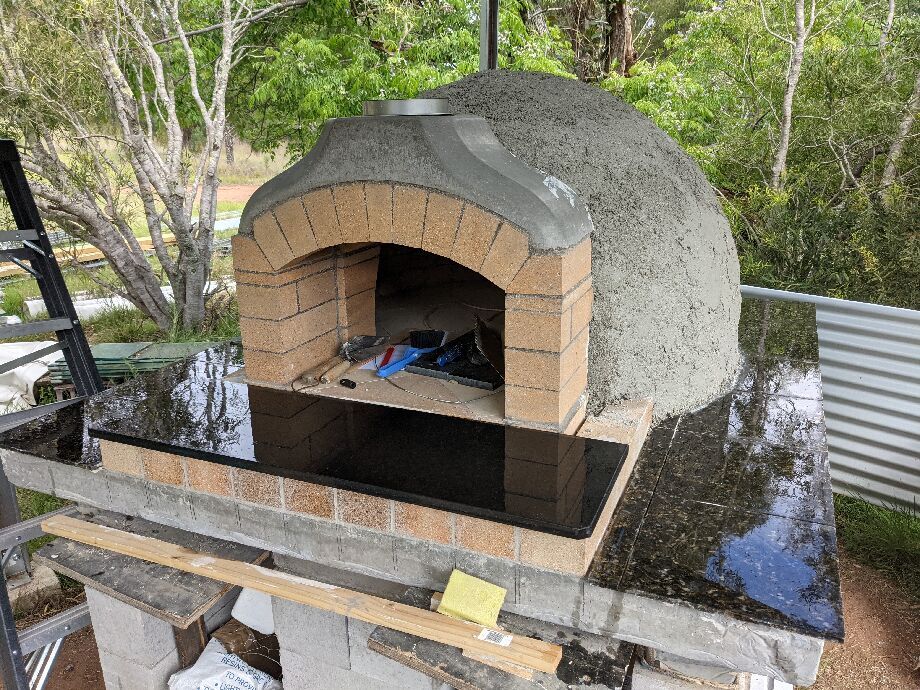 First layer of render completed
Interlude - granite side-returns and grouting
I knew that the side granite returns needed to be embedded into the render, but without leaving an air-gap (ideally) - so that meant doing this bit once the first layer of render was in place.
The support bricks were already mortared in, with a 40mm gap between them and the insulation blanket, so that was easy to work with.
I may have done something wrong, as the granite needed a significant amount removed, on both sides - about 20-30mm (allowing for a 3mm grout join with the front landing).
Happily I have a wet tile cutter, otherwise this would have been unpleasant. It was easier to trim from the front (square) edge than the rear, 45° cut.
Similarly, I thought grouting at this point would be best, as it would ensure no gaps / grooves between the tiles to let water come in under the insulation. This might not have been 100% sensible in retrospect, due to the dust (from the render) staining the lovely black grout later on.
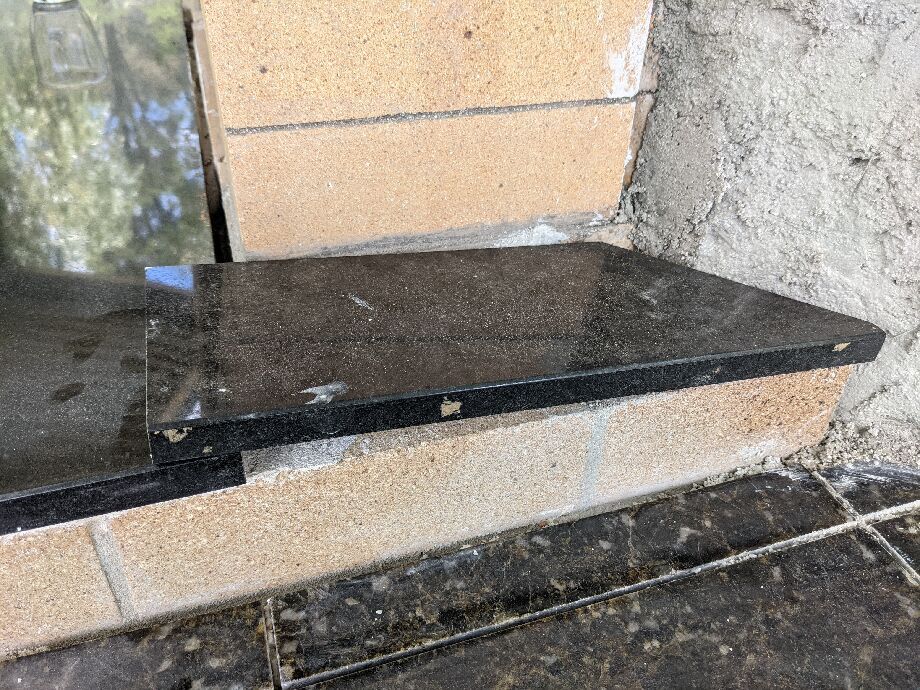 Right-hand side granite overlap
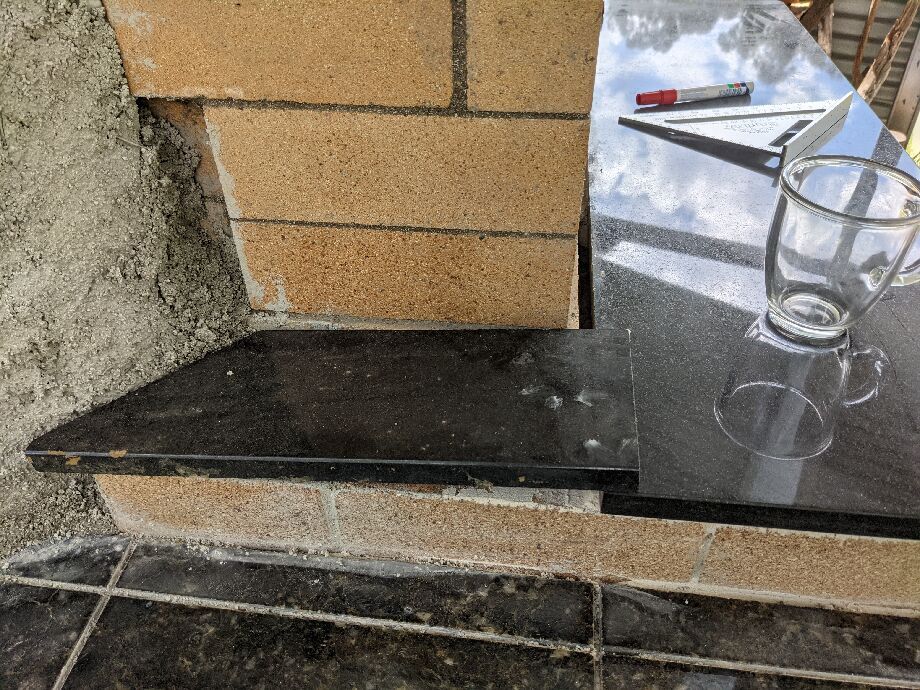 Left-hand side granite overlap
Pre-coloured grout (powder) saves some time, but still needs subsequent waterproofing.
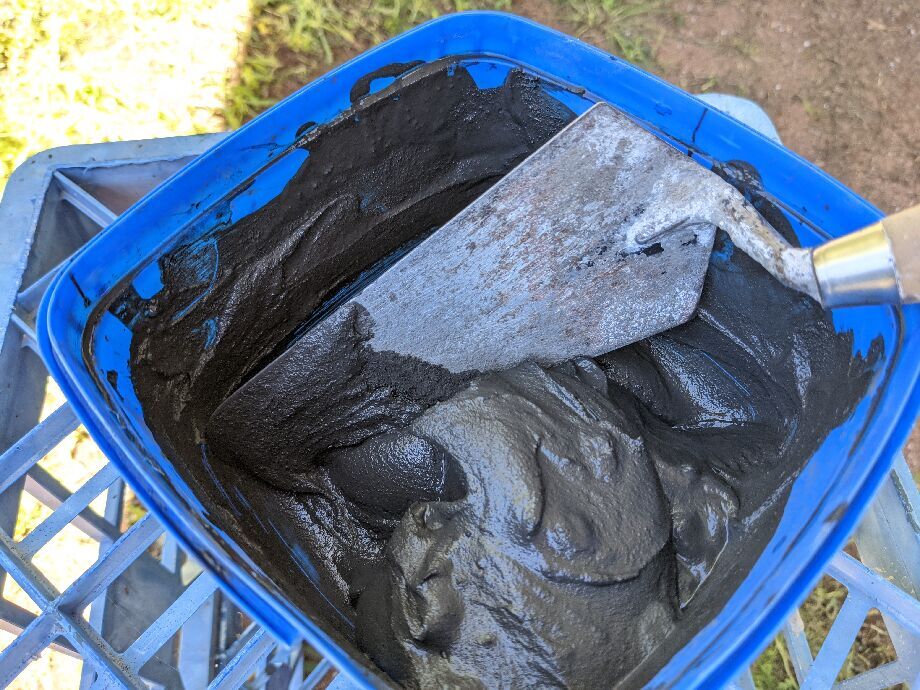 Making the grout
Masking tape is a godsend with ensuring some clean lines on the grout.
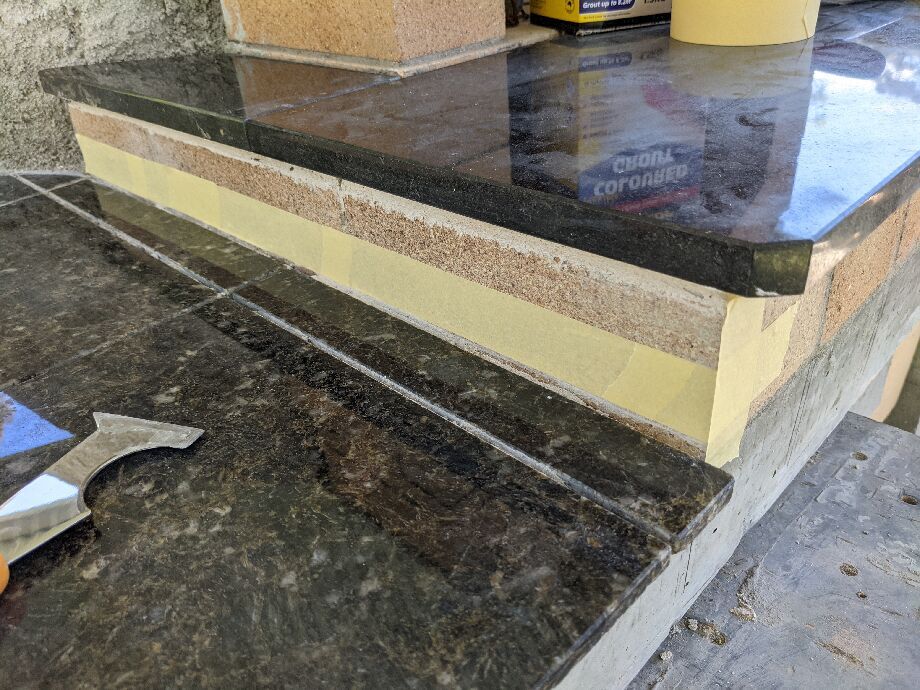 Grouting preparation
Black grout with these ostensibly green-ish granite worked well, I think.
Also shown here is the location and fitting of the side black-granite return, a few mm gap up against the first layer of render, but now mortared in place, and grouted of course.
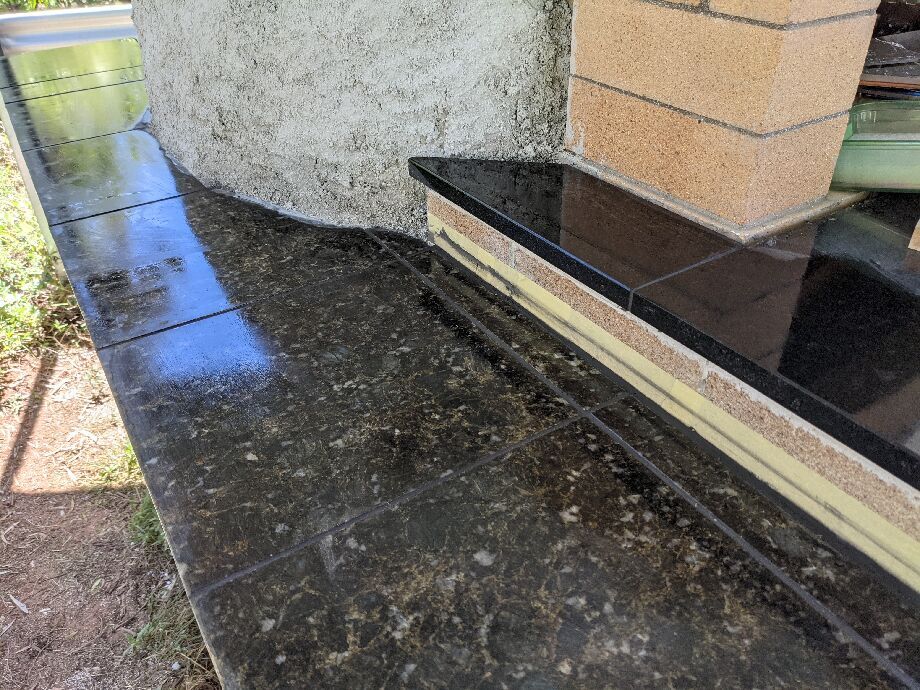 Grout done and drying
The second layer
Each of the third and fourth (final) layers of render took about 3 hours, working cautiously, and with the help of an assistant - so about the same time as the first two layers, solo.
As above, only the last layer was finished up to a good, smooth surface.
By midday through the third layer I had to fall back to my spare perlite (Brunnings, from Bunnings) which I hadn't inspected at purchase time, but when I went to use it I noted the particle size was about three times the stuff that the Melbourne Fire Brick Co provided. I contemplated trying to roughly grind it down between some large flat pieces of timber or bricks, but the volumes make that infeasible. So I just sucked up the larger size. As noted earlier, I should have investigated this before doing any rendering, and used this stuff on the first layer or two, where it wouldn't be seen.
Rendering the dome is one of the very few tasks in the build where the first time you try something, is not the thing everyone will see in the finished build (compare first floor tile, first rear dome bricks, first arch bricks, etc.
Ultimately with the final (fourth) render layer, I used a stickier / wetter mix (not soggy, but less crumbly than I'd been using before) and bumped up the sand and lime ratio a smidge, due to the coarser perlite, and went quite thick - perhaps 15-20mm.
Each earlier layer had shown cracks within 6-12 hours, but that final layer did not, at least not until I got the first serious cooking fire going in it, and even then only very narrow (1mm at most) cracks, so I'm happy with the final results of the rendering (well, so far ...).
I never did get the float going, partly because of that coarser perlite, and partly because the 'some time later' recommendation wasn't hugely useful. After 15-30 minutes, the float just pulled the perlite out of the render, and left thick scratches along the surface.
I'd kind of resolved to needing a fifth layer, and sourcing some finer perlite for that purpose, and doing it properly, but happily I went back to the fourth layer after about 3 hours, using a wet nylon-backed sponge scrubber, and doing a full rubbing over the surface. This ended up working out really well in terms of finish, though I do have a couple of wisdom bumps around the top of the dome, where I'd finished my batch of render, and couldn't be bothered making up a tiny new batch (thinking I'd be doing a fifth layer anyway), but ultimately deciding that it adds to the character of the thing. Nothing for water to sit in, just very slight undulations that I expect no one (else) would ever notice anyway.
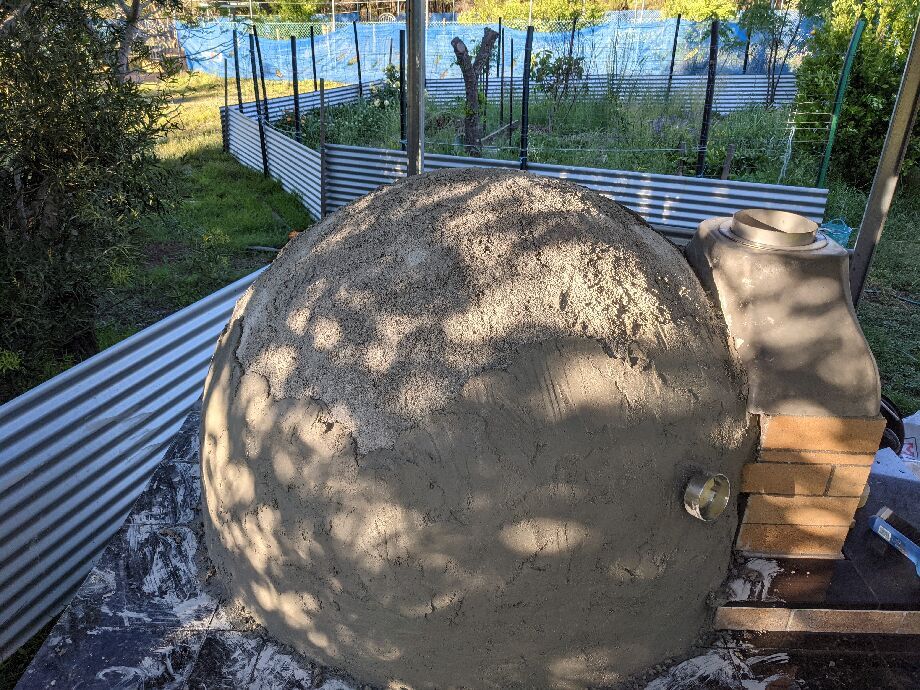 Second layer of render going on
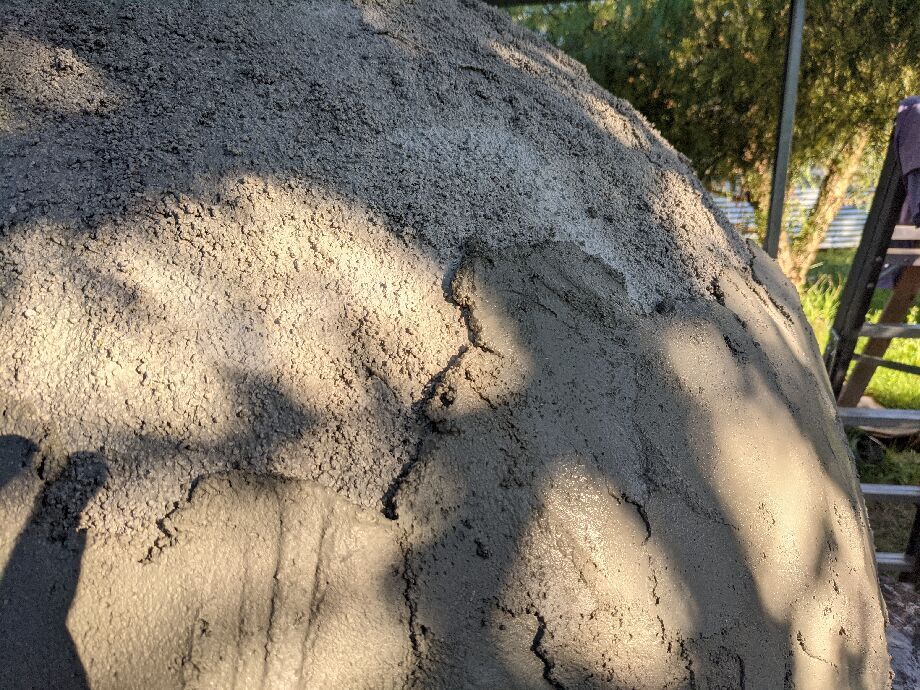 Second layer - showing thickness
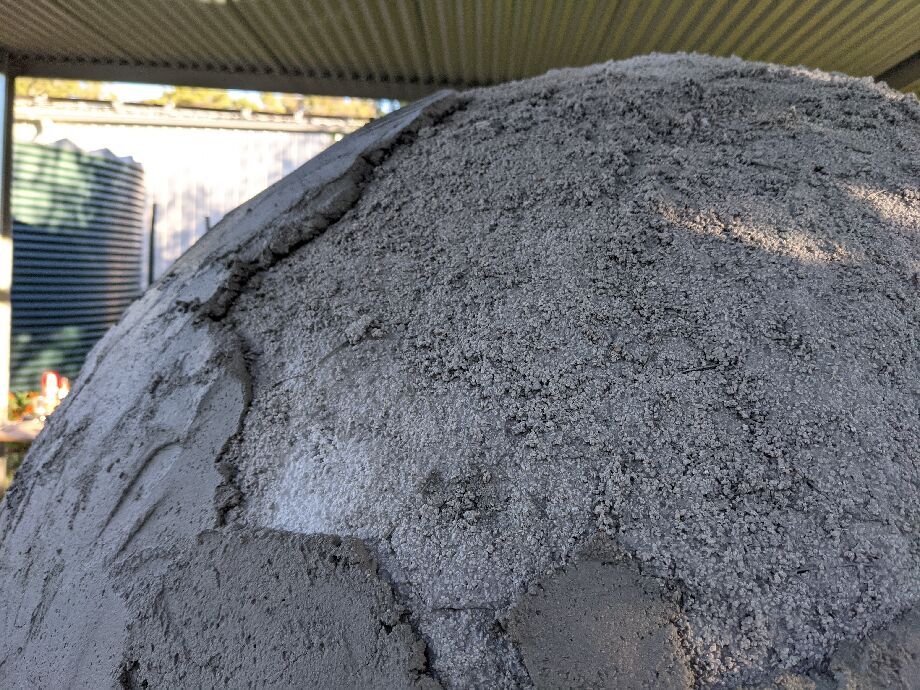 Second layer - showing thickness from a slightly different angle
I used my Bosch corded drill for this, and basically shagged the chuck on it. It's not designed for this job, and so I ended up using smaller batches (3-4 litres of perlite at a time) and doing the wet mixing by hand. Lime's a horrible ingredient to work with.
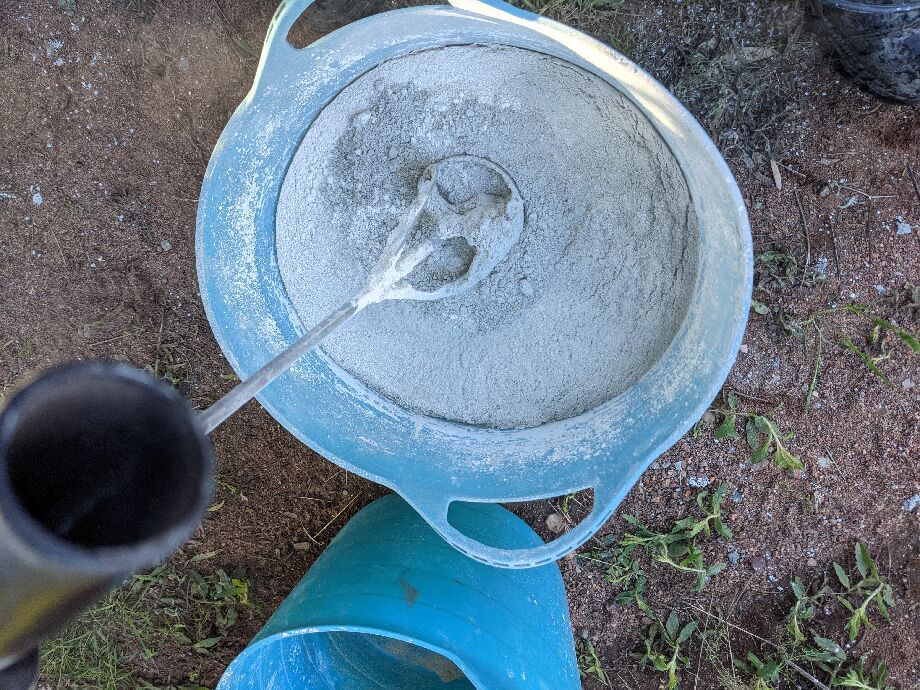 Mixing the dry render ingredients
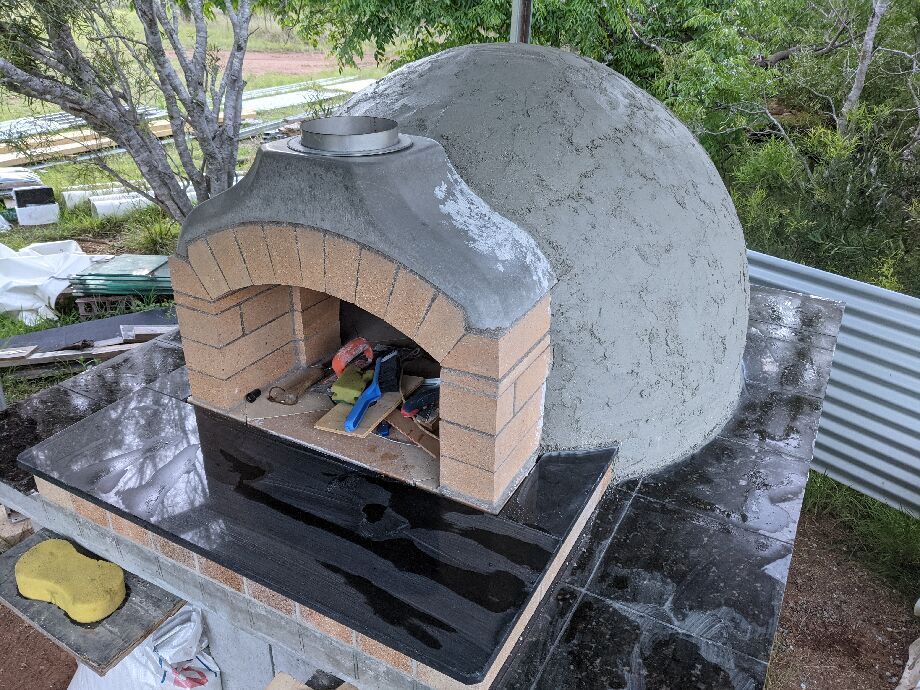 Second render done
The second render was slightly moister, and I experimented more with using the trowel to try to lift the moisture up to the surface and give a better finish, but was still keen to have a fair bit of mechanical grip remaining for the next layer to bond to.
The third layer
The third layer was much the same as layer two, with the exception of locking the thermowell temperature gauge socket into place.
I loaded up the temperature gauge, finger tight, and then marked which way the thermowell needed to be oriented using some marks on masking tape, then pushed it in as I was applying the third layer.
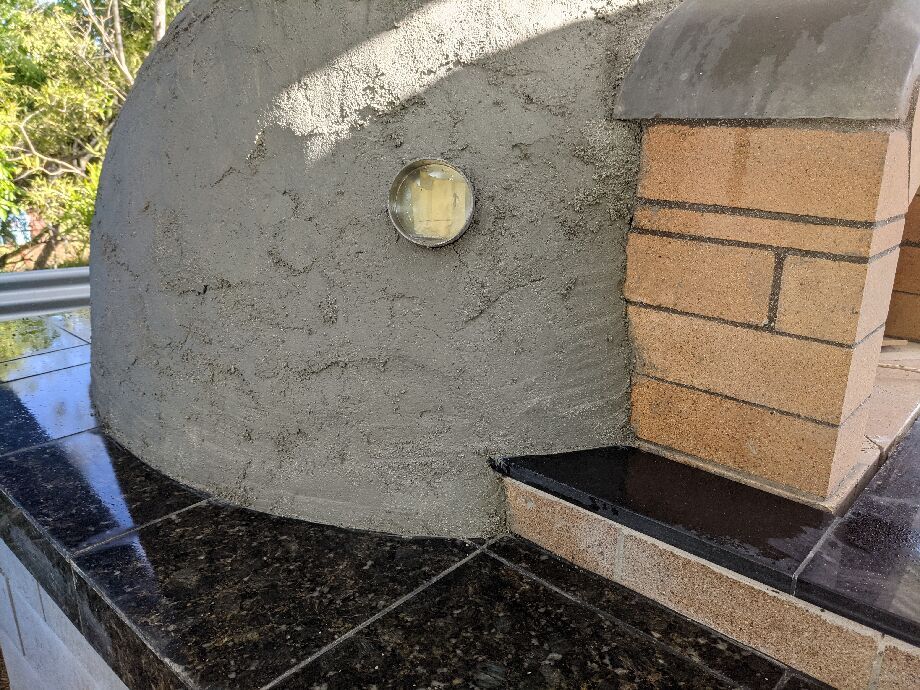 Third layer of render completed
Joining to the brick arch was tricky, as it was hard to get the brickwork there moist enough to hold a really good bond.
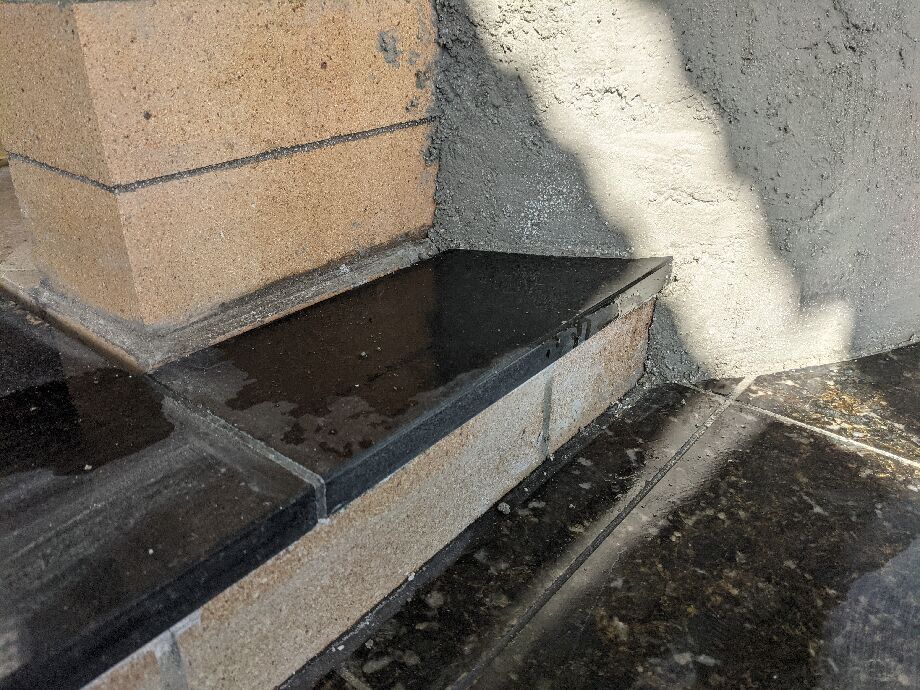 Joining third layer to brick arch
In the third layer you can see the transition to the coarser perlite (top / right).
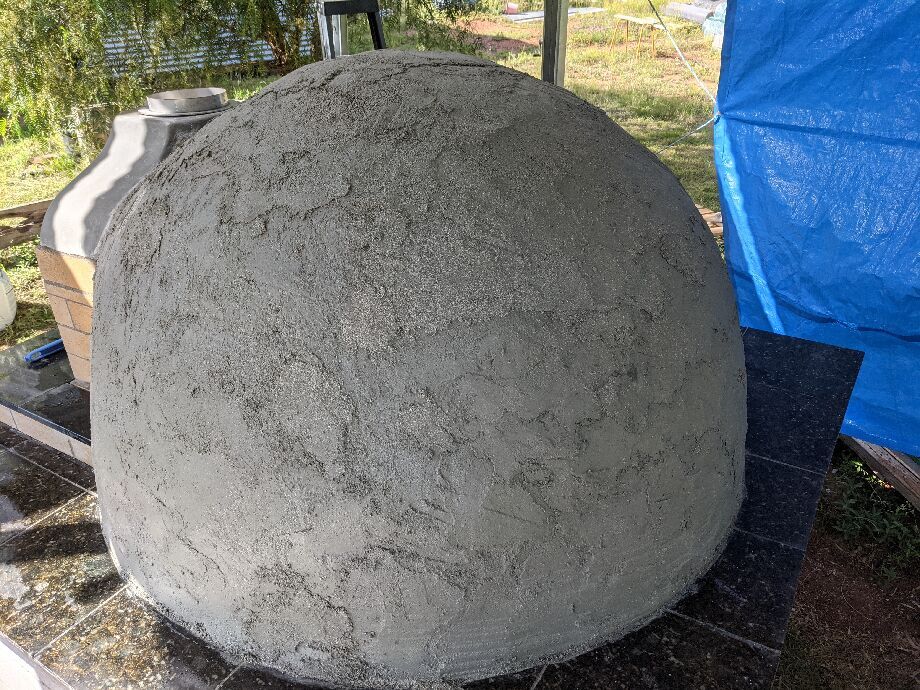 The third layer is complete
The fourth layer
Like many things about a pizza oven build, by the time you start feeling comfortable with a task, you're nearly finished.
Definitely the case with the rendering -- I had everything laid out, finally, properly, so I had a smooth work flow, and was comfortable with the consistency and application.
Even up until I'd finished rendering this layer, I expected I'd do a fifth layer.
Happily, I didn't have to -- I was really bored with the whole rendering thing by this time, and I had no idea how I'd do the area around the thermowell (I was already built-out to the lower edge of that) if I went even thicker with the outer insulation render.
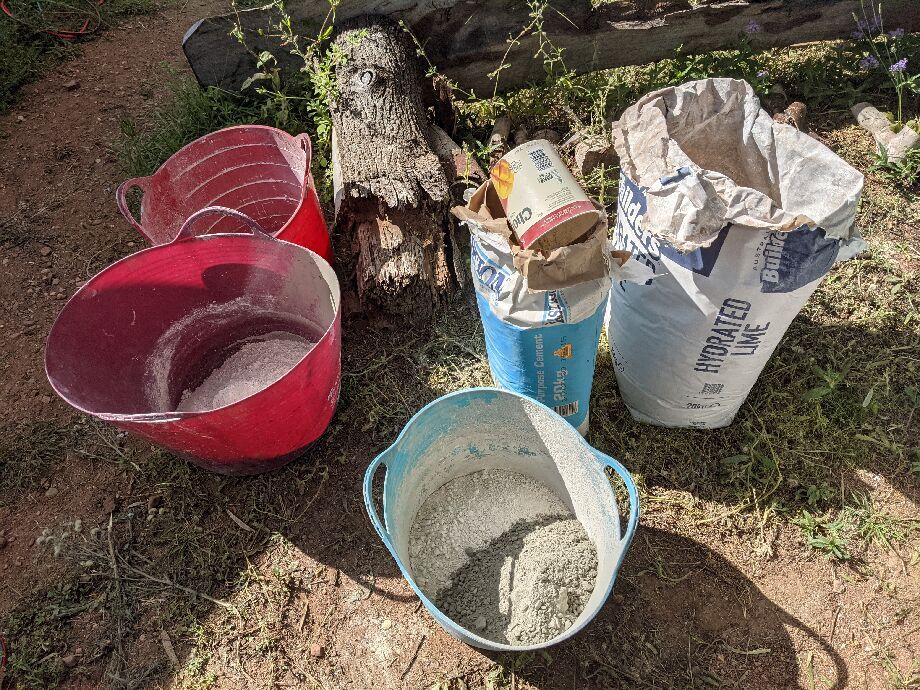 Buckets of ingredients, ready to go
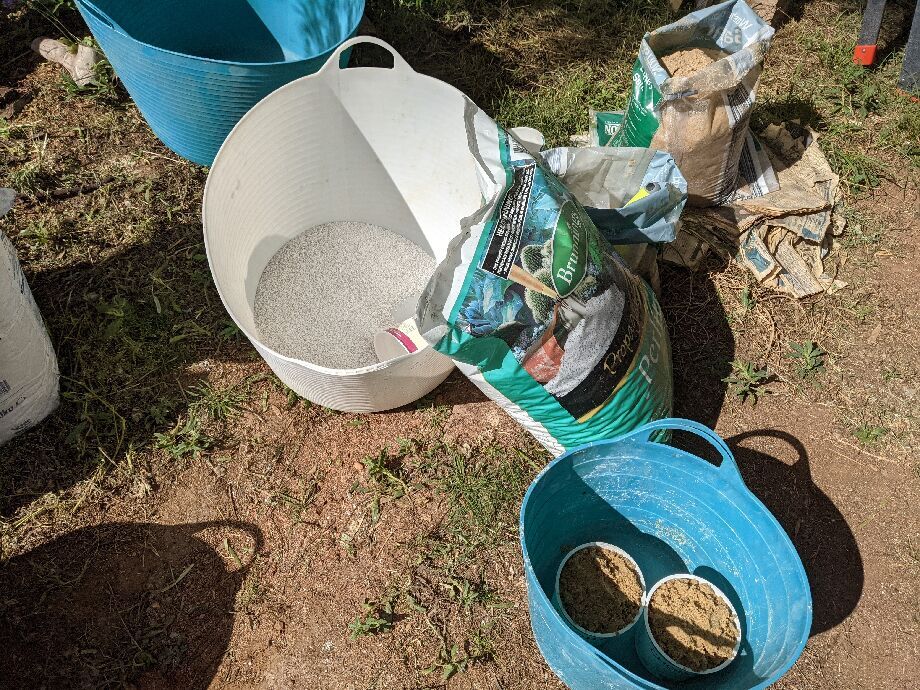 Buckets with yogurt container measuring scoops
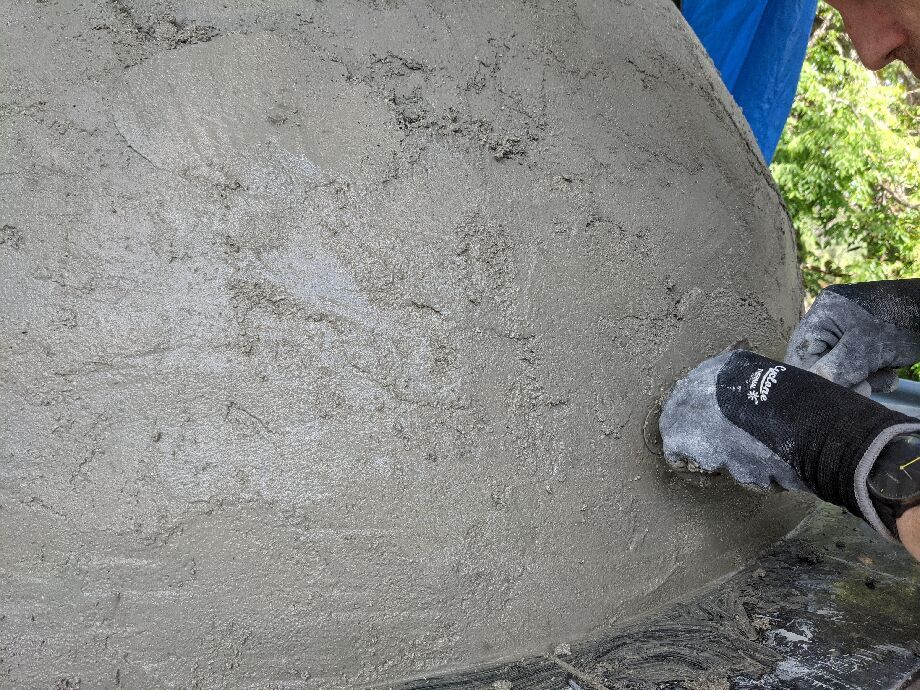 Applying the final render layer
As you can see, a bit moister going on with this layer, and I was moving slower - partly to try to get a decent finish, partly because I was working with the wetter mix and was applying it thicker than previously, also because I was using the coarser perlite, and had bumped around the ratios slightly (a touch more sand & lime & GP cement).
After three hours I returned - the render was going off nicely, so I cautiously tried to smooth it down with a wet nylon / sponge scrubber, and achieved good results with the test spot on the back, so then went over the whole thing.
I was quite happy with the final results, and I know I'll hide some rough bits with the acrylic sealant paint when it finally goes on.
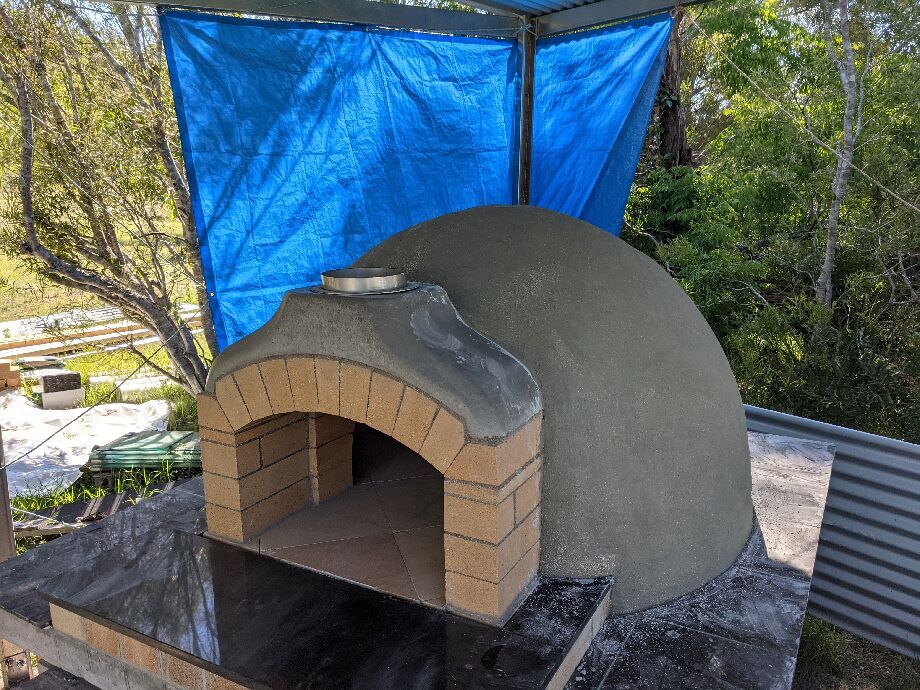 Render, final layer, after smoothing out
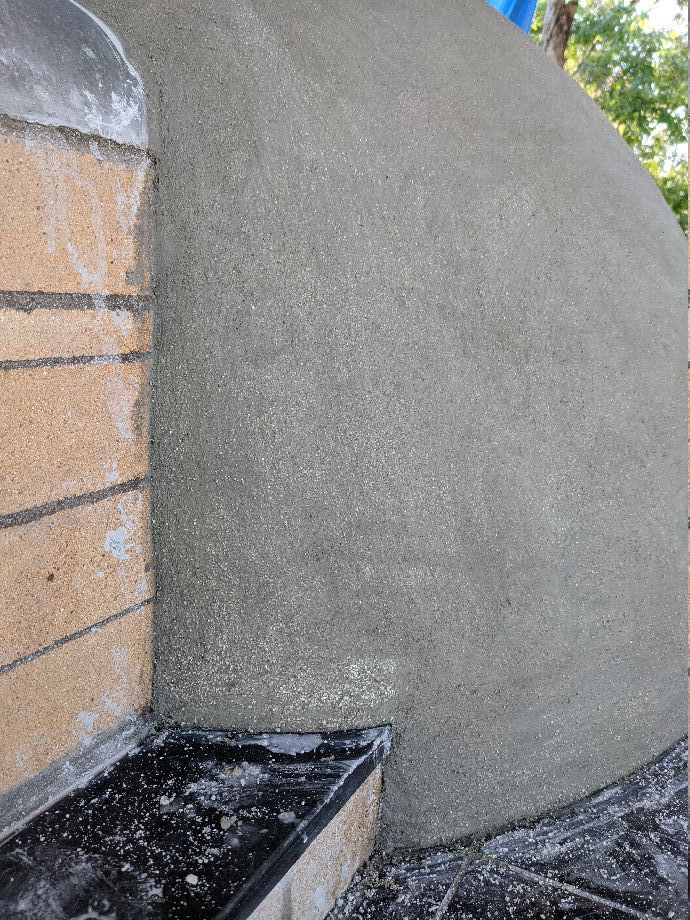 Close-up of finished final layer around arch bricks
Late October here has some warm days, so I put up the blue tarp there to keep direct sunlight off the back of the oven, so the render didn't dry out too quickly.
I did end up applying a large drop-sheet, and keeping that moist for a day or two, which I think helped.
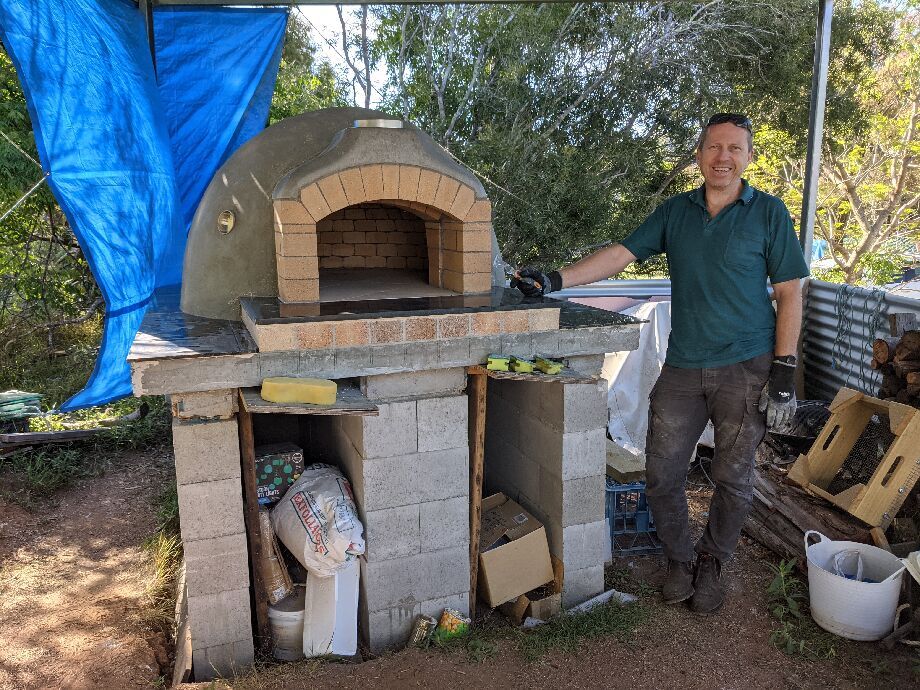 Much happy
What would I do differently?
Measured, at each of the tile joints, the distance from the edge of the stand in to the insulation blanket. As the render layers went on it became impossible to accurately judge how far out I'd come, relying just on a vague memory of where the tiles went to. It constantly felt like I wasn't deep / thick enough along the outer perimeter, and having a way to confirm thickness around the edge would have been useful and reassuring.
Had I known about the consumer grade perlite sizing, I'd have used a few of those bags on the first layer, so I was working with the finer stuff later on, or sourced more of the finer material.
Similarly I should have gone a slightly lower ratio of perlite, and/or a slightly wetter mix on the first couple of coats. I was always going to be happy with a thicker than the 50mm recommended thickness.
Tidying up
I was 99% confident that these two pieces of marine ply that I'd put in when forming up the top slab were not attached to the sacrificial 100x50 galv C-beams at the back ... but it turns out I was 99% wrong there.
My sister was happy to shuffle in there -- that's a 39cm wide gap, not good if you're a bit claustrophobic, or a bit wide in the girth like myself -- and unscrew the two tapping screws holding it in place.
As it happens, those two protruding bits of marine ply had been very handy to put tools on during various stages, so it wasn't all bad to have had them there, but much easier once they'd been removed.
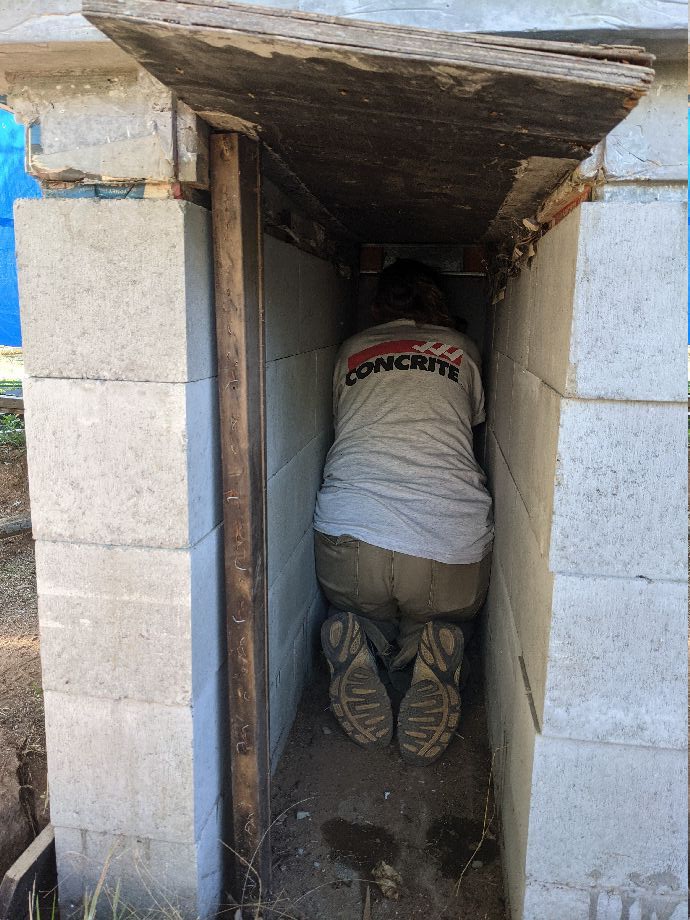 Removing the final bits of the top slab formwork
 State of the oven (2021-11)
Near the side granite returns there you can see exposed perlite, where I'd effectively sanded the surface back with the nylon scrubber. It'll attract water, until it's finally sealed, but the paint that eventually goes on there will hide any remaining small rough surface artefacts.
Installing the flue
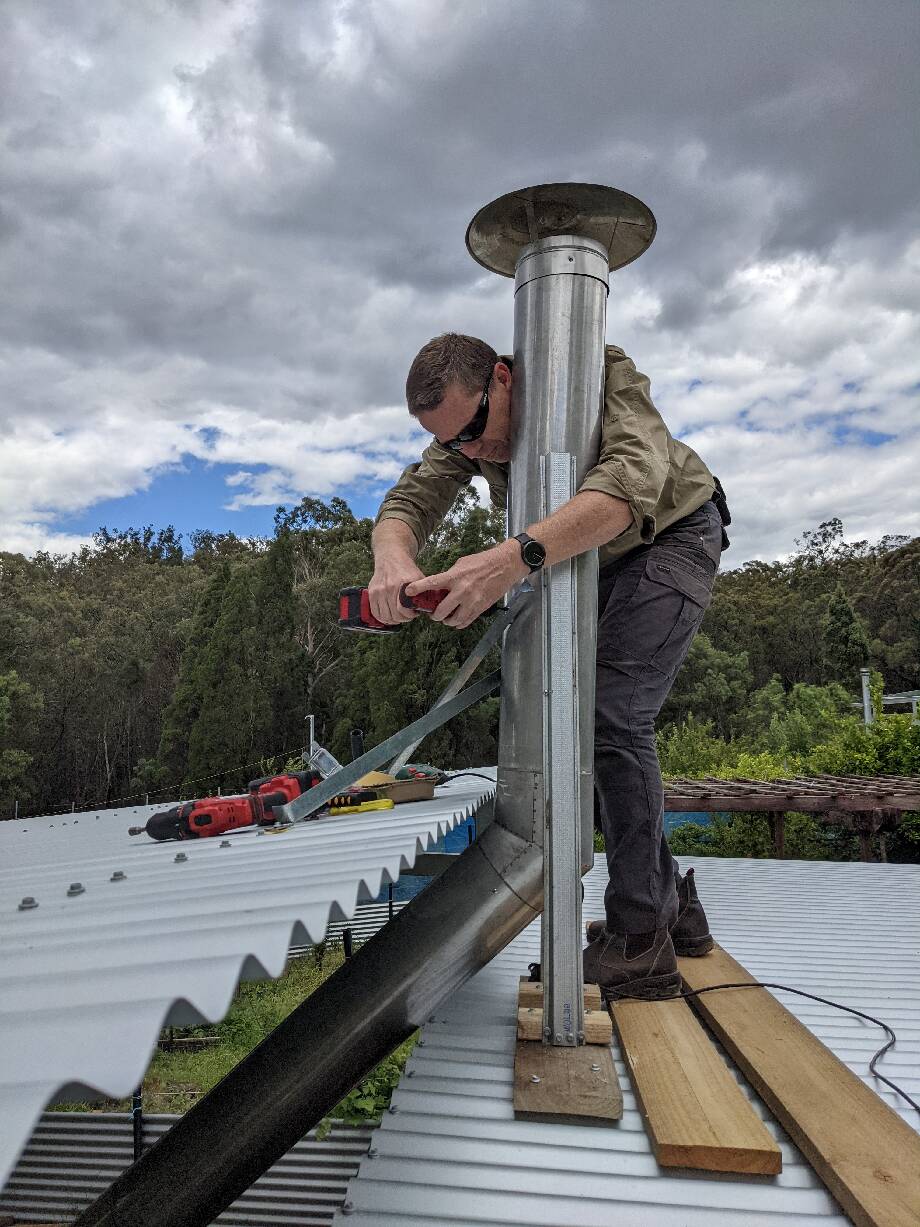 Jedd on the roof, swearing at self-tappers
Another task I thought would take a couple of hours, but took the thick end of a day.
Sure, I'd over-complicated my life by thinking a dog-leg (two x 45 degree joiners) through a clerestory roof would be easier than just punching a hole through a skillion roof and doing a dual-wall flue.
Stainless steel is very hard. It's a pain to hit with an angle grinder, and near-impossible to get through with self-tappers unless you put pilot holes in first.
Self-tappers are preferred at least for the top (cowling) so you can detach in the future for inspection and cleaning. In practice I don't think I'll run the oven enough, plus it runs hot, to have an issue with creosote build-up.
Measuring for the location of the first 45 degree bend was a bit suck-it-and-see, and I did muck up the x-axis angle slightly, but no one else will notice, I'm sure.
Stainless steel rivets big enough to really anchor this flue will need a big, two-handed rivet gun, which I ended up having to purchase -- a multi-hour outing to Bunnings to pick up a $100 rivet gun and a variety of stainless steel rivets.
I had to buy two extra 900mm stainless steel extensions in this 7" diameter size, and two by 45 degree joiners. I used 3 or 4 rivets in each join.
The flue (provided) that came up out of the pre-cast flue needed to be cut down to about 500mm. Getting a good finish on that - it necessarily has to go into the first 45 degree joiner, and be visible - was a bit tricky with the angle grinder, but I sanded the edge back a bit and (like many things) no one's ever going to notice the edge there.
The placement of the oven stand and then oven turned out to be precisely the right place for a standard 900mm length of flue, at 45 degrees, to clear the top roof line of the clerestory roof. Was most impressed. Had it been even 5cm further from the middle of the shed, I'd have had to start cutting out a small amount of roof (allowing rain to come in), or buying and cutting down another length of flue to extend that diagonal slightly.
Before doing any firing at all, they recommend rubbing down the flue with methylated spirits, and then cleaning that off with warm soapy water, and then drying that with paper towel, so you don't end up with finger prints permanently embedded in your flue. I had some places where masking tape had been around that flue section for a few weeks, and the residual was hard to remove there, but, again, no one's ever going to notice.
As to anchoring, the next picture shows this a bit better, along with the last - but basically my design was to rely on the 45 degree bends to be strong enough to maintain the upright angle here, with most of the weight being straight down. So, some top-hats were used, screwed into a base (wood) plate, and to the side of the flue, slightly flared so the galv doesn't immediately peel off (galv should be fine up to 300-400C). That wood base is locked into the roof with a couple of self-tappers also.
Additional two points are made from the higher roofline, using 25mm angle galg-steel, with the ends cut and folded in, so they could be bent to align with the roof.
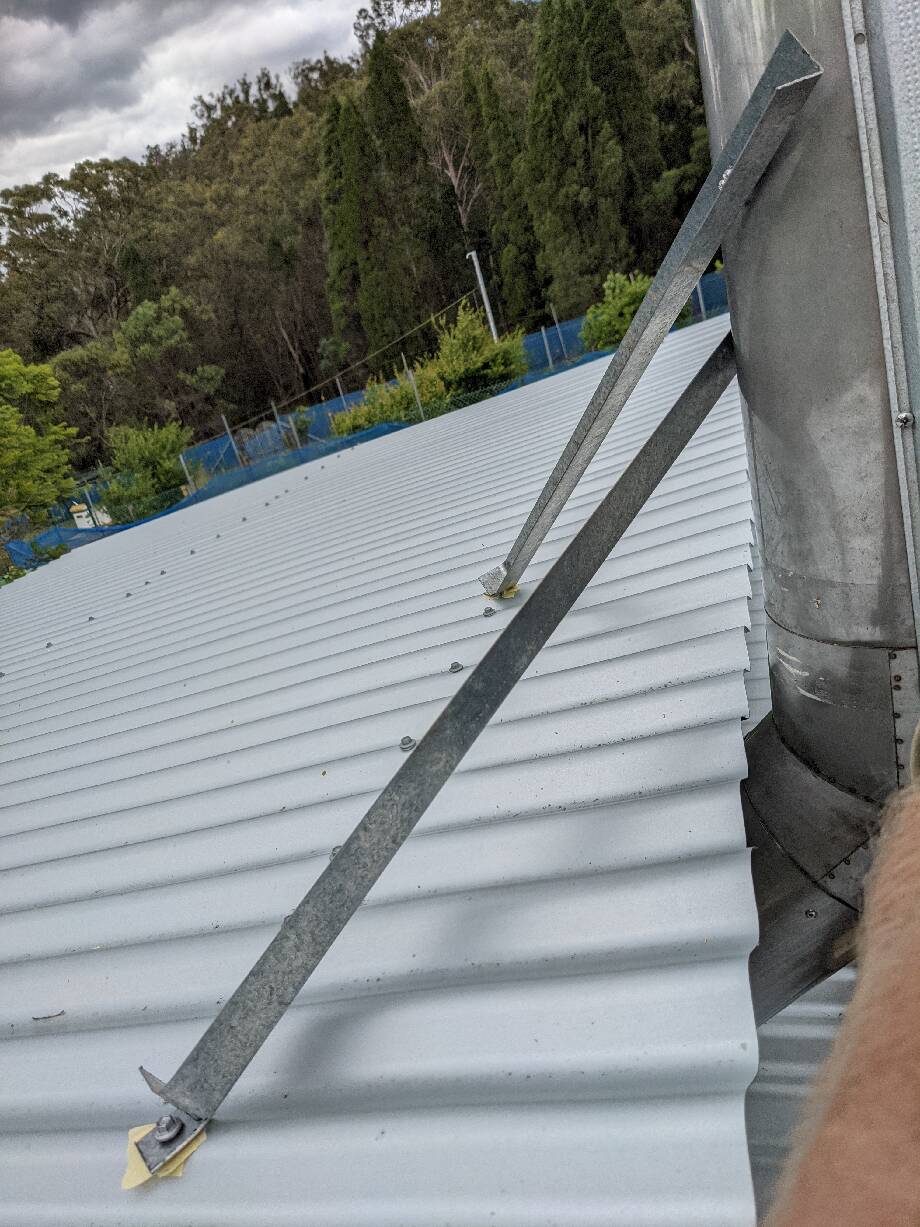 Anchoring the flue to the roof
Render drying and curing
While they say to give 2 days for the render to start to cure, I noted that it took 4 days before the final render of the dome was consistent colour - the darker spots taking a while to morph into the light gray colour.
I'd applied the fourth render layer on the 31st October, and on the 3rd of November about 10am we still had this blotchiness:
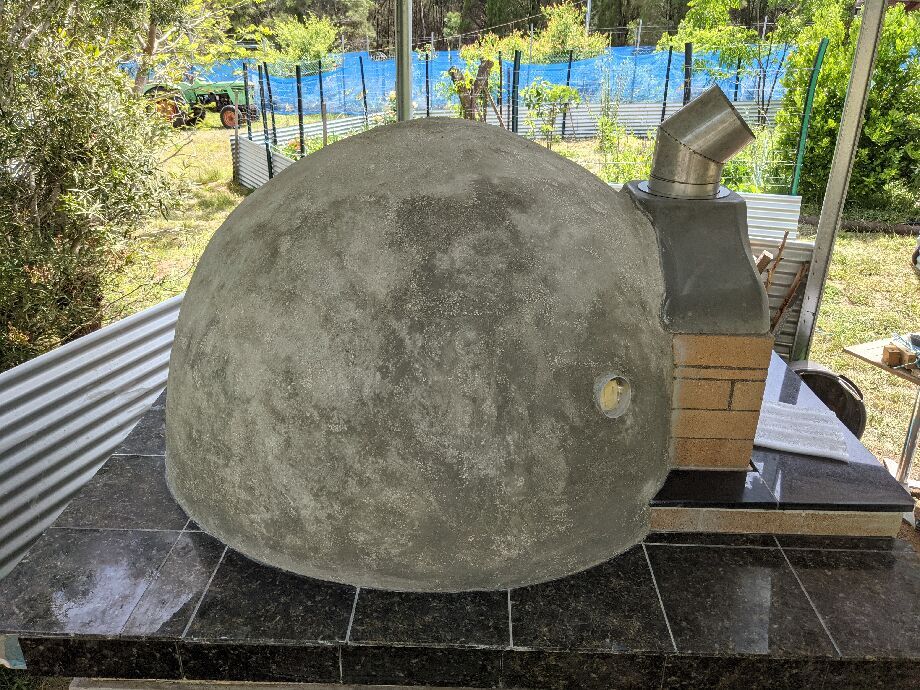 Dome final render drying out - 3 days
On the 4th November, 10am, we then have this:
 Dome final render drying out - west side - 4 days
On the other side, facing east, so getting morning sun, it was drying a bit better:
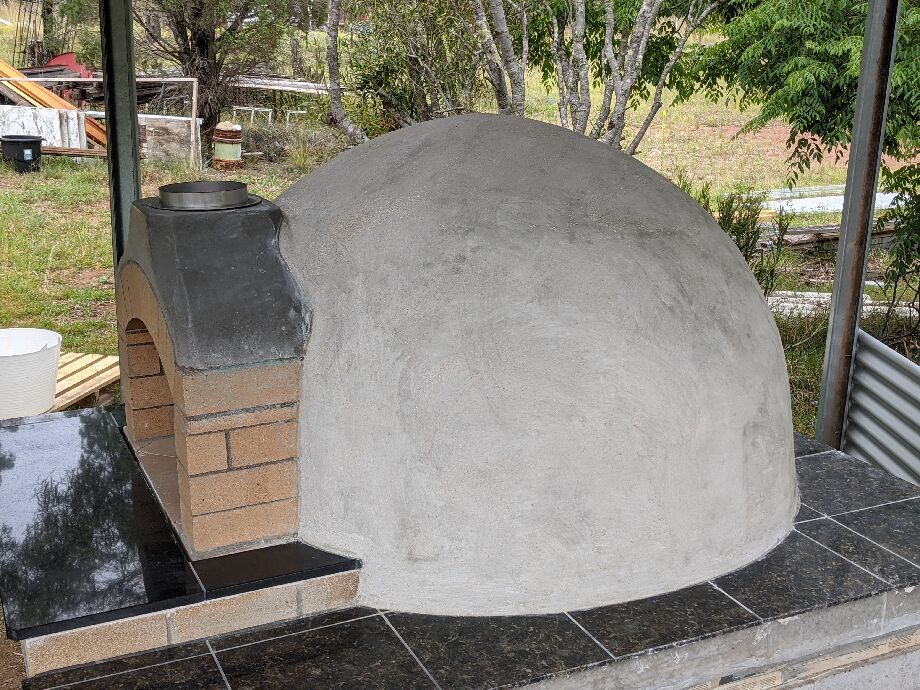 Dome final render drying out - east side - 4 days
I reasoned 14 days from last render, and some months since the last brick mortar was actually wet, I could slightly ramp up the middle stages of the curing fires, though I did end up sticking to the protocols for the 7 curing fires, I was just a little less worried about the fire getting slightly bigger periodically.
Curing Fires
14 days after the last coat of render went on, I did the first fire. The recommendation is that you fire at least 2 days after the final rendering, so I gave it plenty of extra time.
They also say at least 7 days after the last brick is mortared in -- and for me that was actually some months -- so I wasn't expecting any problems with the curing fires.
Unfortunately there's a frustrating lack of hint about just how much firewood you'll need in those 20cm lengths for the first two fires, only 'you'll go through it fairly quickly, so you need some amount available', which isn't terribly helpful.
For my slow combustion stove, I've got a pretty good idea now of how much timber I'll burn through to keep it piping warm for a night -- and it's about 15kg of hardwood -- with some pine up front to get things started. That's obviously severely choked down, so it's burning relatively slowly, and it's a small firebox too.
I also know that to get this pizza oven up to 400 degrees it's reckoned to go through 35kg of hardwood.
Anyway, I followed the recommendations as best I could. The first two firings are very time-consuming, as the fires are necessarily quite small, and need a lot of attention.
200 x 50mm sizes of timber aren't hugely convenient to chop up or subsequently cut to size.
Frustratingly the team knows fairly precisely how much timber you'd go through for each of these firings, and could mention it - I'd take units of kg, milk crates, whatever. They've got a thermometer on the oven, too, so could also mention the range of temperatures you should be seeing (or aiming at) with each of these burns.
There is an en passant reference to 'perhaps getting to 100 or 150 degrees with the first two fires', and it may be the same for the 2nd tranche of slightly larger fires (days 3 and 4). It's not really clear, so I winged it.
There's a mention in the firing videos too about a FAQ section of the web site, but that does not appear to exist
As it happens, I ran the fires much longer than the minimum recommended. Like many aspects of the oven build, as you go on, you realise just how devastating it would be to make any mistake, as the sunk cost is now positively huge. Happily I wasn't in a great rush, and really wanted to do this stage properly, as an exploding pizza oven didn't sound like much fun.
Curing fire 1 - Sunday
Started about 18:30, and kept it going until about 22:00, at which point a couple of small additional timbers, and the door nearly closed, so it'll choke itself down and gently roll back on the heat.
Fairly hands-on for the duration, and I kept the temperature (according to the thermowell thermometer) at about 100, though it'd occasionally sneak up closer to 140 after a new bit of timber went on.
The door thermometer never went about 50C - but I'd been choking the air for most of that burn, with about 10cm gap at the front, so a lot of cool air being pulled past that thermometer.
I noticed that on the side I had the door up against the front, but leaving a small gap, the pre-cast flue on that side was not too hot, but the other side was too hot to touch. Consequently I made a point to swap the sides that I was leaving a gap on.
I went through about this much timber on each of day 1 and 2 -- probably a bit less on day 1, as it was a slightly shorter burn.
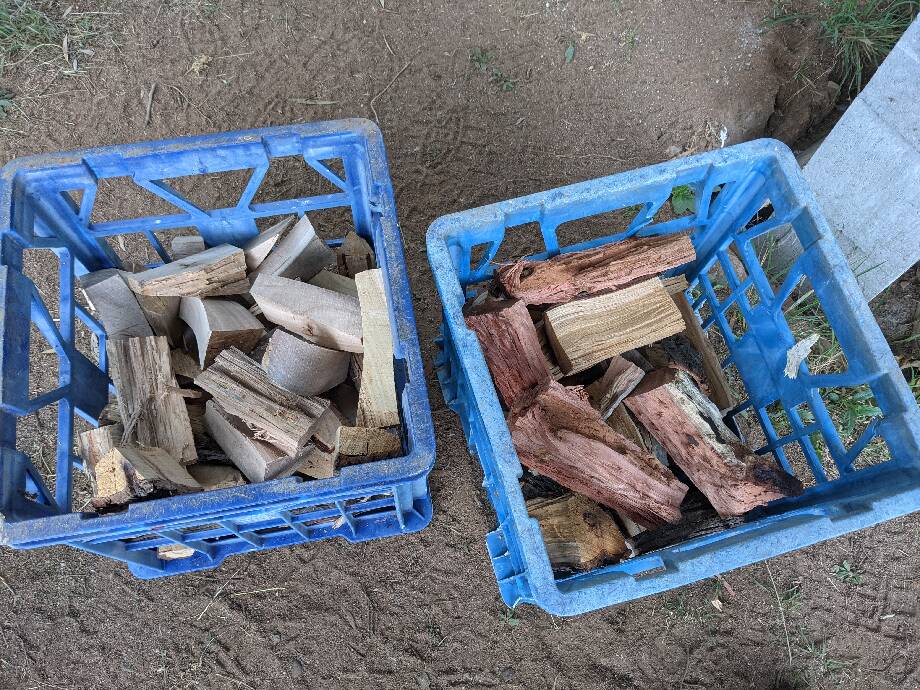 Milk crates of wood
That's a blend of pine (Black Cypress) to get it started, and then bloodwood & ironbark.
Cutting these short timbers is a bit of a pain, and again having a bandsaw to reduce down my standard ~ 300mm lengths of split firewood made things much easier
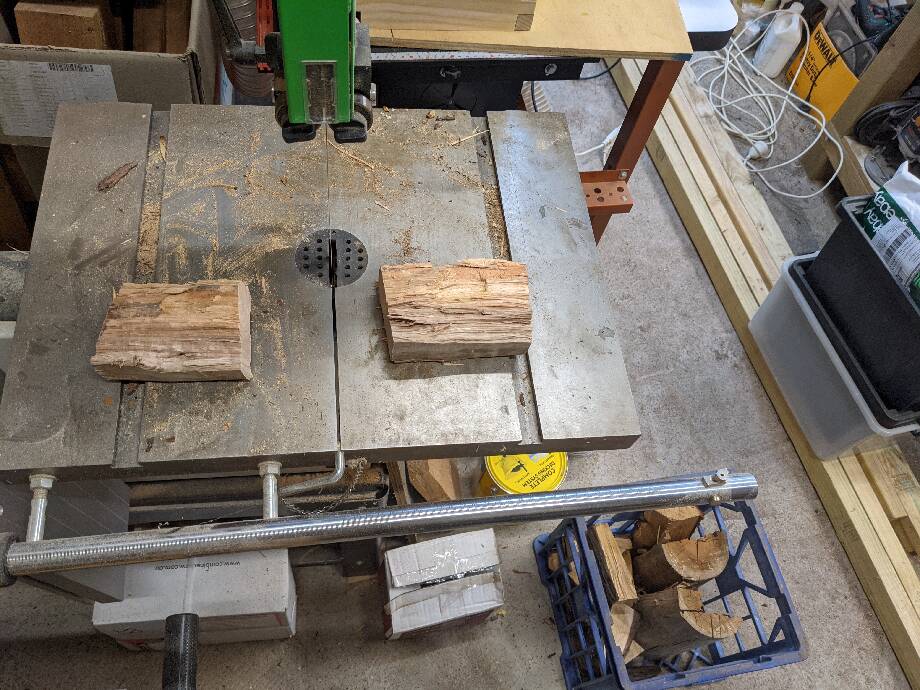 Bandsaw for resizing normal firewood
It's kinda momentous when you light the very first curing fire.
It's also the last time everything will look that clean.
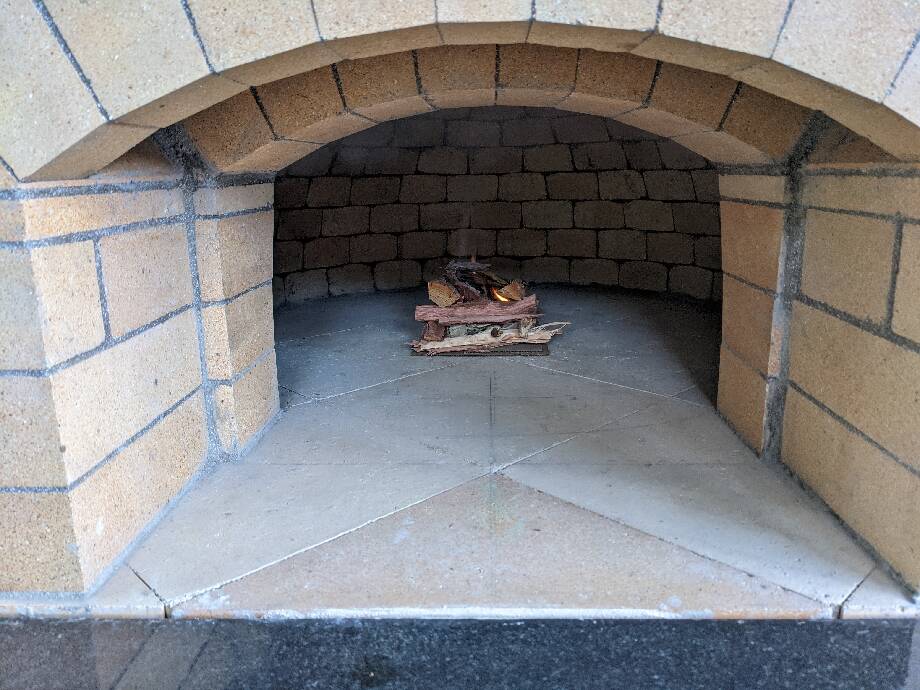 The first fire
Curing fire 2 - Monday
I ran this from 14:00 through 19:30 the next day - again trying to stay around 100-120, but wrapped up at 150C when I closed the door.
At 09:00 the following day, the thermowell gauge was suggesting internal temperature of 90 degrees.
Curing fire 3 - Tuesday
On day three I started the fire up at 11:00 and ran it through to 20:00 -- it was a bit easier, and I was going slightly over the size recommended, given the time the oven had had to naturally dry itself out.
I was pondering merging fires 3 and 4 into a single session, but ended up still doing all the recommended number of fires.
Temperatures were sustained between 150 and 200, but I note I hit 230 very briefly. First was kept in the same place - bang in the middle of the oven - and not allowed to get too big.
I did cook some pizza scrolls during this firing, as 180C is a good temperature for the task.
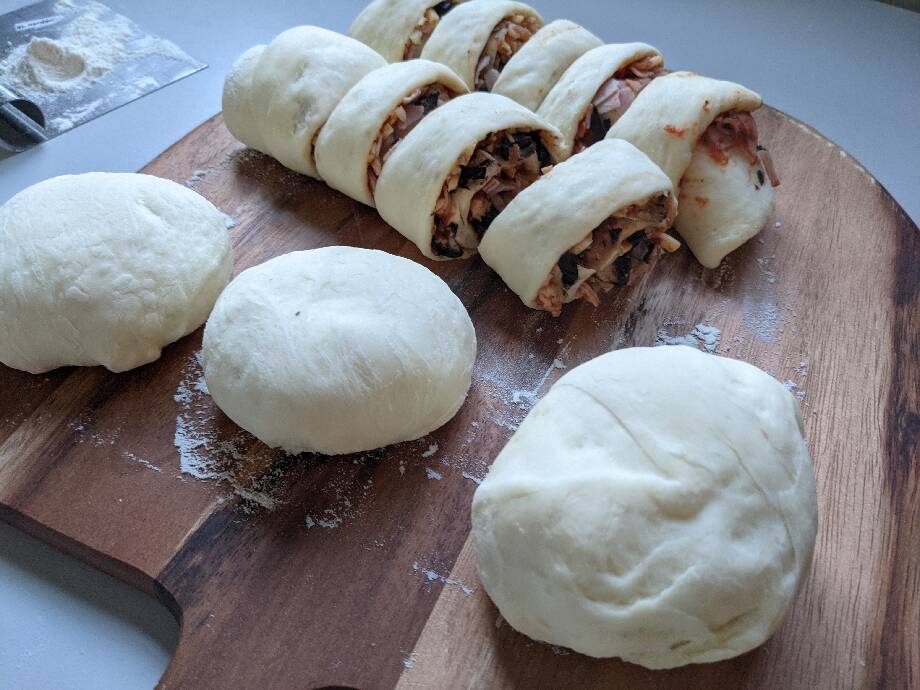 Pizza scrolls - uncooked
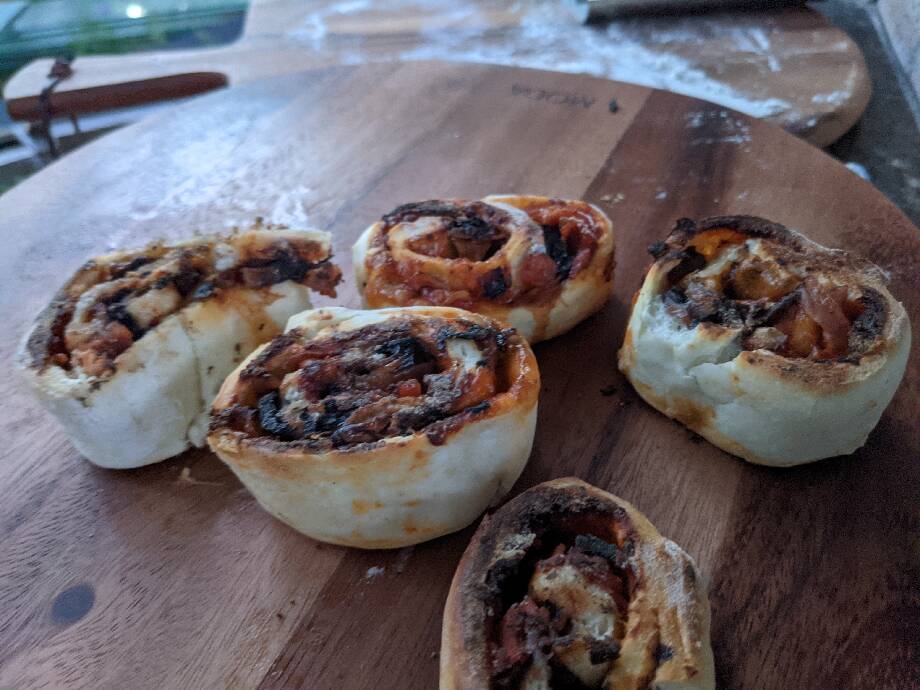 Pizza scrolls - cooked
The oven floor was nominally 200C, according to my infrared thermometer:
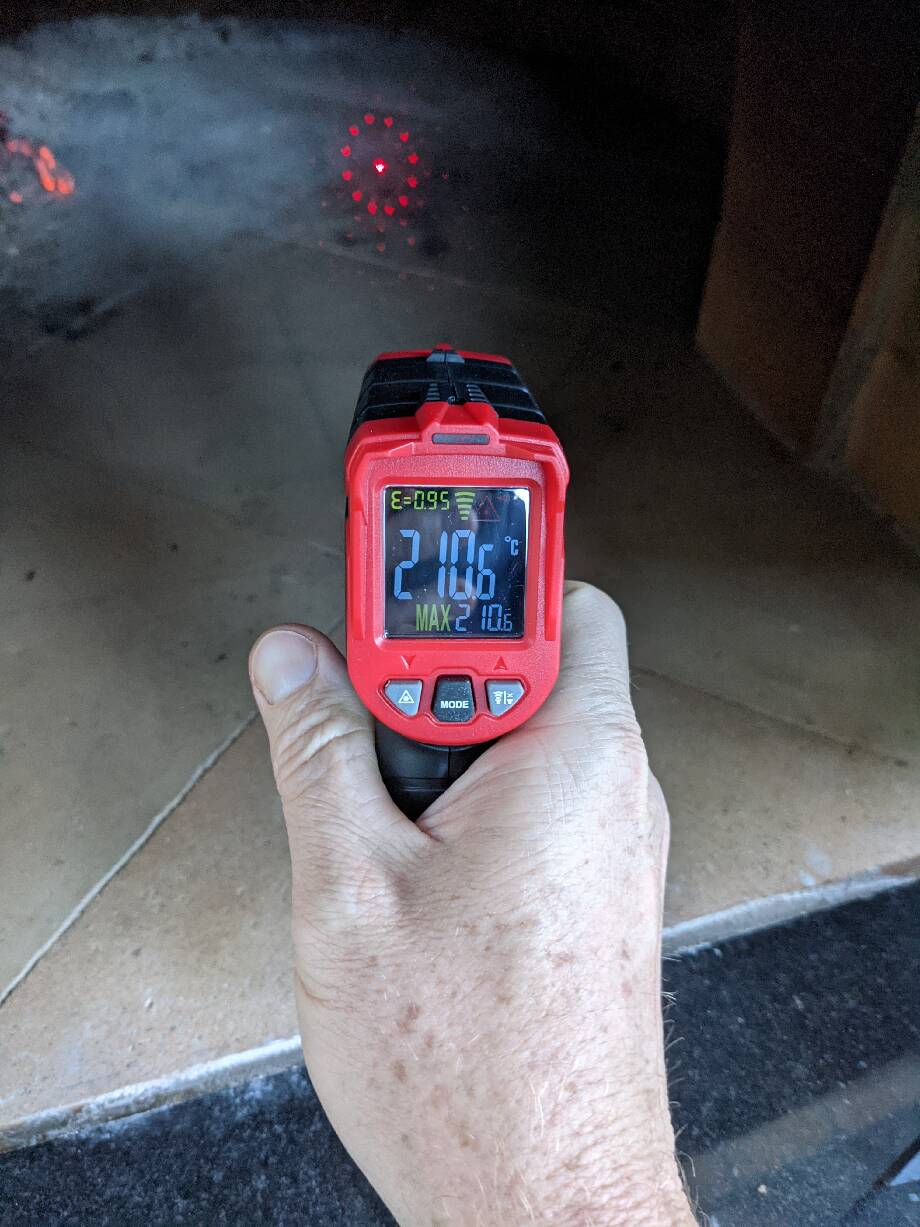 Oven floor temperature via IR
Due to some inadvertent paddling, I made a god-awful mess with the cheese and tomato from one of these scrolls, but the next firing was moved to be over the top of that mess, and, well, turns out this is a great feature of a wood fired oven, you can burn your mistakes away the next day.
During this burn I noticed some very fine cracks along the front arch, between the arch bricks and the render (connected to the pre-cast flue). Plus two fine cracks, about 15cm long, laterally from the top of the arch, on the dome.
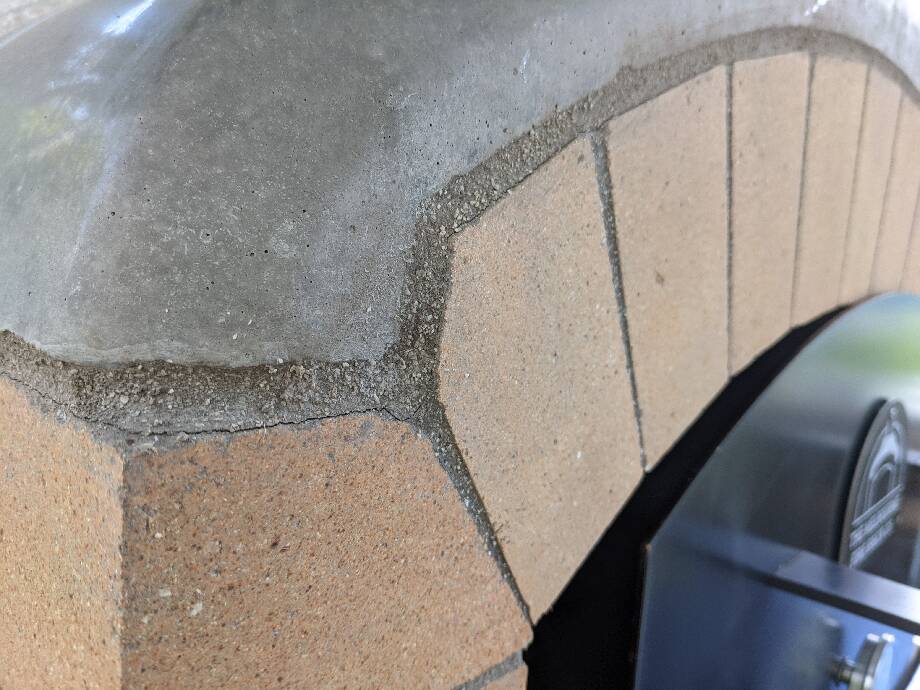 Cracks above front arch and under pre-cast flue
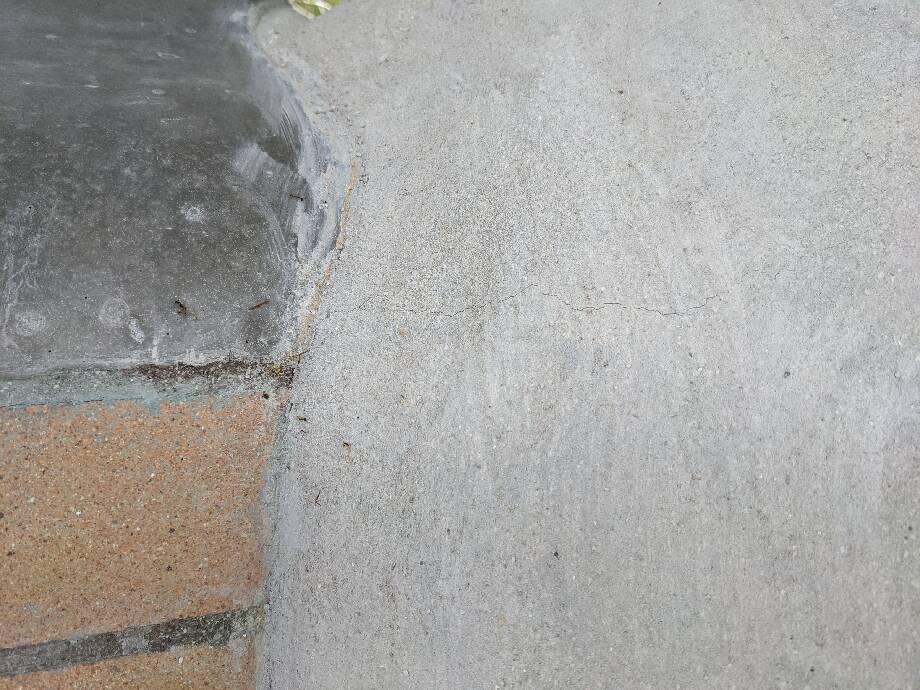 Fine crack from top of arch, on the dome
The outside of the dome reached 30C by the time I wrapped up for the night, again closing the door and letting it cool slowly.
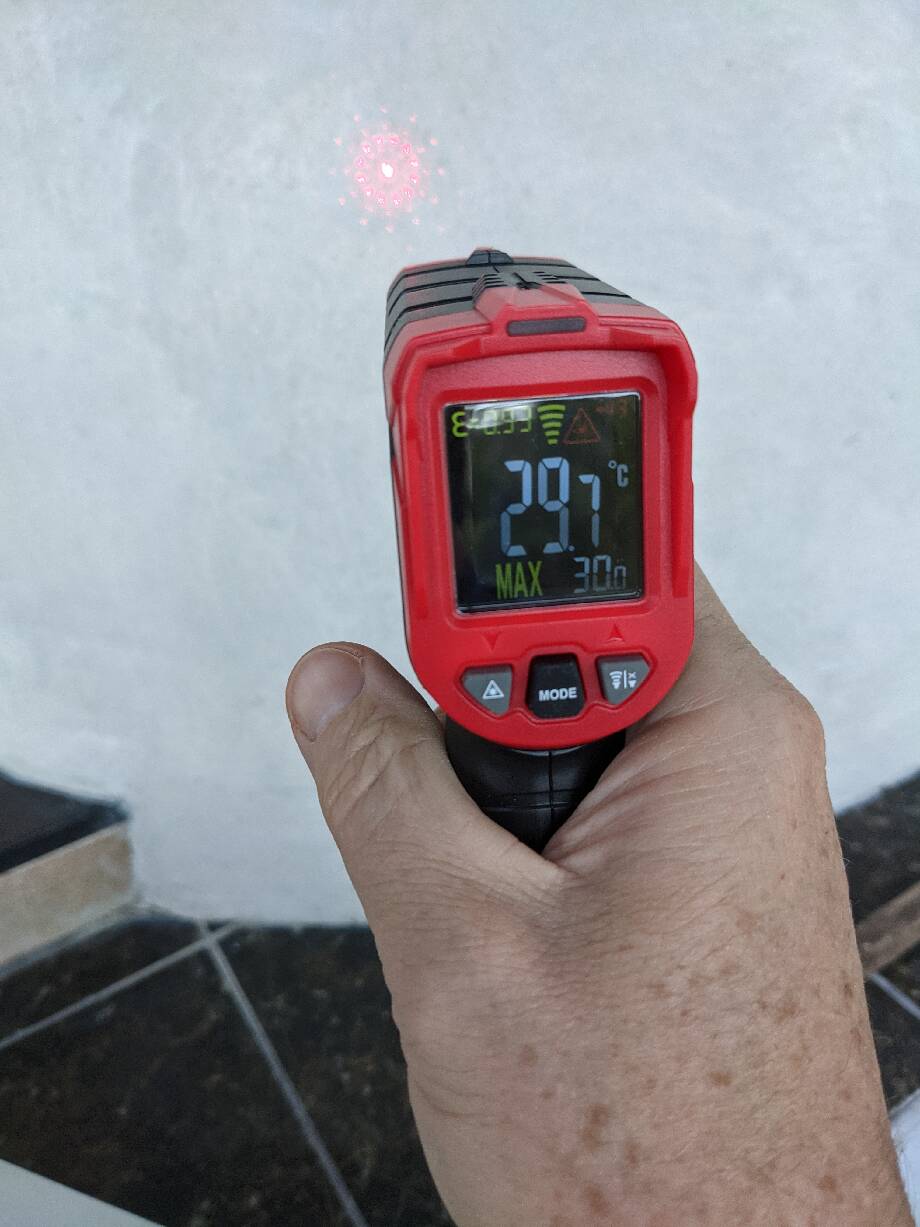 Outside dome temperature
At 9am the next morning the gauge was recording 120C internal. Also, the left-side horizontal crack had sealed up again, the right was still visible.
In the videos, Ben makes the point that a 6h firing is not functionally equivalent to two x 3h firings, as the latter benefits from 6+ hours of still warm and losing moisture after the fire's gone out. Nonetheless, maintaining 9 hours of ~ 200º, with a subsequent 12 hours above 100º, gave me a lot of confidence.
Curing fire 4 - Wednesday
Ran this from 12:00 through 18:00. Again, trying to sustain around the 200 mark, rarely going above it, sometimes dipping to 150.
Choking via the door - about 5cm clearance on the side, but otherwise flush up against the other side and the top of the arch. This seemed to work reasonably well, and was lower-effort - I think I attended about 7 times through the afternoon to top up the fire.
9am the next morning, around 120C.
Curing fire 5 - Thursday
Ran from 12:00 through 19:00, aiming around the 350, but did bump 330 (air temp).
At 19:00, on closing up, temperature gauge was at 250C, door closed for the night.
9am the next day - sitting at 150C.
Curing fire 6 - Friday
This was basically a repeat of day 5.
Making pizzas
My first proper full-temperature pizza firing (the following day) I used pine -- we have an awful lot of it -- to get the fire started, then moved to hardwood.
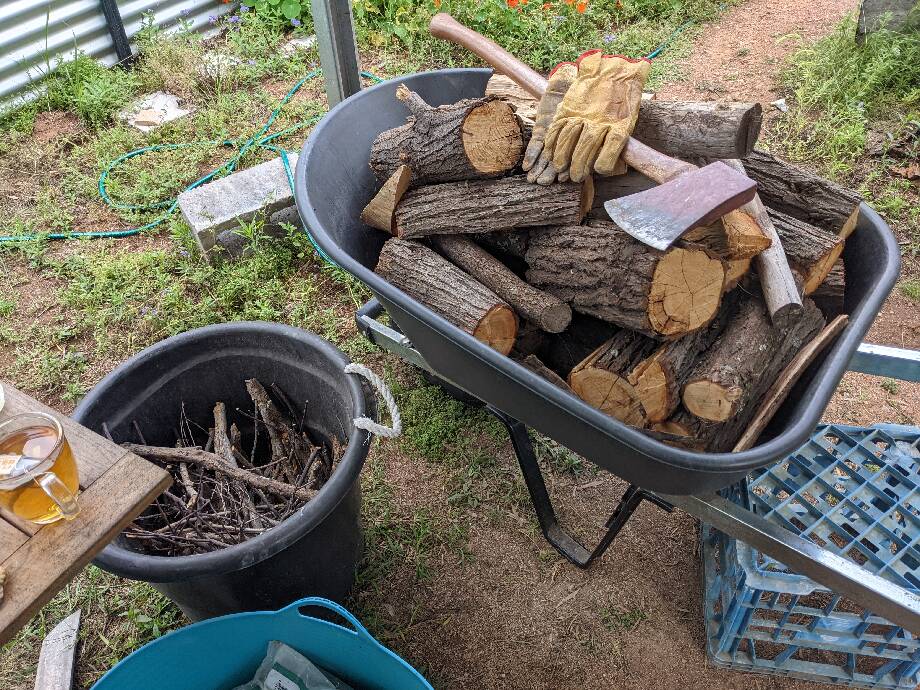 A wheelbarrow of pine
The amount of firewood these things need, if you don't happen to have a lot of timber you can fell, would get expensive.
Interestingly, at the lower temperatures, the inside of the oven soots up - but once you get to about 350 Celsius, the soot actually burns off -- so you really should take a lot of care in your layout and pointing work at the back of the oven:
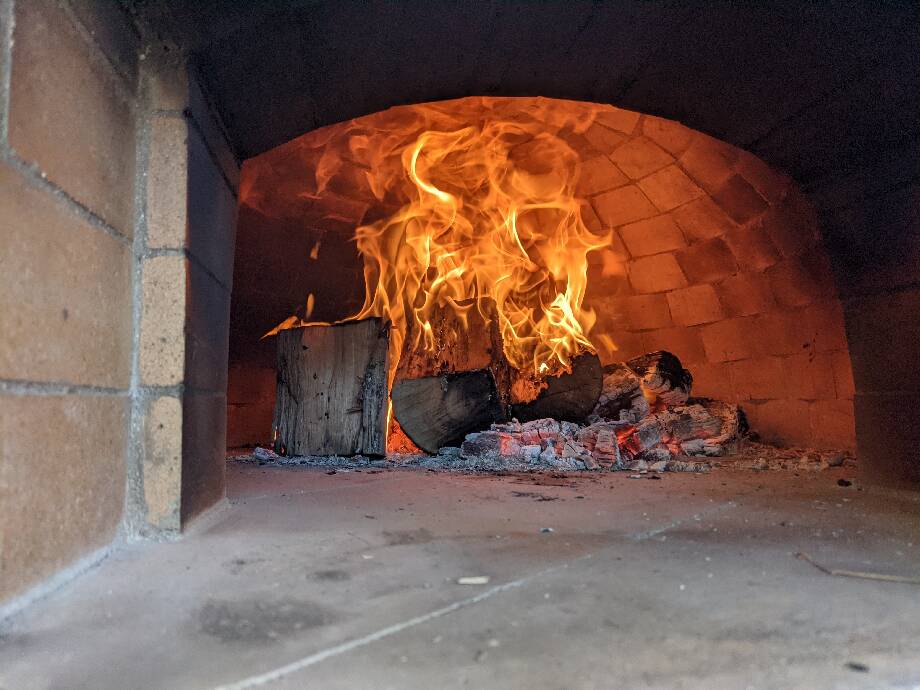 Burning the soot off
Recipes
Naively I used a basic bread dough for the first effort, as I had planned poorly, so the pizzas were tasty, but far from Neapolitan-style. I hadn't obtained my excellent coal scoop by then, or a natural bristle brush, so the floor hadn't been temporarily covered in coals and then cleaned up -- I was using a clear area off to one side that probably hadn't gotten all the way up to a good temperature.
The second cook event, a couple of weeks later, was better. I experimented with a biga (a fairly dry pre-fermentation approach) along with a poolish (a quite wet pre-fermentation).
I'll probably try a biga again, one day, but I'm in no great hurry. The results were better with the poolish (sample size of 1, natch) but the biga was a lot more planning and faffing around, a much bigger (ha) time and effort imposition.
The poolish approach we have adopted from the wonderfully exuberant Vito Tacopelli's youtube video
There's a more succinct version of his recipe at CopyMeThat but if you aren't familiar with the process, I can highly recommend watching Vito's youtube video first.
Anyway, my goal is proper Napoli / Neapolitan style pizza, which means high temp, fast cooking, crunchy and spongy air-filled crusts, minimal volumes of good quality ingredients.
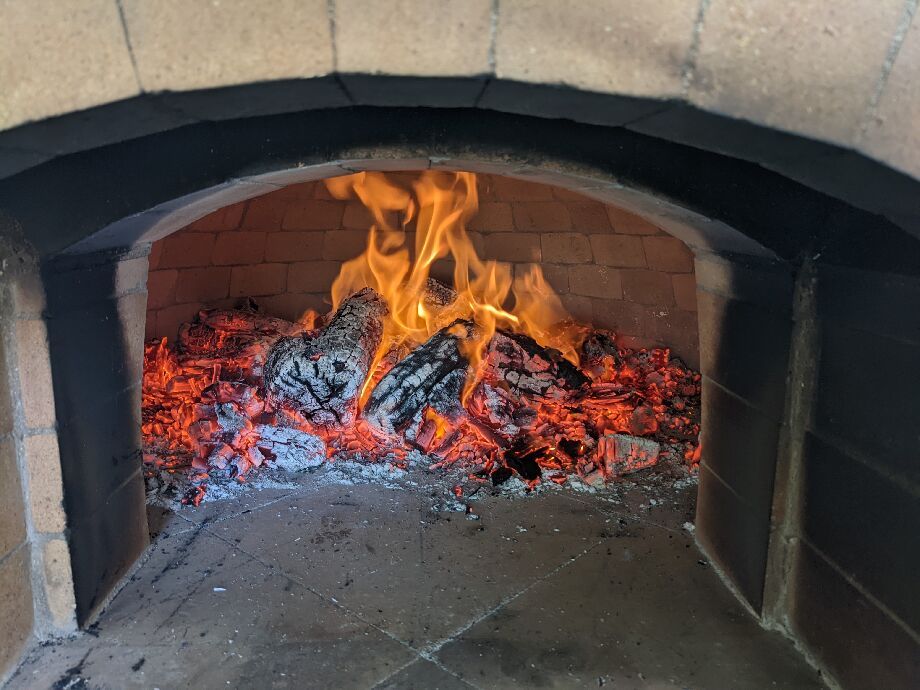 Stonking big fire
I'd been ramping this up for about 3 or 4 hours, a massive fire, coals over the whole surface.
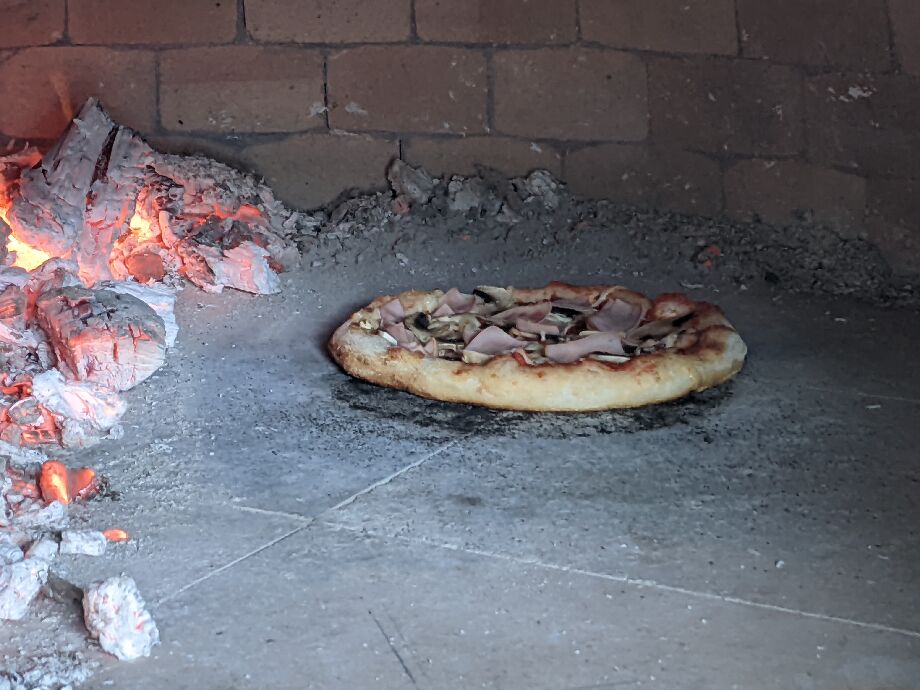 Pizza cooking in a slightly too hot oven
You can see some burning of the semolina from the base there, but after a few sweeps with a moistened natural bristle brush, and a few pizzas slightly cooling that spot down, I was getting a respectable cooking speed (about 2 and a half minutes) without burning the base.
Which does make me wonder how I can approach the target of 90 seconds. I'm guessing I need more heat from above, specifically via flames from the fire.
At the time of that last photo there was not much actual fire remaining. It was (as you can see) an awful lot of coals.
The thermowell temperature gauge suggested I'd peaked at about 520 Celsius, and was sitting around 450-500 by now. My laser temperature gauge was indicating about 400, where I was placing the pizza.
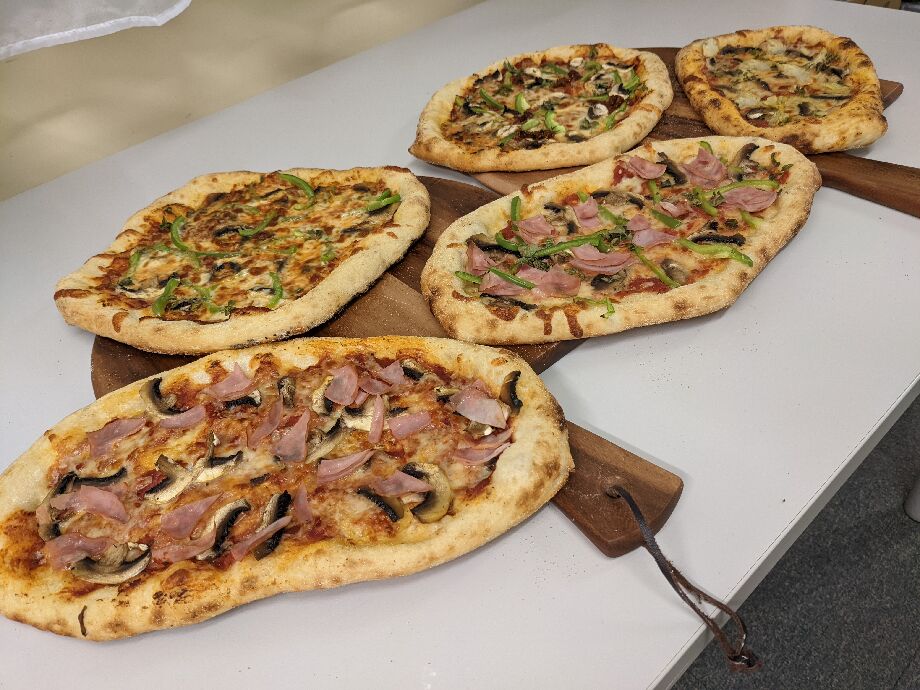 Hot oven, good pre-ferment dough, careful base prep, ensures consistency
Left-over dough, once it's risen a couple of times, can't usefully be frozen, so it makes more sense to cook it all up and freeze pizzas instead.
In this case they were intentionally slightly under-cooked, so the reheating process doesn't insta-char them.